
Neoview Database Administrator's Guide (R2.2)
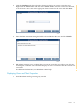

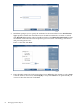
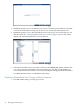

5. You can indicate if you want the refresh operation for the materialized view to ignore changes
to the table. Select the Ignore box for a base table if you want the refresh operation for the
materialized view to ignore changes to the table. The refresh time for a materialized view
grows almost exponentially as more tables participate in a join in the materialized view
query expression. Therefore, the fewer tables in the join clause that need tracking, the better
the refresh performance. Click Next:
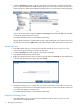
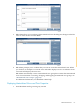
6. DB Admin prompts you to confirm that you want to create this materialized view. When
you click Yes, it attempts to create the view and either displays an error or indicates it was
successful and displays the new view.
DB Admin automatically creates a materialized view group that contains this materialized
view. For information on creating, changing, and dropping materialized view groups, see
“Materialized View Groups” (page 69).
For additional information, see DB Admin online help.
Creating a Materialized Aggregate View
1. Start DB Admin and log on using any user ID that is authorized to access the table for which
you want to create a materialized view.
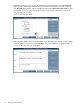
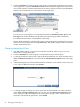
2. Click the Database tab, then select the schema in which you want to create a materialized
view. Right-click the Materialized Views folder and then select Create materialized view
to start the Create Materialized View Wizard. You can also click Create a materialized view
in the right pane.
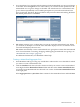
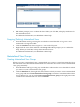
Select Aggregate View or Join View. Enter a name for the materialized view and click Next:
Materialized Views 65