HP OpenView Storage Mirroring application notes High availability for Exchange Server 2000/2003 Part number: T2558–88020 Second edition: May 2005
Legal and notice information © Copyright 2005 Hewlett-Packard Development Company, L.P. Hewlett-Packard Company makes no warranty of any kind with regard to this material, including, but not limited to, the implied warranties of merchantability and fitness for a particular purpose. Hewlett-Packard shall not be liable for errors contained herein or for incidental or consequential damages in connection with the furnishing, performance, or use of this material.
Introduction Microsoft Exchange Server is a messaging and collaboration server for the most demanding business needs. Its scalability, performance, and enhanced security make Exchange an ideal messaging foundation for enterprise networks. Storage Mirroring provides real-time enterprise data protection and replication. Storage Mirroring can be used to provide high availability for your Exchange server.
NOTE: If you are upgrading from an earlier version of the Exchange Failover utility, you will need to do the following: • Compare the sample scripts to your failback and post-restore scripts and incorporate the new commands (-nopublicfolders, -onlypublicfolders) into your scripts. • Modify the failover and failback scripts to remove the NSISPN commands. This functionality has been incorporated into the utility and is no longer necessary in the scripts.
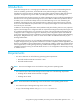
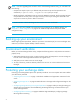
Preparing the source server In this section, you will be configuring the source and installing software. 1. Configure the source as a Windows 200x member server. Source Windows member server 2. Apply any Windows 200x service packs or patches. 3. Install Exchange 200x on the source, if it is not already installed. Source Windows member server Exchange NOTE: Keep track of your installation selections and storage locations so that Exchange can be installed identically on the target.
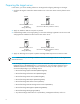
Preparing the target server In this section, you will be installing software on the target and configuring Exchange on the target. 1. Configure the target as a Windows 200x member server in the same Active Directory domain as the source. Source Target Windows member server Exchange Storage Mirroring Windows member server (same Active Directory domain as source) 2. Apply any Windows 200x service packs or patches. 3.
Source Target Windows member server (same Active Directory domain as source) Exchange (Exchange services set to manual startup) 6. When you installed Exchange on the source, the default Exchange storage group was assigned E00 as the prefix of the log files. The second storage group was assigned E01, the third E02, and so on. The storage groups on the target must have the same numbering scheme. If you have one or two storage groups on your source, you can continue with the next step.
Configuring Storage Mirroring mirroring and replication In this section, you will be creating your Storage Mirroring replication set and establishing the Storage Mirroring connection between your source and target servers. 1. On the source, open the Storage Mirroring Management Console (Start, Programs, Storage Mirroring, Management Console). 2. In the left pane of the Management Console, double-click on the target to login. 3. Again in the left pane, double-click on the source to login. 4.
NOTE: If you start Exchange Server and mount the replicated databases on the target, or if the data on the target is otherwise modified, the data on the source and target will no longer match. If the updated data on the target is not needed, perform a full or difference with block checksum mirror from the source to the target. If the updated data on the target is needed, restore the data from the target to the source.
NOTE: In some cases the Information Store (IS) may not start on the first attempt. If this happens, simply restart the service and it should start properly. (You will have to restart the other services in the same order as listed in the script.) The Exchange Failover utility as used in the sample script above is only valid for simple Exchange configurations in which the mail store names (specifically the filename of its database, excluding path information) are unique.
PreBack.BAT rem rem rem rem net net net net net net net net Sample Exchange 2000/2003 pre-failback script. The following lines stop the Exchange services on the target. You may need to modify the script to fit the Exchange version and specific services used in your environment, although the services must be stopped in the order shown.
NOTE: If you start Exchange Server and mount the replicated databases on the target, or if the data on the target is otherwise modified, the data on the source and target will no longer match. If the updated data on the target is not needed, perform a full or difference with block checksum mirror from the source to the target. If the updated data on the target is needed, restore the data from the target to the source.
Applying an Exchange service pack or upgrade 1. Stop the Storage Mirroring service on the source. Any data that was already transmitted from the source but is still in queue on the target will continue to process. 2. Apply the Exchange service pack or upgrade. 3. Verify that all of the data in queue on the target has been applied to the target before continuing.
Recovering after a failure If your source experiences a failure, such as a power, network, or disk failure, your target machine will stand in for the source while you resolve the source machine issues. During the source machine downtime, data is updated on the target machine. When your source machine is ready to come back online, the data is no longer current and must be updated with the new data on the target machine.
4. Change the source IP address to the target's assumed IP address. This is the source's original IP address before it failed. Repaired Source Disconnected Target Standing in for Source Disconnected Windows member server with unique name and IP address changed to match target 5. Verify that the target is disconnected from the network, then connect the source to the network.
11.Reboot when prompted. Repaired Source Domain Member Target Standing in for Source Disconnected Windows member server with unique name and IP address changed to match target 12.After the source reboots, log in as the domain administrator or an equivalent account. Verify that the account has full Exchange Administrator rights. 13.Using the Exchange CD, start the Exchange installation on the source using the following command :\setup\i386\setup.exe /DisasterRecovery 14.
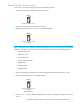
18.Install any Exchange service packs or patches. 19. Install Storage Mirroring, if necessary. Repaired Source Domain Member Target Standing in for Source Disconnected Windows member server with unique name and IP address changed to match target Exchange Storage Mirroring 20.Remove the rebuilt source from the network. Repaired Source Disconnected Target Standing in for Source Disconnected Windows member server with unique name and IP address changed to match target Exchange Storage Mirroring 21.
3. Select the target machine that is currently standing in for the failed source. 4. Highlight the failed source and click Failback. The failback script created earlier will automatically run. During failback, Windows Event Viewer and the Storage Mirroring log record the failback events. When failback is complete, the Exchange services will be stopped on the target and the Failback Complete dialog box will appear. 5. Do not select Continue or Stop at this time. First, reconnect the source to the network.
Running the Exchange Failover utility After the restoration is complete, you will need to run the Exchange Failover utility to verify replica settings. 1. In a command prompt window on the source, change to the Storage Mirroring directory, then execute the following command: exchfailover -setup -failback -s source_name -t target_name where source_name is the name of the source and target_name is the name of the target. 2. Start the Exchange services on the source. 3.
5. Restart any Outlook clients so that they can access the source. To reestablish protection of the Exchange data on the source, create a replication set, reestablish the Storage Mirroring connection to the target, and begin failure monitoring as documented earlier in the procedure. Sample Batch File to Automate Steps After Restore rem Sample batch file to automate steps after restore. rem The user executing this batch file must have System permissions.
NOTE: A copy of this sample script (post_restore.bat.sample) is available in the Samples folder, located in the directory where Storage Mirroring is installed. After you modify the sample script, copy the script and save it with a new name to remove the .sample extension.
1. On the Monitor Settings window, only select Server Name under Items to Failover. Do not select IP Address(es) to failover. This corresponds to step 9 in ”Configuring failure monitoring” on page 9. 2. After failover and failback, you will need to update DNS. This can be done manually after the failover/failback is complete, or can be done during the failover process as part of the failover script postover.bat (step 1 in ”Configuring failure monitoring” on page 9) and failback script preback.
The Windows Dynamic DNS (DDNS) client does not initiate a registration reflecting the failed over name and IP address when failover occurs, and the ipconfig /registerdns command will not cause the failed over name and IP address to be registered. Accordingly, host records for the source will remain intact after failover and any required changes must be made on all DNS servers used by relevant clients.
Appendix 2: Alternate recovery method If you do not want to use a unique name when rebuilding the original source, use the following instructions. 1. On the target, open the Failover Control Center (Start, Programs, Storage Mirroring, Failover Control Center). 2. Select the target machine that is currently standing in for the failed source. 3. Highlight the failed source and click Failback. The failback script created earlier will automatically run.
15.If you accepted the default installation on the original source (before it failed), set Microsoft Exchange Messaging and Collaboration Services and Microsoft Exchange System Management Tools to Disaster Recovery. NOTE: Because the Exchange disaster recovery installation is configured for tape backup recovery, informational messages such as those below do not apply to this configuration and can be disregarded.
By itself, the -r option will create a one-to-one mapping from the source to the target. For example, the command exchfailover.exe -failover -s ExchSrvr -t ExchSrvr_Bkup -r would automatically create a one-to-one mapping on the target.
If needed, you can be the most specific with the -r option by specifying both the group and mail store names. For example, if you need to direct the group and mail store names on the target, the command exchfailover.exe -failover -s ExchSrvr -t ExchSrvr_Bkup -r Indy, Sales:Indy_Bkup, Sales -r Boston, Sales:Boston_Bkup, Sales will pair the mail store Sales in the Indy_Bkup group from the Sales mail store from the Indy group on the source.
Exchange Failover Utility command syntax Command EXCHFAILOVER Description Used in script files to failover Exchange data Syntax EXCHFAILOVER -FAILOVER | -FAILBACK -s -t [-l ] [-norus] [-nospn] [-nopublicfolders] [-onlypublicfolders] [-o ] [-r [][,][:[] [,]]] [-SETUP] [-test] [-u :] [-?[?]] Options 28 • FAILOVER—The Exchange data will be moved from the source to the
Examples Notes • exchfailover -failover -s Indy -t ExchSrvr_Bkup • exchfailover -failover -s Indy -t ExchSrvr_Bkup -r • exchfailover -failover -s Indy -t ExchSrvr_Bkup -r Sales:Indy_Sales • exchfailover -failover -s Indy -t ExchSrvr_Bkup -r Sales, Inside:Indy_Sales, Inside -r Sales, Outside:Indy_Sales, Outside • exchfailover -failover -s Indy -t ExchSrvr_Bkup -r Sales:Indy_Sales -norus -u administrator:password • exchfailover -failover -s Indy -t ExchSrvr_Bkup -o options_file.
Use the following procedure to assign the Write servicePrincipalName permission to a user or group. 1. Open ADSIEdit and go to CN=Server_Name,CN=Computers,DC=Domain_name,DC=com. 2. Right-click on the entry, then choose Properties. 3. Select the Security tab, then click Advanced. 4. Click Add. Click on Object Types and verify that Computers is selected. Click OK. 5. Type in your target_name and click CheckName. 6. Select Full Control, then click OK.
Recipient Update Service Failover The target machine must have the ability to modify the Recipient Update Service information. This involves allowing specific permissions to the Exchange Organization. 1. Open ADSIEdit and go to CN=Exchange_Organization_Name, CN=Microsoft Exchange, CN=Services, CN=Configuration, DC=Domain_name, DC=com. 2. Right-click on the entry, then choose Properties. 3. Select the Security tab, then click Advanced. 4. Click Add.