
HP StorageWorks P9000 Application Performance Extender Software User Guide (5697-0984, September 2012)

5. Create a profile and define target Service Level Objectives (SLOs) for the workloads identified
6. Assign the profile to an array.
7. Add workloads.
8. Enable the controller.
9. View and monitor workload performance.
10. Modify the defined SLOs to achieve the desired bandwidth or latency, if required.
NOTE:
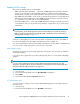
The Submit button is enabled only if the following conditions are met:
• If more than one MP blade is present in the Non QoS MPBs compartment.
• If MP blades have been moved from the Non QoS MPBs compartment to the QoS MPBs compart-
ment or vice versa.
In Partial modes, if the Load Balancer options of both the compartments (Non QoS MPBs and QoS
MPBs) are selected, load balancing happens amongst the MP blades present in the same compartment
only.
If you are only using the load balancing feature, select MPB graphs from the Navigation pane to view
MP blades utilization graphs.
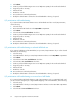
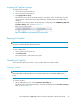
To continue with I/O prioritization, click Next on the DLOM Settings screen.
The SLO Settings screen is displayed.
Alternatively, you can select SLO Settings from the Navigation pane. For more information on setting
SLOs, see “Managing Service Level Objectives” on page 63.
Managing Service Level Objectives
P9000 Application Performance Extender enables you to define service level objectives (SLOs) for XP
and P9500 disk arrays. A defined SLO profile includes 16 SLO targets based on bandwidth or latency.
This section describes the procedure to create SLO profiles, assign profiles to an array, and schedule
profiles.
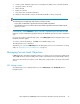
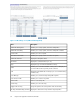
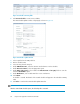
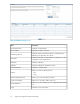
SLO Settings screen
The SLO Settings screen is displayed when you select SLO Settings under Configuration in the
Navigation pane.
HP StorageWorks P9000 Application Performance Extender Software User Guide 63