
HP StorageWorks P9000 Application Performance Extender Software User Guide (5697-0984, September 2012)

Assigning SLO profiles to arrays
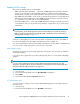
To assign profiles to arrays:
1. Select a profile from the profile list.
2. Select an array from the Array list.
3. Click Apply Profile To Array.
This will assign the profile as the default and the current profile of the selected array. A profile
will become the current profile when SLO scheduling is enabled and the associated profile is
activated.
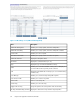
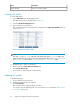
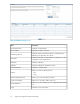
The details of the arrays and their assigned profiles are displayed in the P9000 Array And SLO
Profile(s) Summary table, as shown in Figure 22.
Figure 22 P9000 Array and SLO Profile(s) Summary table
.
Removing SLO profiles
NOTE:
An active or scheduled profile cannot be removed.
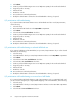
To remove SLO profiles:
1. Select a profile from the profile list.
2. Click Delete Profile.
The selected profile is removed from the system.
Scheduling SLO profiles
This section describes the procedure to create, update, and remove SLO schedules.
Creating a schedule
NOTE:
Ensure that all the workload numbers are associated with the required workloads (PRM groups or
hosts).
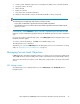
To create a schedule:
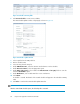
1. On the SLO Settings screen, click the SLO Profile Scheduling tab.
The details of the existing SLO schedules in the system are displayed in the Schedule Summary
table, as shown in Figure 23.
HP StorageWorks P9000 Application Performance Extender Software User Guide 67