hp pavilion vf51 15-inch LCD Monitor (15-inch Viewable Image) User’s Guide Select Language
The information in this document is subject to change without notice. Hewlett-Packard® Company (hereafter HP Company) makes no warranty of any kind with regard to this material, including, but not limited to, the implied warranties of merchantability and fitness for a particular purpose. HP shall not be liable for errors contained herein or for incidental or consequential damages in connection with the furnishing, performance, or use of this material.
Contents Introduction ……………………………..………… 1 Features ……………………………………………………… 1 For Your Safety ……………………………………………… 2 Working in Comfort …………………………………………… 2 Installation ………………………………………… 3 Unpacking the Monitor ………………………………………. 3 Locations and Functions of Controls ……………………… 3 Connecting Your Monitor …………………………………… 4 How to Install the Drivers ……………………… 6 Windows 2000 Users ……..……............…...……………… 6 Windows Me Users ……..……............……...……………… 6 Windows XP Users ……..……............……...
Declaration of Conformity …………………………………… FCC Statement ……………………………………………….. Declaration of VCCI Class B Compliance …………………. Notice for Korea (Class B) ………………………………… DOC Statement (Canada Only) ……………………………..
Introduction This latest LCD monitor has a 15-inch active matrix TFT (thin film transistor) liquid crystal display module. It is designed for use with any Windows®-based PC. The monitor’s compact design provides great space savings on your computer desk. Features Important features include: Automatic configuration to the PC video settings with maximum XGA (1024 x 768) resolution.
For Your Safety Warning To completely disconnect power from your display, you must remove the power cord from the wall outlet and then remove the power cable from the display. Only use with the power adapter supplied with the product. To avoid electrical shock, do not open the power adapter. There are no user-serviceable parts inside. Refer servicing to qualified service personnel.
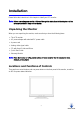
Installation Please follow the instructions in this chapter to install your LCD monitor. Note: Before connecting your monitor, first read through the instructions in this chapter and the safety precautions in the previous chapter.
Use the power button located at the lower middle of the front panel of your monitor to turn on and off the monitor. Three control buttons are also located at the lower middle of the front panel of your monitor. Their functions are described below: Button Select Up (▲) Function Description (1) Opens the OSD Main Menu. (2) Selects item for user adjustment. (1) Moves upward through items in the OSD Main Menu, or increases user-adjustable values. (2) Opens Brightness Menu (Direct-key function).
4. Plug the analog video signal cable into the Analog Video Input port on the back of the monitor (as shown above). 5. Connect the other end of the video cable into your computer’s video port. (Please check your computer’s documentation for port location.) Note: For best monitor performance, it is strongly recommended that you use Auto Configuration to automatically configure your monitor’s settings.
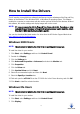
How to Install the Drivers The HP monitor comes with driver software that allows you to take advantage of the Plug and Play feature of the Windows ® Me, Windows 2000, or Windows XP operating system. This software enables the computer to communicate with the monitor and use all the monitor features. Without this software, the monitor settings and display images will not be correct. NOTE: HP computers may ship with the Plug and Play drivers preinstalled.
3. Select the Settings tab. 4. Click Advanced button. 5. Select the Monitor tab. 6. Click the Change button. 7. Select the Specify a Location box. 8. Find and open the vf51.inf file on the CD-ROM disc in the Drivers directory, and click OK. 9. Click Next to install the selected monitor. Windows XP Users NOTE: The procedure for installing the driver for your operating system may vary. To install the driver for your monitor: 1. Click Start. 2. Click Control Panel. 3. Click Appearance and Themes. 4.
Using Your Monitor This chapter contains information about using your LCD monitor. Turning the Monitor On and Off Use the power button located at the lower middle of the front panel of the monitor to turn the monitor on and off. When the monitor is on, the light (LED) near the Power button is illuminated. The light is green when both the monitor and PC are active, and amber when the monitor is in a reduced power mode.
Tilting the Monitor The monitor has a tilt feature that allows you to tilt the monitor back and forth to find the most comfortable viewing position. To tilt the monitor, grasp the sides and push the monitor back or pull it toward you until it is in the desired position. The monitor can be tilted 20º backward and 5º forward. Note: Do not tilt the monitor by grasping the top edge.
use 60 Hz refresh rate for best performance. The table in the “Video Mode” section shows the image refresh rates supported by the monitor at different screen resolutions. To set the refresh rate with a standard Windows installation, consult your Windows or graphics card documentation. Minimizing Power Consumption Many PCs support industry standard power-save signaling techniques. Power management features reduce the monitor’s power consumption after a period of keyboard and mouse inactivity.
Note: If the screen is still dirty, you can dampen the cloth with several drops of distilled water. Make sure the LCD panel is completely dry before you turn the monitor back on. 4. Plug in the monitor. 5. Turn on your PC and monitor.
Adjusting Your Monitor This chapter contains information about how to change display settings for your LCD Monitor. It is designed with an On-Screen Display (OSD) menu to help you easily adjust to its optimum performance. Note: You must perform Auto Configuration before making any adjustment. Summary of Control Buttons There are three control buttons located at the lower middle part of the front panel of your monitor: Select: Displays the OSD Main Menu and selects items for user adjustment.
The following table briefly describes each of the items in the OSD Main Menu. Item Description H POSITION Adjusts the horizontal (H) position of the displayed image. The default setting of H position is in the middle. V POSITION Adjusts the vertical (V) position of the displayed image. The default setting of V position is in the middle. CLOCK Adjusts the timing clock setting of the display. The default setting of the timing clock is in the middle (50).
Selecting Items in the OSD Menu To select a specific item in the OSD Main Menu, or a specific item in the OSD submenu, use the Up (▲) and Down (▼) buttons to move to that item, and then select it by pressing the Select button. Making Adjustments in the OSD Menu Adjusting the Positions of the Displayed Images To adjust the horizontal (or vertical) positions of the displayed images, follow the steps below: 1. Open the OSD Main Menu by pressing the Select button. 2.
1. Open the OSD Main Menu by pressing the Select button. 2. Press the Up (▲) or Down (▼) buttons to move forward or backward to the CLOCK (or PHASE) icon and highlight it. 3. Press the Select button to select it. This will open the CLOCK (or PHASE) bar with the associated numeric value for your adjustment onscreen. 4. Press the Up (▲) or Down (▼) buttons to adjust its value. The range for adjustment is from 0 to 100.
highlight it. 3. Press the Select button to select it. This will open the COLOR submenu with four options in it: BLUISH, WHITE, REDDISH, and USER RGB SAVE. 4. Press the Up (▲) or Down (▼) buttons to select the setting. As you choose an item, the color setting of your display immediately updates to reflect this setting. You may also set your own color definitions. To do this, move to the USER RGB SAVE option, and then press the Select button. This will open the USER RGB SAVE submenu.
Adjusting Contrast and Brightness To adjust the contrast (or brightness) of the displayed images, follow the steps below: 1. Open the OSD Main Menu by selecting the Select button. 2. Press the Up (▲) or Down (▼) buttons to move forward or backward to the CONTRAST (or BRIGHTNESS) icon and highlight it. 3. Press the Select button to select it. This will open the CONTRAST (or BRIGHTNESS) bar with associated numeric value for your adjustment onscreen. 4.
You may determine how long the OSD will stay onscreen by selecting the OSD TIMEOUT option. Increase or decrease the OSD display time by pressing the Up (▲) or Down (▼) buttons in the OSD TIMEOUT submenu. The maximum timeout setting is 60 seconds. You may turn on or off the displayed image information by selecting the INFORM ON-OFF option. Turn this option on to display information onscreen that informs you when the input signal has been changed.
Checking Other Information about Your Monitor There is some useful information available to you with the OSD display. These include BACKLIGHT INFO, SERIAL NUMBER and MODE INFO. BACKLIGHT INFO tells you the total accumulated time the backlight has been turned on. To show this information, follow the steps below: 1. Open the OSD Main Menu by pressing the Select button. 2. Press the Up (▲) or Down (▼) buttons to move forward or backward to the BACKLIGHT INFO icon and highlight it. 3.
Choosing Your Native or Preferred Language for the OSD Display There are five language options for the OSD display: English, Deutsch, Français, Italiano, and Español. To make your choice, follow the steps below: 1. Open the OSD Main Menu by pressing the Select button. 2. Press the Up (▲) or Down (▼) buttons to move forward or backward to the LANGUAGE icon and highlight it. 3. Press the Select button to select it. This will open the LANGUAGE submenu. 4.
Note: Auto Configuration uses state-of-the-art signal processing algorithms based on the image displayed on your screen. Therefore, you should not change the image on your screen while Auto Configuration is running. Once you have executed Auto Configuration for a particular mode, the monitor will store the new values in its permanent memory. To execute Auto Configuration using the Direct Key function: 1. Make sure the OSD Main Menu is not displayed onscreen.
Troubleshooting This chapter contains information about how to troubleshoot your LCD Monitor. If you have tried all of the items listed below, please contact a qualified service technician. A. My monitor doesn’t work, even though the computer appears to work. 1. Make sure the power cable is securely plugged into the monitor. 2. Make sure the monitor is turned on. 3. Try turning the monitor off and then turning it on again. 4.
LCD Monitor Quality and Pixel Policy for vf51 Monitor vf51 15-inch monitor The HP vf51 TFT monitor uses high-precision technology, manufactured according to HP standards, to guarantee trouble-free performance. Nevertheless, the monitor may have cosmetic imperfections that appear as small bright or dark spots. This is common to all LCD monitors used in products supplied by all vendors and is not specific to the HP P4824A LCD. One or more defective pixels or sub-pixels cause these imperfections.
Technical Information This chapter contains technical information about your LCD Monitor. Monitor Information LCD Module 15-in (38.1 cm), active matrix TFT, anti-glare coating, 0.297 mm pixel pitch Display Size 304.1 mm x 228.1 mm Viewing Angle Left/Right Up/Down -60° ~ 60° -55° ~ 45° Luminance Contrast Ratio 220 cd/m2 (Typical) 350 : 1 (Typical) Display Colors 16.7 Millions AC Adapter Input 100 ~ 240 VAC Full Range, 50/60 Hz. < 1.2 A @ 110V; < 0.6 A @ 230 V Output 12 VDC, 3.
Operating Conditions Temperature 5° ~ 40°C at altitude 0 ~ 2000m 5° ~ 30°C at altitude 2000 ~ 3000m 20% ~ 85% RH, non-condensing 3000m Max. Humidity Altitude Storage Conditions Temperature Humidity Altitude -20° ~ 60°C 5% ~ 95% RH 10000m Max. Video Modes Your LCD monitor supports the following industry-standard combinations of screen resolution and refresh rates. Other combinations are possible, but may require adjustments to the image.
Unknown Video Modes Like all other monitors, your LCD monitor is designed to work with standard video modes. However, not all video/graphics cards use only standard display modes. Your LCD monitor uses state-of-the-art technology, which is designed to automatically synchronize to any display mode listed in the above table. We recommend you choose one of the supported modes listed above.
DECLARATION OF CONFORMITY According to ISO/IEC Guide 22 and CEN/CENELEC EN 45014 Manufacturer's name: HEWLETT-PACKARD France Manufacturer's address: 5 Avenue Raymond Chanas-Eybens 38053 GRENOBLE Cedex 09 - FRANCE Declares that the product : Product Name HP LCD 15” Monitor Model Name vf51 Product Number P4824** (Where * can be any alphanumeric character or blank) Conforms to the following Product Specifications: SAFETY - International: - Europe : IEC 60950:1991 +A1 +A2 +A3 +A4 / GB4943-1995.
FCC Statement This equipment has been tested and found to comply with the limits for a Class B digital device pursuant to Part 15 of the FCC Rules. These limits are designed to provide reasonable protection against harmful interference in a residential installation. This equipment generates, uses, and can radiate radio frequency energy. If not installed and used in accordance with the instructions, it can cause harmful interference to radio communications.
DOC Statement (Canada Only) This Class B digital apparatus meets all requirements of the Canadian Interference-Causing Equipment Regulations. Cet appareil numérique de la Classe(*) est conforme à la norme NMB-003 du Canada Environmental Information HP has a strong commitment toward the environment. Your HP monitor has been designed to respect the environment as much as possible. HP can also take back your old monitor for recycling when it reaches the end of its useful life.
Congratulations! You have just purchased a TCO'99 approved and labelled product! Your choice has provided you with a product developed for professional use. Your purchase has also contributed to reducing the burden on the environment and also to the further development of environmentally adapted electronics products. This product meets the requirements for the TCO'99 scheme which provides for an international environmental and quality labelling of personal computers.
Below you will find a brief summary of the environmental requirements met by this product. The complete environmental criteria document may be ordered from: TCO Development SE-114 94 Stockholm, Sweden Fax: +46 8 782 92 07 Email (Internet): development@tco.se Current information regarding TCO'99 approved and labelled products may also be obtained via the Internet, using the address: http://www.tco-info.