
HP RIP Software - HP RIP Software User Guide


Installation 1-5
Installation To get started using the RIP, follow these steps in order:
• Step 1: Install the Printer (page 1-5)
• Step 2: Install the VideoNet Card and Cable (page 1-5)
• Step 3: Install the VideoNet Protocol (page 1-7)
• Step 4: Install the Web Server (page 1-9)
• Step 5: Install the RIP Software (page 1-9)
• Step 6: Start the RIP (page 1-11)
• Step 7: Add Ports and Hot Folders (page 1-14)
• Step 8: Add a Printer to the Client Workstation (page 1-16)
• Step 9: Add the Hot Folder to the Client Workstation (page 1-23)
• Step 10: Print a Test File (page 1-24)
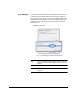
Step 1: Install the Printer Unpack, set up, and install the printer, media, and ink as described in
the documentation included with the printer.
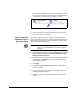
Step 2: Install the
VideoNet Card and Cable
1. Power off the computer you will be using to run the RIP.
2. Install the VideoNet printer interface card into an available PCI
expansion slot.
3. Connect the printer to the interface card using the cable supplied
with the printer.
4. Power on the computer.
After Windows starts, it detects the new interface card and installs
the driver software.
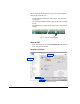
You should see two icons, one representing your office LAN, the
other representing the VideoNet connection.