
HP StorageWorks SAN Virtualization Services Platform Manager User Guide (5697-0454, May 2010)
Setting application types for virtual disks
To set a virtual disk’s application type:
1. In the navigation tree, expand the Entities node.
2. Click the Virtual Disk node. The virtual disks list appears in the list area.
3. Right-click the virtual disk to which you want to add applications. Select Set Application.
4. From the Select Application box, select the application that is using the virtual disk. If the correct
option does not appear, click Cancel to close the wizard, and add the application to the
applications list. See “Adding an application to the applications list” on page 120.
5. Click Next. A confirmation screen appears.
6. Click Finish. The virtual disk’s application is set and is now displayed in the Application Type
display field in the Virtual Disks list.
To set application types to one or more virtual disks:
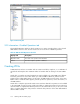
1. From the Tools menu, select Options > Virtual Disk’s Application. The virtual disk’s Application
dialog box appears.
2. From the applications list, select the application that you want to add to one or more virtual
disk(s). If the application is not listed, add the application to the list as follows:
a. Click Add New. The VSM dialog box appears.
b. In the Application Type field, enter the application type name that you want to add.
c. Click OK. The VSM dialog box closes and the application type you added is added to the
applications list.
3. From the applications list, select the application that you want to add to one or more virtual
disk(s).
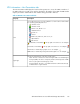
4. Click Add to volume. A wizard opens to the Select Virtual Disk(s) screen and displays the list of
available virtual disks.
5. If you would like to select a virtual disk from a folder, navigate to the folder in the tree on the left
of the screen. The Select Virtual Disk(s) screen displays the list of back-end LUs in the selected
folder.
6. In the top right area of the screen, select one of the virtual disks to which you want to add the
application.
7. Click Add. The virtual disk you selected is added to the list at the bottom right of the screen. If
you want to change your selection, select the virtual disk in the bottom list, click Remove, and
then select and add another virtual disk.
8. Repeat steps 2 through 7 to set each additional application type for more virtual disks, as
necessary.
9. Click Next. A confirmation screen appears.
10. Click Finish. The application is added to the virtual disk.
Managing OUIDs for virtual disks
For information about OUIDs, see “Working with OpenVMS” on page 144.
SAN Virtualization Services Platform Manager User Guide 121