
Serviceguard Manager Version A.04.00 Release Notes, June 2004


Serviceguard Manager Version A.04.00 Release Notes
Installing and Running Serviceguard Manager
Chapter 140
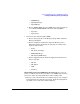
— If you specify the -l option, you may also specify the -p
<password> option to give that user’s password.
—The -c <clustername> option specifies the clusters you want the
Session Server to discover. (The Session Server can discover only
the nodes on its subnets.) These clusters will be displayed on
your map, under the Session Server’s name. Repeat the -c option
for several clusters in this session.
— The -local option will discover the cluster where the Session
Server is configured, whether it is specifically listed in the -c
option or not.
— Specify -un TRUE to see the unused nodes discovered by this
Session Server on its subnets. These are nodes that have
Serviceguard installed, but are not currently configured in any
cluster.
• To open another session, repeat these steps.
When the interface opens, you will see what you have chosen, and you
will be given a chance to fill in any options you have not yet chosen.
Using the Interface
When Serviceguard Manager opens, you have a chance to choose Connect
or Open (unless you have already specified one of them in the command
line).
Use Open to see any saved “snapshot” file (one with .sgm extension). To
get acquainted with the program, Open a supplied Example file.
To see your own clusters “live”, use Connect. You need to have a logon for
a node that is running Serviceguard A.11.13 or later. This will be your
Session Server. It can discover clusters on its subnets, if they have
granted it access.
For the rules about access for admin capability, see Table 1-1 on page 16
Once you have a session open, open Help from the toolbar. Open the
Getting Started topic from the Help window’s Table of Contents. Using
Serviceguard is a good place to start. Map Legend explains status, colors,
and symbols on the map.
Select a tree or map object, and choose Properties from the Actions
menu.