Veritas Storage Foundation™ 5.
Legal Notices © Copyright 2005-2008 Hewlett-Packard Development Company, L.P. Confidential computer software. Valid license from HP required for possession, use, or copying. Consistent with FAR 12.211 and 12.212, Commercial Computer Software, Computer Software Documentation, and Technical Data for Commercial Items are licensed to the U.S. Government under vendor’s standard commercial license. The information contained herein is subject to change without notice.
Contents 1. Introducing Serviceguard Extension for RAC About Serviceguard Extension for RAC . . . . . . . . . . . . . . . . . . . . . . . . . . . . . . . . . . . . . . . . . . . . . . . . . . How Serviceguard Extension for RAC Works (High-Level Perspective). . . . . . . . . . . . . . . . . . . . . . . . . Component Products and Processes of SG SMS Serviceguard Cluster File System for RAC . . . . . . . . Communication Infrastructure . . . . . . . . . . . . . . . . . . . . . . . . . . . . . . . . . . . . . .
Contents Using Storage Checkpoints and Storage Rollback for Backup and Restore . . . . . . . . . . . . . . . . . . . . . . About Storage Checkpoints and Storage Rollback . . . . . . . . . . . . . . . . . . . . . . . . . . . . . . . . . . . . . . . . Determining Space Requirements for Storage Checkpoints . . . . . . . . . . . . . . . . . . . . . . . . . . . . . . . . . . Performance of Storage Checkpoints . . . . . . . . . . . . . . . . . . . . . . . . . . . . . . . . . . . . . . . . . . . . . . . . . . . .
Contents Shutting Down the Clone Database and Unmounting File Systems. . . . . . . . . . . . . . . . . . . . . . . . . Restarting a Clone Database . . . . . . . . . . . . . . . . . . . . . . . . . . . . . . . . . . . . . . . . . . . . . . . . . . . . . . . . Recreating Oracle Tempfiles . . . . . . . . . . . . . . . . . . . . . . . . . . . . . . . . . . . . . . . . . . . . . . . . . . . . . . . . Resynchronizing the Snapshot to Your Database . . . . . . . . . . . . . . . . . . . . . . . . . . . . . . . . . .
Contents 6
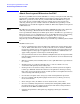
Preface The Veritas Storage Foundation™ 5.0 for Oracle RAC HP Serviceguard Storage Management Suite Configuration Guide Extracts contain relevant information extracted from Veritas™ partner documentation and supplemented with HP specific content. Printing History The last printing date and part number indicate the current edition.
1 Introducing Serviceguard Extension for RAC This chapter contains the following topics: Chapter 1 • “About Serviceguard Extension for RAC” on page 10 • “How Serviceguard Extension for RAC Works (High-Level Perspective)” on page 11 • “Component Products and Processes of SG SMS Serviceguard Cluster File System for RAC” on page 13 • “Communication Infrastructure” on page 14 • “Cluster Interconnect Communication Channel” on page 16 • “Low-level Communication: Port Relationship Between GAB and Pro
Introducing Serviceguard Extension for RAC About Serviceguard Extension for RAC About Serviceguard Extension for RAC HP Serviceguard Extension for RAC (SGeRAC) is a storage management and clustering solution that is included with the HP Serviceguard Storage Management Suite (SG SMS) Serviceguard Cluster File System for RAC bundle.
Introducing Serviceguard Extension for RAC How Serviceguard Extension for RAC Works (High-Level Perspective) How Serviceguard Extension for RAC Works (High-Level Perspective) Real Application Clusters (RAC) is a parallel database environment that takes advantage of the processing power of multiple computers. The Oracle database is the physical data stored in tablespaces on disk, while the Oracle instance is a set of processes and shared memory that provide access to the physical database.
Introducing Serviceguard Extension for RAC How Serviceguard Extension for RAC Works (High-Level Perspective) Figure 1-1 12 Serviceguard Extension for RAC Architecture Chapter 1
Introducing Serviceguard Extension for RAC Component Products and Processes of SG SMS Serviceguard Cluster File System for RAC Component Products and Processes of SG SMS Serviceguard Cluster File System for RAC To understand how the SG SMS Serviceguard Cluster File System for RAC product manages database instances running in parallel on multiple nodes, review the architecture and communication mechanisms that provide the infrastructure for Oracle RAC.
Introducing Serviceguard Extension for RAC Communication Infrastructure Communication Infrastructure To understand the communication infrastructure, review the data flow and communication requirements. Data Flow The CVM, CFS, ODM, and Oracle Real Application Clusters (RAC) elements reflect the overall data flow, or data stack, from an instance running on a server to the shared storage.
Introducing Serviceguard Extension for RAC Communication Infrastructure Communication Requirements End-users on a client system are unaware that they are accessing a database hosted by multiple instances. The key to performing I/O to a database accessed by multiple instances is communication between the processes. Each layer or component in the data stack must reliably communicate with its peer on other nodes to function properly.
Introducing Serviceguard Extension for RAC Cluster Interconnect Communication Channel Cluster Interconnect Communication Channel The cluster interconnect provides the communication channel for all system-to-system communication, in addition to one-node communication between modules. Low Latency Transport (LLT) and Group Membership Services/Atomic Broadcast (GAB) make up the SG SMS Serviceguard for Oracle RAC communications package central to the operation of SGeRAC.
Introducing Serviceguard Extension for RAC Cluster Interconnect Communication Channel Cluster Membership At a high level, all nodes configured by the installer can operate as a cluster; these nodes form a cluster membership. In SGeRAC, a cluster membership specifically refers to all systems configured with the same cluster ID communicating by way of a redundant cluster interconnect. Refer to Using Serviceguard Extension for RAC for additional information.
Introducing Serviceguard Extension for RAC Low-level Communication: Port Relationship Between GAB and Processes Low-level Communication: Port Relationship Between GAB and Processes All components in SGeRAC use GAB for communication. Each process wanting to communicate with a peer process on other nodes registers with GAB on a specific port. This registration enables communication and notification of membership changes. For example, the SGeRAC engine (had) registers on port h.
Introducing Serviceguard Extension for RAC Cluster Volume Manager Cluster Volume Manager CVM is an extension of Veritas Volume Manager, the industry-standard storage virtualization platform. CVM extends the concepts of VxVM across multiple nodes. Each node recognizes the same logical volume layout, and more importantly, the same state of all volume resources. CVM supports performance-enhancing capabilities, such as striping, mirroring, and mirror break-off (snapshot) for off-host backup.
Introducing Serviceguard Extension for RAC Cluster Volume Manager Port V CVM uses port v for kernel-to-kernel communication. During specific configuration events, certain actions require coordination across all nodes. An example of synchronizing events is a resize operation. CVM must ensure all nodes see the new or old size, but never a mix of size among members. CVM also uses this port to obtain cluster membership from GAB and determine the status of other CVM members in the cluster.
Introducing Serviceguard Extension for RAC Cluster File System Cluster File System CFS enables you to simultaneously mount the same file system on multiple nodes and is an extension of the industry-standard Veritas File System. Unlike other file systems which send data through another node to the storage, CFS is a true SAN file system. All data traffic takes place over the storage area network (SAN), and only the metadata traverses the cluster interconnect.
Introducing Serviceguard Extension for RAC Oracle Disk Manager Oracle Disk Manager SGeRAC requires Oracle Disk Manager (ODM), a standard API published by Oracle for support of database I/O. SGeRAC provides a library for Oracle to use as its I/O library. ODM Architecture When the ODM library is linked, Oracle is able to bypass all caching and locks at the file system layer and to communicate directly with raw volumes.
Introducing Serviceguard Extension for RAC Additional Features of Serviceguard Extension for RAC Additional Features of Serviceguard Extension for RAC Additional SGeRAC features include: Chapter 1 • The ability to transition from a local high-availability cluster into a disaster recovery environment.
Introducing Serviceguard Extension for RAC Additional Features of Serviceguard Extension for RAC 24 Chapter 1
2 Planning SGeRAC Installation and Configuration This chapter contains the following topics: Chapter 2 • “Installation Requirements” on page 26 • “About CVM and CFS in an SGeRAC Environment” on page 30 • “Overview of SGeRAC Installation and Configuration Tasks” on page 35 25
Planning SGeRAC Installation and Configuration Installation Requirements Installation Requirements Make sure each node on which you want to install or upgrade SGeRAC meets the installation requirements.
Planning SGeRAC Installation and Configuration Installation Requirements Table 2-1 Hardware Requirements (Continued) Item Description Fibre Channel or SCSI Host Bus Adapters SGeRAC requires at least one built-in SCSI adapter per system to access the operating system disks, and at least one additional SCSI or Fibre Channel Host Bus Adapter per system for shared data disks. Disk Space (local) Confirm that your system has enough free disk space to install SGeRAC.
Planning SGeRAC Installation and Configuration Installation Requirements Supported Operating Systems Within a cluster, all nodes must use the same operating system version. Run SF 5.0 for Oracle RAC on these operating systems at the suggested patch levels. • HP-UX 11i v2 (If necessary, upgrade the operating system to this version or a later version) • HP-UX 11i v3 • For each platform, Symantec recommends applying the latest HP-UX operating system patches available from HP.
Planning SGeRAC Installation and Configuration Installation Requirements Required HP Patches SGeRAC requires HP-UX depots and patches on each node before installation. For current information, please refer to the HP Serviceguard Storage Management Suite Release Notes available at: http://docs.hp.com/en/ha.
Planning SGeRAC Installation and Configuration About CVM and CFS in an SGeRAC Environment About CVM and CFS in an SGeRAC Environment Before installing SGeRAC, you can review concepts on CVM and CFS to better understand the overall setup and plan your SGeRAC configuration.
Planning SGeRAC Installation and Configuration About CVM and CFS in an SGeRAC Environment About CFS Review CFS File System benefits, CFS configuration differences from VxFS and CFS recovery operations. CFS File System Benefits Many features available in VxFS do not come into play in an SGeRAC environment because ODM handles such features. CFS adds such features as high availability, consistency and scalability, and centralized management to VxFS.
Planning SGeRAC Installation and Configuration About CVM and CFS in an SGeRAC Environment Coordinating CVM and CFS Configurations After installing SGeRAC, a VCS cluster attribute (HacliUserLevel) is set to give root the ability to run commands on remote systems by way of the cluster interconnect. CFS takes advantage of this mechanism to enable you to perform file system operations requiring the primary node be initiated on secondary nodes and carried out on the primary node transparently.
Planning SGeRAC Installation and Configuration About CVM and CFS in an SGeRAC Environment Enabling Write Access to Volumes in the Disk Groups By default, the activation mode for shared disk groups is inactive (set to off).
Planning SGeRAC Installation and Configuration About CVM and CFS in an SGeRAC Environment About Raw Volumes Versus CFS for Data Files Keep these points in mind about raw volumes and CFS for data files: • If you use file-system-based data files, the file systems containing these files must be located on shared disks. Create the same file system mount point on each node. • If you use raw devices, such as VxVM volumes, set the permissions for the volumes to be owned permanently by the database account.
Planning SGeRAC Installation and Configuration Overview of SGeRAC Installation and Configuration Tasks Overview of SGeRAC Installation and Configuration Tasks Phases involved in installing and configuring SF 5.
Planning SGeRAC Installation and Configuration Overview of SGeRAC Installation and Configuration Tasks Setting up Backup and Recovery Feature for SGeRAC (optional) You can configure the following SGeRAC optional features to back up and recover data at the volume and file system levels: • Veritas Storage Checkpoint Allows efficient backup and recovery of Oracle RAC databases. This feature is available with SF Oracle RAC as part of the Veritas File System.
3 Configuring the Repository Database for Oracle This chapter contains the following topics: Chapter 3 • “About Configuring the Repository Database for Oracle” on page 38 • “Creating and Configuring the Repository Database for Oracle” on page 39 37
Configuring the Repository Database for Oracle About Configuring the Repository Database for Oracle About Configuring the Repository Database for Oracle After installing SF Oracle RAC, you can create and configure the repository database using the sfua_db_config script. Configuring the repository database will enable you to use SF Oracle RAC features such as Checkpoint, FlashSnap and Storage Mapping.
Configuring the Repository Database for Oracle Creating and Configuring the Repository Database for Oracle Creating and Configuring the Repository Database for Oracle Before running the sfua_db_config script, review the following requirements: NOTE • Make sure a disk group exists with at least one volume, which should not be shared. A VxFS file system must be created on the disk group. • The volume must be mounted. • Obtain an unique virtual IP address for public NIC interface.
Configuring the Repository Database for Oracle Creating and Configuring the Repository Database for Oracle $prod repository for HA solution: * A mount point of already mounted Veritas Volume on a shared storage, with Veritas File system. * A public NIC used by each system in the cluster. * A Virtual IP address and netmask. Press enter to continue.
4 Using Storage Checkpoints and Storage Rollback This chapter contains the following topics: Chapter 4 • “About Storage Checkpoints and Storage Rollback in SG Oracle RAC” on page 42 • “Using Storage Checkpoints and Storage Rollback for Backup and Restore” on page 43 • “Determining Space Requirements for Storage Checkpoints” on page 45 • “Performance of Storage Checkpoints” on page 47 • “Backing up and Recovering the Database Using Storage Checkpoints” on page 48 • “Guidelines for Oracle Recove
Using Storage Checkpoints and Storage Rollback About Storage Checkpoints and Storage Rollback in SG Oracle RAC About Storage Checkpoints and Storage Rollback in SG Oracle RAC Veritas Storage Checkpoints enable efficient backup and recovery of Oracle databases. The Veritas Storage Checkpoint feature is available with SG Oracle RAC as part of the Veritas File System package and is used for the efficient backup and recovery of Oracle databases.
Using Storage Checkpoints and Storage Rollback Using Storage Checkpoints and Storage Rollback for Backup and Restore Using Storage Checkpoints and Storage Rollback for Backup and Restore SG Oracle RAC provides a Storage Checkpoint facility that is similar to the snapshot file system mechanism; however, a Storage Checkpoint persists after a system reboot.
Using Storage Checkpoints and Storage Rollback Using Storage Checkpoints and Storage Rollback for Backup and Restore You can set a quota to limit how much space a file system will give to all storage checkpoints, to prevent the checkpoints from consuming all free space. See the command dbed_ckptquota for more information. Storage Rollback restores a database, a tablespace, or datafiles on the primary file systems to the point-in-time image created during a Storage Checkpoint.
Using Storage Checkpoints and Storage Rollback Determining Space Requirements for Storage Checkpoints Determining Space Requirements for Storage Checkpoints To support Block-level Incremental (BLI) Backup and storage rollback, the file systems need extra disk space to store the Storage Checkpoints. The extra space needed depends on how the Storage Checkpoints are used.
Using Storage Checkpoints and Storage Rollback Determining Space Requirements for Storage Checkpoints Always reserve free disk space for growing volumes and file systems. You can also preallocate sufficient space for each file system when the file system is first created or manually grow the file system and logical volume where the file system resides. See the vxassist(1) and fsadm_vxfs(1) manual pages for more information.
Using Storage Checkpoints and Storage Rollback Performance of Storage Checkpoints Performance of Storage Checkpoints Veritas File System attempts to optimize the read and write access performance on both the Storage Checkpoint and the primary file system. Reads from a Storage Checkpoint typically perform at nearly the throughput of reads from a normal VxFS file system, allowing backups to proceed at the full speed of the VxFS file system.
Using Storage Checkpoints and Storage Rollback Backing up and Recovering the Database Using Storage Checkpoints Backing up and Recovering the Database Using Storage Checkpoints Storage Checkpoints can be created by specifying one of the following options: online, offline, or instant. To create a Storage Checkpoint with the online option, the database should be online and you must enable ARCHIVELOG mode for the database. For the offline option, the database should be offline.
Using Storage Checkpoints and Storage Rollback Backing up and Recovering the Database Using Storage Checkpoints drwxr-xr-x3oracledba1024Nov 11 2000 . drwxr-xr-x3oracledba512Nov 16 11:00 .. -rw-r--r--1oracledba209747968 Nov 16 10:58 .tstmp -rw-r--r--1oracledba209747968Nov 16 10:58 .tstab lrwxrwxrwx1oracledba18Nov 11 2000 tstmp -> .tstmp::cdev:vxfs: lrwxrwxrwx1oracledba18Nov 11 2000 tstab -> .tstab::cdev:vxfs: 3. Run dbv tool against Quick I/O file tstmp.
Using Storage Checkpoints and Storage Rollback Backing up and Recovering the Database Using Storage Checkpoints 3. Use tar to back up the Storage Checkpoint. $ cd /tmp/ckpt_ro $ ls db01 $ tar cvf /tmp/PROD_db01_903937870.tar ./db01 Recovering a Database Using a Storage Checkpoint Because Storage Checkpoints record the before images of blocks that have changed, you can use them to do a file-system-based storage rollback to the exact time when the Storage Checkpoint was taken.
Using Storage Checkpoints and Storage Rollback Guidelines for Oracle Recovery Guidelines for Oracle Recovery For optimal Oracle recovery, follow these guidelines: • Back up all control files before storage rollback in case the subsequent Oracle recovery is not successful. Oracle recommends that you keep at least two copies of the control files for each Oracle database and that you store the copies on different disks.
Using Storage Checkpoints and Storage Rollback Guidelines for Oracle Recovery To perform an incomplete media recovery, use one of the following: — RECOVER DATABASE UNTIL CANCEL; — RECOVER DATABASE UNTIL TIME ’yyyy-mm-dd:hh:mm:ss’; (You can confirm the time of error by checking the ../bdump/alert*.log file.
Using Storage Checkpoints and Storage Rollback Using the Storage Checkpoint Command Line Interface (CLI) Using the Storage Checkpoint Command Line Interface (CLI) Veritas Storage Foundation for Oracle RAC provides a command line interface to many key operations. The command line interface lets you incorporate command operations into scripts and other administrative processes.
Using Storage Checkpoints and Storage Rollback Examples of Using the Command Line Interface Examples of Using the Command Line Interface Review the examples for using the Veritas Storage Foundation for Oracle RAC command line interface to perform administrative operations. For more detailed information about the commands and their syntax and available options, see the individual manual pages.
Using Storage Checkpoints and Storage Rollback Examples of Using the Command Line Interface Table 4-4 Repository Using dbed_update Notes Prerequisites You must be logged on as the database administrator (typically, the user ID oracle). Usage notes The dbed_update command creates a repository in the /etc/vx/vxdbed/$ORACLE_SID directory where information used by SG Oracle RAC is kept. If the repository already exists, the command will refresh the information.
Using Storage Checkpoints and Storage Rollback Examples of Using the Command Line Interface • Use the dbed_ckptcreate command as follows: $ /opt/VRTS/bin/dbed_ckptcreate -S PROD \ -H /oracle/product/10g -o online Storage Checkpoint Checkpoint_971672042 created.
Using Storage Checkpoints and Storage Rollback Examples of Using the Command Line Interface Table 4-6 Display Storage Checkpoints Notes (Continued) Usage Notes In addition to displaying the Storage Checkpoints created by SG Oracle RAC, dbed_ckptdisplay also displays other Storage Checkpoints (for example, Storage Checkpoints created by the Capacity Planning Utility and NetBackup).
Using Storage Checkpoints and Storage Rollback Examples of Using the Command Line Interface NetBackup_incr_PROD_955133480NBU/db01 NetBackup_full_PROD_955132952NBU/db01 To display all Storage Checkpoints without updating the repository • Use the dbed_ckptdisplay command as follows: $ /opt/VRTS/bin/dbed_ckptdisplay -S PROD \ -H /oracle/product/10g -o all -n Checkpoint_971672042Sun May 15 13:55:53 2005C+R+IN Checkpoint_903937870Fri May 13 22:51:10 2005C+R+ON Checkpoint_901426272Wed May 11 16:17:52 2005P+R+ON
Using Storage Checkpoints and Storage Rollback Examples of Using the Command Line Interface Table 4-7 Scheduling Storage Checkpoints Notes (Continued) Usage notes Create a new crontab file or edit an existing crontab file to include a Storage Checkpoint creation entry with the following space-delimited fields: minute hour day_of_month month_of_year day_of_week \ /opt/VRTS/bin/dbed_ckptcreate where: minute - numeric values from 0-59 or * hour - numeric values from 0-23 or * day_of_month - numeric values f
Using Storage Checkpoints and Storage Rollback Examples of Using the Command Line Interface Table 4-8 Mounting Storage Checkpoints Notes (Continued) Usage notes The dbed_ckptmount command is used to mount a Storage Checkpoint into the file system namespace. Mounted Storage Checkpoints appear as any other file system on the machine and can be accessed using all normal file system based commands. Storage Checkpoints can be mounted as read-only or read-write.
Using Storage Checkpoints and Storage Rollback Examples of Using the Command Line Interface Table 4-9 Unmounting Storage Checkpoints Notes (Continued) Usage notes The dbed_ckptumount command is used to unmount a mounted Storage Checkpoint from the file system namespace. Mounted Storage Checkpoints appear as any other file system on the machine and can be accessed using all normal file system based commands. When mounted Storage Checkpoints are not required, they can be unmounted.
Using Storage Checkpoints and Storage Rollback Examples of Using the Command Line Interface $ /opt/VRTS/bin/dbed_ckptrollback -S PROD \ -H /oracle/product/10g -T DATA01 -c Checkpoint_903937870 If the Oracle database is running, you must take the tablespace offline before running this command. If the tablespace is online, the command will fail. In the case of an instant Storage Checkpoint, rolling back a tablespace does not apply.
Using Storage Checkpoints and Storage Rollback Examples of Using the Command Line Interface Manual (interactive) recovery, which requires using the -i option, of the clone database allows the user to control the degree of recovery by specifying which archive log files are to be replayed. Automatic (non-interactive) recovery, which is the default usage of the command, recovers the entire database and replays all of the archive logs. You will not be prompted for any archive log names.
Using Storage Checkpoints and Storage Rollback Examples of Using the Command Line Interface Table 4-13 dbed_clonedb Command Options (Continued) Option Description -o restartdb Mounts the Storage Checkpoint file system and starts the clone database. The -o restartdb option will not attempt to recover the clone database. -d Used with the -o umount option. If the -d option is specified, the Storage Checkpoint used to create the clone database is removed along with the clone database.
Using Storage Checkpoints and Storage Rollback Examples of Using the Command Line Interface 4. CONNECT / AS SYSDBA 5. RECOVER DATABASE UNTIL CANCEL USING BACKUP CONTROLFILE 6. enter the archive log(s) you wish to apply 7. EXIT Press after you have completed the above steps.
Using Storage Checkpoints and Storage Rollback Examples of Using the Command Line Interface • Use the dbed_clonedb command as follows: $ /opt/VRTS/bin/dbed_clonedb -S NEW9 -o restartdb Database instance NEW9 is up and running.
5 Using FlashSnap for Backup and Recovery This chapter contains the following topics: Chapter 5 • “About Veritas Database FlashSnap” on page 68 • “Planning to Use Database FlashSnap” on page 72 • “Preparing Hosts and Storage for Database FlashSnap” on page 73 • “Summary of Database Snapshot Steps” on page 83 • “Creating a Snapplan (dbed_vmchecksnap)” on page 88 • “Validating a Snapplan (dbed_vmchecksnap)” on page 95 • “Displaying, Copying, and Removing a Snapplan (dbed_vmchecksnap)” on page
Using FlashSnap for Backup and Recovery About Veritas Database FlashSnap About Veritas Database FlashSnap Veritas Database FlashSnap helps to create a point-in-time copy of a database for backup and off-host processing. Database FlashSnap allows you to make backup copies of your volumes online with minimal interruption to users.
Using FlashSnap for Backup and Recovery About Veritas Database FlashSnap • In many companies, there is a clear separation between the roles of system administrators and database administrators. Creating database snapshots typically requires superuser (root) privileges, privileges that database administrators do not usually have. • In some companies, database administrators are granted root privileges, but managing storage is typically not central to their job function or their core competency.
Using FlashSnap for Backup and Recovery About Veritas Database FlashSnap Database FlashSnap allows you to check the storage setup against requirements set forth in the snapplan. Depending on the results, the database administrator may need to modify the snapplan or the system administrator may need to adjust the storage configuration. Properly configuring storage is the only aspect of using Database FlashSnap that requires the system administrator’s participation.
Using FlashSnap for Backup and Recovery About Veritas Database FlashSnap Snapplan creation and validation is only supported on CVM master node. NOTE • dbed_vmclonedb (used on the primary or secondary host) Mounts and starts a clone database using snapshot volumes. It can also shut down a clone database and deport its volumes, as well as restart a clone database that has been shut down. The snapshot image can be brought up on the same host running the primary database or on a secondary host.
Using FlashSnap for Backup and Recovery Planning to Use Database FlashSnap Planning to Use Database FlashSnap Before using Database FlashSnap, you must first determine your intended application.
Using FlashSnap for Backup and Recovery Preparing Hosts and Storage for Database FlashSnap Preparing Hosts and Storage for Database FlashSnap This section describes the following: • “Setting Up Hosts” on page 73 • “Creating a Snapshot Mirror of a Volume or Volume Set Used by the Database” on page 74 • “Upgrading Existing Volumes to Use Veritas Volume Manager 5.
Using FlashSnap for Backup and Recovery Preparing Hosts and Storage for Database FlashSnap Figure 5-2 Example of an Off-host Database FlashSnap Solution Primary Host Secondary Host Network 1 2 Disks containing primary volum es used to hold production databases SCSI or Fibre Channel Connectivity Disks containing snapshot volumes Host and Storage Requirements Before using Database FlashSnap, ensure that: • All files are on VxFS file systems over VxVM volumes. Raw devices are not supported.
Using FlashSnap for Backup and Recovery Preparing Hosts and Storage for Database FlashSnap corrupted, you can quickly restore them from the snapshot volumes. Snapshot volumes can be used for a variety of purposes, including backup and recovery, and creating a clone database. You must create snapshot mirrors for all of the volumes used by the database datafiles before you can create a snapshot of the database. This section describes the procedure used to create snapshot mirrors of volumes.
Using FlashSnap for Backup and Recovery Preparing Hosts and Storage for Database FlashSnap Table 5-1 vxsnap Command for Snapshot Mirror Notes (Continued) Usage Notes • Create a separate disk group for Oracle database-related files. • Do not share volumes between Oracle database files and other software. • ORACLE_HOME cannot be included in the snapshot mirror. • Resynchronization speed varies based on the amount of data changed in both the primary and snapshot volumes during the break-off time.
Using FlashSnap for Backup and Recovery Preparing Hosts and Storage for Database FlashSnap # vxsnap -g diskgroup addmir volume_name alloc= diskname There is no option for creating multiple mirrors at the same time. Only one mirror can be created at a time. 5. List the available mirrors: # vxprint -g diskgroup -F%name -e"pl_v_name in \"volume_name\"" The following two steps enable database FlashSnap to locate the correct mirror plexes when creating snapshots. 6.
Using FlashSnap for Backup and Recovery Preparing Hosts and Storage for Database FlashSnap # vxprint -g PRODdg -F%name -e"pl_v_name in \"data_vol\" \ && p2 in \"dbed_flashsnap\"" data_vol-02 9.
Using FlashSnap for Backup and Recovery Preparing Hosts and Storage for Database FlashSnap # vxdg upgrade diskgroup 2. If the volume to be upgraded has a DRL plex or subdisk from an earlier version of VxVM, use the following command to remove this: # vxassist [-g diskgroup] remove log volume [nlog=n] Use the optional attribute nlog=n to specify the number, n, of logs to be removed. By default, the vxassist command removes one log. 3.
Using FlashSnap for Backup and Recovery Preparing Hosts and Storage for Database FlashSnap 1. Upgrade the disk group, PRODdg. # vxdg upgrade PRODdg 2. Remove the DRL plexes or subdisks, belonging to an earlier version of VxVM, from the volume to be upgraded. # vxassist -g PRODdg remove log data_vol logtype=drl 3. Reattach any snapshot volume back to the primary volume to be upgraded. # vxsnap -g PRODdg snapback SNAP-data_vol 4. Turn off FastResync on the volume to be upgraded.
Using FlashSnap for Backup and Recovery Preparing Hosts and Storage for Database FlashSnap # vxplex -g PRODdg -o dcoplex=data_vol_dcl-02 \convert state=SNAPDONE data_vol-04 # vxprint -g PRODdg pl data_vol-03 -DISABLED4194304-- - - sd PRODdg02-01 data_vol-03ENABLED41943040- - v fsgenENABLED4194304-ACTIVE data_vol - - pl data_vol-01 data_volENABLED4194304-ACTIVE sd PRODdg01-01 data_vol-01ENABLED41943040- pl data_vol-04 data_volENABLED4194304-SNAPDONE - sd PRODdg02-03 data_vol-04ENABLED4194
Using FlashSnap for Backup and Recovery Preparing Hosts and Storage for Database FlashSnap # vxsnap -g PRODdg addmir data_vol_dcl alloc=PRODdg02 b. Associate the data plex with the new DCO plex and convert it to a SNAPDONE state.
Using FlashSnap for Backup and Recovery Summary of Database Snapshot Steps Summary of Database Snapshot Steps You can use Database FlashSnap commands to create a snapshot of your entire database on the same host or on a different one. Three types of snapshots can be created: online, offline, or instant. If the SNAPSHOT_MODE specified in the snapplan is set to online, dbed_vmsnap first puts the tablespaces to be snapshot into backup mode.
Using FlashSnap for Backup and Recovery Summary of Database Snapshot Steps The dbed_vmchecksnap command can also be used to perform the tasks listed in Table 5-2. Table 5-2 dbed_vmchecksnap Command Options Task Command Option List all snapplans associated with a specific ORACLE_SID dbed_vmchecksnap -o list Remove the snapplan from the VxDBA repository dbed_vmchecksnap -o remove -f SNAPPLAN Copy a snapplan from the VxDBA repository to your local directory dbed_vmchecksnap -o copy -f SNAPPLAN 3.
Using FlashSnap for Backup and Recovery Summary of Database Snapshot Steps Figure 5-3 Chapter 5 Prerequisites for Creating a Snapshot of Your Database 85
Using FlashSnap for Backup and Recovery Summary of Database Snapshot Steps There are many actions you can take after creating a snapshot of your database using Database FlashSnap. You can create a clone of the database for backup and off-host processing purposes. You can resynchronize the snapshot volumes with the primary database. In the event of primary database failure, you can recover it by reverse resynchronizing the snapshot volumes.
Using FlashSnap for Backup and Recovery Summary of Database Snapshot Steps Figure 5-4 Chapter 5 Actions You Can Perform After Creating a Snapshot of Your Database 87
Using FlashSnap for Backup and Recovery Creating a Snapplan (dbed_vmchecksnap) Creating a Snapplan (dbed_vmchecksnap) The dbed_vmchecksnap command creates a snapplan that dbed_vmsnap uses to create a snapshot of an Oracle database. The snapplan specifies snapshot scenarios (such as online, offline, or instant). You can name a snapplan file whatever you choose. Each entry in the snapplan file is a line in parameter=argument format.
Using FlashSnap for Backup and Recovery Creating a Snapplan (dbed_vmchecksnap) Table 5-3 Parameter Values for dbed_vmchecksnap (Continued) Parameter SNAPSHOT_MODE Value online or offline or instant Specifies whether the database snapshot should be online, offline, or instant. • If the snapshot is created while the database is online, the dbed_vmsnap command will put the tablespaces into backup mode.
Using FlashSnap for Backup and Recovery Creating a Snapplan (dbed_vmchecksnap) Before creating a snapplan, make sure the following conditions have been met: Table 5-4 Snapplan Requirements Prerequisites Usage Notes • You must have configured the storage for Database Flashsnap.You must be the Oracle database administrator. • The disk group must be version 110 or later. For more information on disk group versions, see the vxdg(1M) manual page.
Using FlashSnap for Backup and Recovery Creating a Snapplan (dbed_vmchecksnap) • In this example, a snapplan, snap1, is created for a snapshot image in a single-host configuration and default values are set. The host is named host1 and the working directory is /export/snap_dir. $ cd /export/snap_dir $ /opt/VRTS/bin/dbed_vmchecksnap -S PROD \ -H /oracle/product/10g -f snap1 -o setdefaults -t host1 Snapplan snap1 for PROD. ===================================================== SNAPSHOT_VERSION=5.
Using FlashSnap for Backup and Recovery Creating a Snapplan (dbed_vmchecksnap) SNAPSHOT_MODE=online SNAPSHOT_PLAN_FOR=database SNAPSHOT_PLEX_TAG=dbed_flashsnap SNAPSHOT_VOL_PREFIX=SNAP_ ALLOW_REVERSE_RESYNC=no SNAPSHOT_MIRROR=1 By default, a snapplan’s SNAPSHOT_PLEX_TAG value is set as dbed_flashsnap. You can use the -p option to assign a different tag name. Make use of the -p option when creating the snapplan with the setdefaults option.
Using FlashSnap for Backup and Recovery Creating a Snapplan (dbed_vmchecksnap) NOTE Before taking the snapshot, make sure all tagged snapshot mirrors are in snapdone state. The following sample explains the setup and the procedure for taking multi-mirror snapshots. To set up and take multi-mirror snapshots 1. Add the second mirror and DCO log. When allocating storage for the second mirror and DCO logs, make sure the snap volumes are splittable.
Using FlashSnap for Backup and Recovery Creating a Snapplan (dbed_vmchecksnap) alter system set log_archive_dest_1 = 'LOCATION=/ora_mnt/oracle/oradata/PROD/archivelogs MANDATORY [REOPEN]’ [scope=both]; For more information about Oracle parameters for archiving redo logs, see your Oracle documentation.
Using FlashSnap for Backup and Recovery Validating a Snapplan (dbed_vmchecksnap) Validating a Snapplan (dbed_vmchecksnap) After creating a snapplan, the next steps are to validate the snapplan parameters and check whether the snapshot volumes have been configured correctly for creating snapshots. If validation is successful, the snapplan is copied to the repository. The snapplan is validated using the dbed_vmchecksnap command with the -o validate option.
Using FlashSnap for Backup and Recovery Validating a Snapplan (dbed_vmchecksnap) $ cd /export/snap_dir $ /opt/VRTS/bin/dbed_vmchecksnap -S PROD -H /oracle/product/10g \ -f snap1 -o validate PRIMARY_HOST is host1 SECONDARY_HOST is host1 The version of PRIMARY_DG-PRODdg is 110. The primary diskgroup PRODdg is a shared disk group SNAPSHOT_DG is SNAP_PRODdg SNAPSHOT_MODE is online The database is running in archivelog mode.
Using FlashSnap for Backup and Recovery Displaying, Copying, and Removing a Snapplan (dbed_vmchecksnap) Displaying, Copying, and Removing a Snapplan (dbed_vmchecksnap) Consider these notes before listing all snapplans for a specific Oracle database, displaying a snapplan file, or copying and removing snapplans. Table 5-6 Check Snapplan Notes Usage Notes • If the local snapplan is updated or modified, you must revalidate it.
Using FlashSnap for Backup and Recovery Displaying, Copying, and Removing a Snapplan (dbed_vmchecksnap) PRIMARY_HOST=host1 SECONDARY_HOST=host1 PRIMARY_DG=PRODdg SNAPSHOT_DG=SNAP_PRODdg ORACLE_SID=PROD ARCHIVELOG_DEST=/prod_ar SNAPSHOT_ARCHIVE_LOG=yes SNAPSHOT_MODE=online SNAPSHOT_PLAN_FOR=database SNAPSHOT_PLEX_TAG=dbed_flashsnap SNAPSHOT_VOL_PREFIX=SNAP_ ALLOW_REVERSE_RESYNC=no SNAPSHOT_MIRROR=1 STORAGE_INFO PRODdg02 SNAP_PLEX=prod_ar-02 STATUS_INFO SNAP_STATUS=init_full DB_STATUS=init Copying a Snapplan
Using FlashSnap for Backup and Recovery Displaying, Copying, and Removing a Snapplan (dbed_vmchecksnap) To remove a snapplan from the VxDBA repository • Use the dbed_vmchecksnap command as follows: $ /opt/VRTS/bin/dbed_vmchecksnap -S ORACLE_SID -f\ SNAPPLAN -o remove In the following example, the snapplan, snap1, is removed from the VxDBA repository. $ /opt/VRTS/bin/dbed_vmchecksnap -S PROD -f snap1 -o remove The snapplan snap1 has been removed.
Using FlashSnap for Backup and Recovery Creating a Snapshot (dbed_vmsnap) Creating a Snapshot (dbed_vmsnap) The dbed_vmsnap command creates a snapshot of an Oracle database by splitting the mirror volumes used by the database into a snapshot database. You can use the snapshot image on either the same host as the database or on a secondary host provided storage is shared by the two hosts. The snapshot image created by dbed_vmsnap is a frozen image of an Oracle database’s datafiles.
Using FlashSnap for Backup and Recovery Creating a Snapshot (dbed_vmsnap) $ /opt/VRTS/bin/dbed_vmsnap -S ORACLE_SID -f SNAPPLAN \ -o snapshot [-F] NOTE To force snapshot creation, use the -F option. The -F option can be used after a snapshot operation has failed and the problem was fixed without using Veritas Storage Foundation for Oracle commands. (That is, the volumes were synchronized without using Veritas Storage Foundation for Oracle commands.
Using FlashSnap for Backup and Recovery Creating a Snapshot (dbed_vmsnap) $ /opt/VRTS/bin/dbed_vmsnap -S PROD -f snap2 -o snapshot dbed_vmsnap started at 2005-03-02 23:01:10 VxDBA repository is up to date. The database is running in archivelog mode. A snapshot of ORACLE_SID PROD is in DG SNAP_PRODdg. Snapplan snap2 is used for the snapshot. VxDBA repository volume is SNAP_arch. If -r is used in dbed_vmclonedb, make sure is created and owned by Oracle DBA.
Using FlashSnap for Backup and Recovery Backing Up the Database from Snapshot Volumes (dbed_vmclonedb) Backing Up the Database from Snapshot Volumes (dbed_vmclonedb) Snapshots are most commonly used as a source for backing up a database. The advantage of using snapshot volumes is that the backup will not contest the I/O bandwidth of the physical devices.
Using FlashSnap for Backup and Recovery Backing Up the Database from Snapshot Volumes (dbed_vmclonedb) Figure 5-6 Example System Configuration for Database Backup on a Secondary Host Network Primary host for dat abase Secondary host Local di sks Local disks Control lers c1 c2 c3 Cont rollers c4 Vol umes created on these disks are accessed by the primary host c1 Disk Arrays c2 c3 c4 Snapshot volumes created on t hese disks are accessed by both hosts Back up to disk, t ape or other medi a by
Using FlashSnap for Backup and Recovery Backing Up the Database from Snapshot Volumes (dbed_vmclonedb) Table 5-8 Backup Snapshot Notes (Continued) Usage Notes NOTE • The dbed_vmclonedb command can be used on the secondary host. • In a single-host configuration, the primary and secondary hosts are the same. • In a single-host configuration, -r relocate_path is required. • In a two-host configuration, the vxdbavol=vol_name option is required.
Using FlashSnap for Backup and Recovery Backing Up the Database from Snapshot Volumes (dbed_vmclonedb) Note the following limitations: • Any mounted Storage Checkpoints must be unmounted before running the following commands: $ /opt/VRTS/bin/dbed_vmclonedb -o umount,new_sid=new_sid \ -f SNAPPLAN • It is only possible to mount a Storage Checkpoint carried over with the snapshot volumes in a two-host configuration if the snapshot volumes were mounted with the dbed_vmclonedb command with the -o mount option
Using FlashSnap for Backup and Recovery Cloning a Database (dbed_vmclonedb) Cloning a Database (dbed_vmclonedb) Veritas Storage Foundation lets you create a clone database using snapshot volumes. You can use snapshots of a primary database to create a clone of the database at a given point in time.
Using FlashSnap for Backup and Recovery Cloning a Database (dbed_vmclonedb) Table 5-9 Recover Database Notes Prerequisites Usage Notes • You must be logged in as the Oracle database administrator. • Before you can use the dbed_vmclonedb command, you must validate a snapplan and create a snapshot. The volume snapshot must contain the entire database. • The system administrator must provide the database administrator with access to the necessary volumes and mount points.
Using FlashSnap for Backup and Recovery Cloning a Database (dbed_vmclonedb) $ /opt/VRTS/bin/dbed_vmclonedb -o update_status,\ new_sid=new_sid,server_name=server_name -f SNAPPLAN \ [-r relocate_path] Example: Mounting the file systems without bringing up the clone database 1. In this example, file systems are mounted without bringing up the clone database. The clone database must be manually created and recovered before it can be used.
Using FlashSnap for Backup and Recovery Cloning a Database (dbed_vmclonedb) dbed_vmclonedb started at 2006-03-09 23:26:50 Mounting /clone/arch on /dev/vx/dsk/SNAP_PRODdg/SNAP_arch. Mounting /clone/prod_db on /dev/vx/dsk/SNAP_PRODdg/SNAP_prod_db. All redo-log files found. Altering instance_name paramter in initpune.ora. Altering instance_number paramter in initpune.ora. Altering thread paramter in initpune.ora. Starting automatic database recovery. Database NEWPROD (SID=NEWPROD) is in recovery mode.
Using FlashSnap for Backup and Recovery Cloning a Database (dbed_vmclonedb) Table 5-10 dbed_vmclonedb command options (Continued) relocate_path NOTE Represents the name of the initial mount point for the snapshot image. When cloning a database on a secondary host, ensure that PRIMARY_HOST and SECONDARY_HOST parameters in the snapplan file are different. When the -o recoverdb option is used with dbed_vmclonedb, the clone database is recovered automatically using all available archive logs.
Using FlashSnap for Backup and Recovery Cloning a Database (dbed_vmclonedb) dbed_vmclonedb ended at 2006-03-09 23:04:50 Shutting Down the Clone Database and Unmounting File Systems When you are done using the clone database, you can shut it down and unmount all snapshot file systems with the dbed_vmclonedb -o umount command. If the clone database is used on a secondary host that has shared disks with the primary host, the -o umount option also deports the snapshot disk group.
Using FlashSnap for Backup and Recovery Cloning a Database (dbed_vmclonedb) In this example, the clone database is re-started. $ /opt/VRTS/bin/dbed_vmclonedb -S PROD -g SNAP_PRODdg \ -o restartdb,new_sid=NEWPROD,server_name=host1\ -f snap1 -r /clone dbed_vmclonedb started at 2006-03-02 15:14:49 Mounting /clone/prod_db on /dev/vx/dsk/SNAP_PRODdg/SNAP_prod_db. Mounting /clone/prod_ar on /dev/vx/dsk/SNAP_PRODdg/SNAP_prod_ar. Oracle instance NEWPROD successfully started.
Using FlashSnap for Backup and Recovery Cloning a Database (dbed_vmclonedb) SIZE 4194304 REUSE AUTOEXTEND ON NEXT 1048576 MAXSIZE 33554432 ; ALTER TABLESPACE TEMP ADD TEMPFILE '/clone_path/temp02.dbf' REUSE; ALTER DATABASE TEMPFILE '/clone_path2/temp02.dbf' OFFLINE; 4. Evaluate whether you need to recreate any temp files. If you want to recreate tempfiles, proceed to the next step. 5. In the add_tf.$ORACLE_SID.
Using FlashSnap for Backup and Recovery Resynchronizing the Snapshot to Your Database Resynchronizing the Snapshot to Your Database When you have finished using a clone database or want to refresh it, you can resynchronize it with the original database. This is also known as refreshing the snapshot volume or merging the split snapshot image back to the current database image. After resynchronizing, the snapshot can be retaken for backup or decision-support purposes.
Using FlashSnap for Backup and Recovery Removing a Snapshot Volume Removing a Snapshot Volume If a snapshot volume is no longer needed, you can remove it and free up the disk space for other uses by using the vxedit rm command. Table 5-12 Remove Snapshot Notes Prerequisites • You must be logged in as superuser. • If the volume is on a mounted file system, you must unmount it before removing the volume. To remove a snapplan and snapshot volume 1.
6 Investigating I/O Performance for SG Oracle RAC: Storage Mapping This chapter contains the following topics: Chapter 6 • “About Storage Mapping in SG Oracle RAC” on page 118 • “Understanding Storage Mapping” on page 119 • “Verifying Veritas Storage Mapping Setup” on page 120 • “Using vxstorage_stats” on page 121 • “Displaying I/O Statistics Information” on page 123 • “Using dbed_analyzer” on page 125 • “Oracle File Mapping (ORAMAP)” on page 128 117
Investigating I/O Performance for SG Oracle RAC: Storage Mapping About Storage Mapping in SG Oracle RAC About Storage Mapping in SG Oracle RAC The storage mapping feature available with SG Oracle RAC enables you to map datafiles to physical devices. You can obtain and view detailed storage topology information using the vxstorage_stats and dbed_analyzer commands. You can also use the Oracle Enterprise Manager to access storage mapping information.
Investigating I/O Performance for SG Oracle RAC: Storage Mapping Understanding Storage Mapping Understanding Storage Mapping Access to mapping information is important since it allows for a detailed understanding of the storage hierarchy in which files reside, information that is critical for effectively evaluating I/O performance. Mapping files to their underlying device is straightforward when datafiles are created directly on a raw device.
Investigating I/O Performance for SG Oracle RAC: Storage Mapping Verifying Veritas Storage Mapping Setup Verifying Veritas Storage Mapping Setup Before using the Veritas Storage Mapping option, verify that the features are set up correctly: To verify that your system is using the Veritas Storage Mapping option 1. Verify that you have a license key for the storage mapping option. # /opt/VRTS/bin/vxlictest -n "VERITAS Mapping Services" -f \ "Found_Edi_map" Found_Edi_map feature is licensed 2.
Investigating I/O Performance for SG Oracle RAC: Storage Mapping Using vxstorage_stats Using vxstorage_stats The vxstorage_stats command displays detailed storage mapping information and I/O statistics about one or more VxFS files. The mapping information and I/O statistics are recorded only for VxFS files and VxVM volumes. In vxstorage_stats command output, I/O topology information appears first followed by summary statistics for each object.
Investigating I/O Performance for SG Oracle RAC: Storage Mapping Using vxstorage_stats sdc3t1d32MIRROR176774400 daEMC000184502242:02:0c:020DISK1431130190 daEMC000184502242:31:0c:020DISK1431130190 rd/dev/vx/rdmp/c3t1d15s41PARTITION55930880 sd/dev/rdsk/c3t1d15s41PARTITION176697605760 sdc3t1d152MIRROR176774400 daEMC000184502242:01:0c:020DISK1431130190 NOTE 122 For file type (fi), the SIZE column is number of bytes; for volume (v), plex (pl), sub-disk (sd), and physical disk (da), the SIZE column is in 512-by
Investigating I/O Performance for SG Oracle RAC: Storage Mapping Displaying I/O Statistics Information Displaying I/O Statistics Information To display I/O statistics information • Use the vxstorage_stats command with the -s option to display I/O statistics information: $ /opt/VRTSdbed/bin/vxstorage_stats -s -f file_name For example: $ /opt/VRTSdbed/bin/vxstorage_stats -s -f \ /data/system01.
Investigating I/O Performance for SG Oracle RAC: Storage Mapping Displaying I/O Statistics Information EMC000184502242:31:0c:01112308174752-/dev/rhdisk4147058249735263397406.01250.18 EMC000184502242:02:0c:01573332049897-EMC000184502242:31:0c:01112308174752-/dev/rhdisk14389562649167229549111.49279.42 EMC000184502242:01:0d:010000-EMC000184502242:32:0d:01113368190456-/dev/rhdisk424407484011957611669613.12287.
Investigating I/O Performance for SG Oracle RAC: Storage Mapping Using dbed_analyzer Using dbed_analyzer Effectively performing a parallel backup requires an understanding of which tablespaces reside on which disks. If two tablespaces reside on the same disk, for example, backing them up in parallel will not reduce their downtime. The dbed_analyzer command provides tablespace-to-physical disk mapping information for all the datafiles in a specified tablespace, list of tablespaces, or an entire database.
Investigating I/O Performance for SG Oracle RAC: Storage Mapping Using dbed_analyzer SYSAUX/usr1/oracle/rw/DATA/sysaux.
Investigating I/O Performance for SG Oracle RAC: Storage Mapping Using dbed_analyzer c3t21000020379DBD5Fd0ROLL_1/usr1/oracle/rw/DATA/roll_1_5000 1021968 c3t21000020379DBD5Fd0ROLL_2/usr1/oracle/rw/DATA/roll_2_6000 1021968 c3t21000020379DBD5Fd0ORDERS/usr1/oracle/rw/DATA/orders_4000 1021968 c3t21000020379DBD5Fd0ORD_IDX/usr1/oracle/rw/DATA/ord_idx_10000 1021968 c3t21000020379DBD5Fd0QTY_IDX/usr1/oracle/rw/DATA/qty_idx_7001 1024016 c3t21000020379DBD5Fd0ITM_IDX/usr1/oracle/rw/DATA/itm_idx_2001 1024016 c3t210000203
Investigating I/O Performance for SG Oracle RAC: Storage Mapping Oracle File Mapping (ORAMAP) Oracle File Mapping (ORAMAP) Veritas has defined and implemented two libraries: For HP-UX IA: libvxoramap_64.so For HP-UX PA: libvxoramap_64.sl These two libraries provide a mapping interface to Oracle 10g release 2 or a later release.
Investigating I/O Performance for SG Oracle RAC: Storage Mapping Oracle File Mapping (ORAMAP) • Element components A mapping element component is a mapping structure that describes a storage component within the I/O stack. Elements can be mirrors, stripes, partitions, RAID5, concatenated elements, and disks. This component contains information about the element’s mapping structure, such as the element’s size, type, number of subelements, and a brief description.
Investigating I/O Performance for SG Oracle RAC: Storage Mapping Oracle File Mapping (ORAMAP) 1. Verify $ORACLE_HOME is ready for Oracle file mapping (ORAMAP): # cd $ORACLE_HOME/rdbms/filemap/bin # ls -l -r-xr-x--- 1 root system 900616 Apr 08 19:16 fmputl -r-sr-xr-x 1 root system 14614 Apr 08 19:16 fmputlhp 2. Confirm the following items and make the appropriate corrections: • root owns fmputlhp and the setud bit is set. • The permissions for fmputlhp are -r-sr-xr-x.
Investigating I/O Performance for SG Oracle RAC: Storage Mapping Oracle File Mapping (ORAMAP) For more information about various features and capabilities of the DBMS_STORAGE_MAP package, see your Oracle documentation. 3. Use SQL commands to display the mapping information that is captured in Oracle’s dynamic performance views.
Investigating I/O Performance for SG Oracle RAC: Storage Mapping Oracle File Mapping (ORAMAP) From Oracle Enterprise Manager, you can view storage mapping information and a graphical display of the storage layout. Storage mapping information cannot be viewed with the Oracle 10g version of the Oracle Enterprise Manager client. However, the Oracle9i version of Oracle Enterprise Manager can be used with Oracle 10g to view storage mapping information.
Investigating I/O Performance for SG Oracle RAC: Storage Mapping Oracle File Mapping (ORAMAP) If you want to use storage array information accessible through the VAIL providers, install VAIL and perform any required configuration for the storage arrays and VAIL providers. To use deep mapping services and performance statistics for supported storage arrays, you must install both VAIL and Veritas Mapping Services (VxMS).
Investigating I/O Performance for SG Oracle RAC: Storage Mapping Oracle File Mapping (ORAMAP) 134 Chapter 6
A Troubleshooting SG Oracle RAC This appendix contains the following topics: Appendix A • “About Troubleshooting SG Oracle RAC” on page 136 • “Troubleshooting Tips” on page 137 • “Troubleshooting Oracle” on page 138 • “Troubleshooting SG Oracle RAC Checkpoint” on page 140 135
Troubleshooting SG Oracle RAC About Troubleshooting SG Oracle RAC About Troubleshooting SG Oracle RAC Review the troubleshooting options, known problems, and their solutions. Running Script for Engineering Support Analysis You can use a script to gather information about the configuration and status of your cluster and its various modules. The script will also identify package information, debugging messages, console messages, and information about disk groups and volumes.
Troubleshooting SG Oracle RAC Troubleshooting Tips Troubleshooting Tips Review the information on the error logs that you must access. • To check the Oracle installation error log, you must access: $ORACLE_BASE/oraInventory/logs/installActionsdate_time.log This file contains errors that occurred during installation. It clarifies the nature of the error and at exactly which point it occurred during the installation.
Troubleshooting SG Oracle RAC Troubleshooting Oracle Troubleshooting Oracle For help resolving issues with Oracle components, check the following information: • Oracle log files • Oracle notes Oracle Log Files Review the information on the files that you must access.
Troubleshooting SG Oracle RAC Troubleshooting Oracle Oracle Notes Review the following Oracle notes: Table A-2 Oracle Notes 259301.1 CRS and 10g Real Application Clusters 280589.1 How to install Oracle 10g CRS on a cluster where one or more nodes are not to be configured to run CRS. 265769.1 10g RAC: Troubleshooting CRS Reboots 279793.1 How to Restore a Lost Vote Disk in 10g 239998.
Troubleshooting SG Oracle RAC Troubleshooting SG Oracle RAC Checkpoint Troubleshooting SG Oracle RAC Checkpoint Headings indicate likely symptoms or procedures required for a solution.