
HP Storage Essentials V5.1 User Guide Second Edition (Linux Release) (T4283-96056, November 2006)


Running Reports502
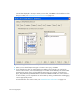
If Report Designer is running on the same computer as the management server, you can use
localhost for the DNS name, as shown in the following example:
jdbc:oracle:thin:@localhost:1521:APPIQ
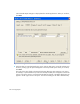
e. Type the following in the User Name field: Report_User
This is the user name that is used to access the schema view in the management server
database. This user has read privileges only for the schema views.
f. Type the following in the Password field: appiq
9. Click OK.
Report Designer searches for JDBC driver.
You may have entered incorrect path information if Report Designer cannot find the JDBC
drivers.
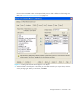
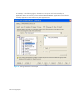
10.Select APPIQ_SYSTEM under the schemas section.
The Tables pane becomes populated. These are all the tables you can use to create the reports.
It is best to select as many tables as possible rather than too few. If you are not too sure as to
which tables you may be using, you may want to select them all.
11.Select the tables and then click Add. Click the Done button when you have finished adding
tables.
The tables populate the Catalog Browser window.
12.Click File > Save Catalog to save the catalog.
Designing Custom Reports
IMPORTANT: This section assumes you have already installed and configured Report Designer and
integrated it with the management server.
These steps assume you are running Report Designer 6.0, and you have the online help for Report
Designer installed. The instructions provide general information about using Report Designer. For
additional information, refer to the online help for Report Designer. The management server only
supports Report Designer running on Microsoft Windows.
NOTE: You cannot create custom reports for NetApp filers.
Creating Standard Reports
The following steps are for Microsoft Windows and for Report Designer 6.0:
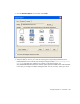
1. Open Report Designer.
2. If the Choose Report screen does not appear, select File > New in Report Designer.