
HP Storage Essentials V5.1 User Guide Second Edition (Linux Release) (T4283-96056, November 2006)


Finding an Element’s Storage Capacity584
Printing Elements in Capacity Manager
The software lets you print the topology in Capacity Manager. For example, you can provide a
printout to upper management that shows not only the topology of the network, but also the
capacity of each element.
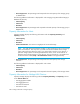
To print the elements in Capacity Manager:
1. Access Capacity Manager as described in ”Accessing Capacity Manager” on page 575.
2. If the topology spans more than one screen, arrange the elements so they are closer together,
preferably on one screen. To move an element, click the button and then the element you want
to move. Drag the element to its new location. Moving elements closer together prevents the
printout from appearing too stretched.
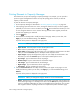
3. Click the button.
4. Use the fields on the Paper tab to modify the setup of the page. When you are done, click
Apply. If you want the default settings, click Default.
A preview of the printout is displayed in the right pane.
IMPORTANT: Before you change the margins, decide on a unit of measurement.
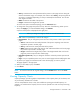
• Paper format - Select the paper size from the drop-down menu.
• Unit - Select cm (centimeters) or inch for the margins.
• Paper width - Displays the width of the paper. You can modify the measurement in this field
when you select the Custom option in the Paper format drop-down menu.
• Paper height - Displays the height of the paper. You can modify the measurement in this
field when you select the Custom option in the Paper format drop-down menu.
• Top margin - Type a measurement for the top margin.
• Bottom margin - Type a measurement for the bottom margin.
• Left margin - Type a measurement for the left margin.
• Right margin - Type a measurement for the right margin.
• Orientation - Click an orientation for the printout.
5. Click the View Selection tab to modify how the printout will appear on the page. You can
modify the following. When you are done, click Apply. If you want the default settings, click
Default.
A preview of the printout is displayed in the right pane.
IMPORTANT: Before you change the margins, decide on a unit of measurement.
• Start x - Determines the horizontal placement of the printout on the page with zero being the
closest to the right margin. For example, if the value is 50 for Start x, the printing starts at 50
inches or centimeters (depending on what you selected) from the right margin. You can also
enter negative numbers. Anything more than zero expands the printout to another page.