
HP Storage Essentials V5.00.01 user guide (T4283-96012, January 2006)


Viewing Element Topology and Properties268
Keeping the Remote Console Active
NOTE: This section is for only management servers running on Microsoft Windows.
Keep in mind the following:
• The remote console become inactive when the custom command finishes its execution. To use the
menus and buttons in the remote console, the remote console must be kept active.
• If you leave the Remote Console (cmd /k) open after running a script, users can traverse the
directory structure of the management server.
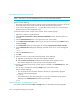
To keep the remote console window active, create a remote command prompt:
1. Right-click an element in System Manager.
2. Select Custom Commands > Set Up Custom Commands from the drop-down menu. HP
comment.
3. Click the Add Command button in the upper-right corner of the window.
4. In the Add Custom Command window, type a name for the command in the Name field, for
example, prompt.
5. In the Description field, type a description, for example, Accesses the remote console.
6. In the Command Line field type the following command, which will run on the management
server:
cmd /k
7. Select the All elements option.
8. Click OK.
9. When you want to run the remote command prompt, do the following:
a. Right-click an element from which you want to obtain information.
b. Select Custom Commands and select the command from the drop-down menu.
The software displays the remote console on the management server.
10.To enter a command in the remote console, type the command in the Commands field. Then,
press ENTER.
You can stop a command by clicking the Stop button in the remote console.
Keep in mind the following:
• You can quickly access information about the element you right-clicked by typing the
following at the command prompt:
set appiq
• The software ships with a utility called plink. To view the commands for plink, type the
following in the Commands field and then press ENTER:
plink
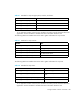
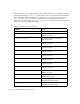
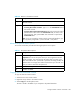
About the Buttons on the Remote Console
The remote console provides the Stop and Help buttons, as described in the following table.