
HP StorageWorks Storage Mirroring for Virtual Infrastructure user's guide (T2558-96086, February 2008)


20
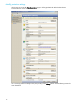
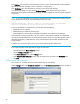
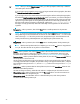
In the Recipients area, enter the e-mail address(es) to which you want to send the automatic e-mail notifications.
Separate the addresses with either a comma, semicolon, or carriage return.
In the
Notifications area, select the events for which you want to send e-mail messages.
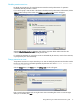
To verify that your settings are valid, click the
Test E-mail Settings button. Storage Mirroring for Virtual
Infrastructure will verify that e-mail notifications can be sent to the recipients you entered using the configured
e-mail server.
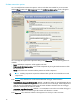
NOTE: If you receive the following error message after testing the e-mail notification, the antivirus software
on your Storage Mirroring server may be blocking the outbound e-mails.
“Failure sending mail. Unable to connect to the remote server. An established
connection was aborted by the software in your host machine.”
In order to use automatic e-mail notification, you may need to do the following:
• Disable the anti-virus software
• Disable blocking of outbound e-mail messages
• Exclude
DtEsxSvc.exe from the processes that are blocked to send outbound e-mail messages
Also consider that in many organizations, anti-virus software is administered centrally by an IT department,
who may periodically send the policy to override machine-specific settings. You may need request that your IT
department set the policy so that
DtEsxSvc.exe is excluded from the processes that are blocked to send
e-mail messages.
In addition, you may need to open port 25 in your antivirus software to allow SMTP e-mail.
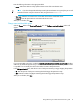
If you choose to disable e-mail notification for this job at a later time:
1. Select the job from the
Monitor Protection window.
2. Click the
Configure Protection button.
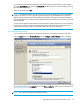
3. In the
E-mail notifications area, click the Change button.
4. In the
Configure e-mail notifications window, clear the checkboxes for all events in the Notifications area.
5. Click
Save.
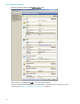
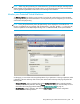
Change VirtualCenter credentials
You can enter new credentials to be used when authenticating with VirtualCenter.
Click the
Change button in the VirtualCenter credentials area. The Set VirtualCenter credentials window will appear.