
HP StorageWorks Storage Mirroring for Virtual Infrastructure user's guide (T2558-96086, February 2008)


Storage Mirroring for Virtual Infrastructure user’s guide 25
Understanding failover and job reversal
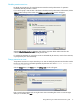
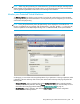
When you select the Failover button, the following dialog box appears where you can select failover options:
•
Live failover—Select this option to perform a failover with network connectivity.
•
Test failover—Select this option to perform a test failover in which the source is not actually shut down.
•
Complete the current replication cycle before failover—Select this option to let the current replication cycle
complete before failing over. If the job is not in the “Stopped” state, the failover will begin after the ongoing
synchronization or replication cycle is complete.
NOTE: If the job is in “Stopped” or “Error” state, this option is not applicable. Failover will begin
immediately.
• Failover immediately—Select this option to begin the failover process immediately.
Failover and reversal scenarios
The following are representative scenarios where you might need to perform a failover or reversal:
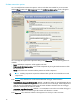
Failover after a problem is encountered on the source
1. Click the Failover button.
2. Choose the
Live failover option. This will allow the clients to use the target until the source is repaired. At this
point, you can either:
• Use the target replica as a permanent production server by deleting the protection job, then selecting
the
Keep the associated replica virtual machine option. For more information, see “Monitor your Protected
Virtual Machines” on page 23.
• Move the latest data back to the source. To do this, complete steps 3-7.
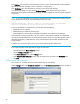
3. Click the
Reverse protection button. When you are prompted to confirm, click Yes.
4. Wait for the original source to be synchronized with changes from the target.
5. Click the
Failover button.
6. Choose the
Live failover option.
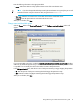
7. Click the
Reverse protection button. When you are prompted to confirm, click Yes.
At this point, the job will be back in its original configuration.