
HP StorageWorks Storage Mirroring user's guide (T2558-96073, February 2008)


8 - 2
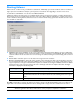
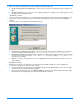
6. Choose to create a new replication set or use a replication set that already exists.
Create a new replication set with this name—If you choose to create a new replication, specify a replication set
name.
Use this replication set—If you choose to use an existing replication set, specify the name of that replication set by
selecting it from the pull-down menu.
Click
Next to continue.
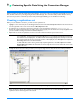
7. If you are creating a new replication set, a tree display appears identifying the volumes and directories available on your
selected source server. Mark the check box of the volumes and/or directories you want to protect. Click
Next to
continue.
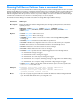
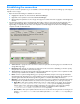
8. Select the location on the target where the data will be stored.
Send all data to a single path on the target—This option sends all selected volumes and directories to the same
location on the target. The default location is
\source_name\replication_set_name\volume_letter.
Send all data to the same path on the target—This option sends all selected volumes and directories to the same
directories on the target. For example,
c:\data and d:\files on the source will go to c:\data and d:\files,
respectively, on the target.
Custom—To select a custom path, click once in the Target Path field and modify the drive and directory to the
desired location.
Click
Next to continue.
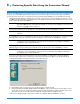
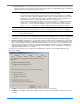
9. Review your selections on the summary screen. If your Connection Wizard settings are correct, establish your
connection by completing one of the two options below:
If you do not want to set advanced options, click Finish. The Connection Wizard will close, the connection will be
established, and mirroring and replication will begin.
If you want to set advanced options, click Advanced Options. The Connection Wizard will close and the Storage
Mirroring Connection Manager will open. The
Servers tab will be completed.