
HP StorageWorks Replacing an HSG60 and HSG80 Cache Module Installation Instructions (EK-80CAH-IM. F01, March 2005)


Page 4
Note: If the controller did not restart, use the following steps:
1. Press and hold the Reset button.
2. Reseat the controller program card.
3. Release the Reset button.
6. From the CLI prompt, display details about the
configured controller by entering the following
command:
SHOW THIS_CONTROLLER FULL
7. Set the date and time by entering the following
command:
SET THIS_CONTROLLER TIME=
dd-mm-yyyy:hh:mm:ss
8. Mount the logical units on the host.
9. If using a Windows 2000 or Windows NT, restart the
server.
10. Disconnect the PC or terminal from the controller
maintenance port.
Replacing an HSG60 and HSG80 cache
module in dual-redundant controller
configurations
Perform the steps in the following subsections to replace
HSG60 and HSG80 cache modules in a dual-redundant
controller configuration.
Caution: Static electricity can easily damage a cache
module or a DIMM. Wear a snug-fitting, grounded ESD
wrist strap.
To differentiate on which component activity is being
completed, symbols are displayed in the margin of text for
your convenience. Table 1 describes those symbols.
Note: When replacing DIMMs, see Figure 3 on page 3.
Removing a cache module
Perform the following steps to remove an HSG60 and HSG80
cache module in a dual-redundant configuration:
1. For the controller associated with the cache module to
be replaced, complete the following substeps:
a. Connect a PC or terminal to the maintenance
port.
b. Run the Virtual Terminal Display (VTDPY)
utility by entering the following command:
RUN VTDPY
c. Record which units have I/O activity.
d. Exit VTPY by pressing Ctrl+Y.
Note: In Transparent Failover mode, units that failed over due to a
RESTART command revert back to preferred controller after about
1 minute. The next step may not show that the units have failed over.
e. Restart the controller by entering the following
command:
RESTART THIS_CONTROLLER
f. Disconnect the PC or terminal from the
maintenance port of the controller having its
cache module replaced.
2. For the operational controller, complete the following
substeps:
a. Connect the PC or terminal to the maintenance
port of the operational controller.
Note: The controller connected to the PC or terminal becomes “this
controller.” The controller for the cache module being removed
becomes the “other controller.”
b. Display and note the configuration information
(for example, the Failover mode, cache mode,
serial numbers, SCSI mode, and so forth) for the
operational controller by entering the following
command:
SHOW THIS_CONTROLLER
c. Disable failover and take the controllers out of
the dual-redundant configuration by entering the
following command:
SET NOFAILOVER
d. Start the FRUTIL by entering the following
command:
RUN FRUTIL
FRUTIL automatically asks you if you want to
replace the controller cache battery.
e. Enter N(o).
f. Enter 1 for the Replace or remove a controller
or cache module option.
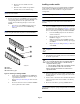
Table 1: Replacement Procedure Symbols
Symbol Description
Indicates that the procedural step must be
completed for the
operational
cache
module, which is
not
being replaced.
Indicates that the procedural step must be
completed for the
cache module that has
failed or is to be replaced
.
H
Indicates that the procedural step must be
completed for the
field replaceable unit
(FRU) or new or replacement cache module
being installed
.