
HP StorageWorks Command Console V2.5 User Guide (AA-RV1UA-TE, March 2005)


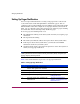
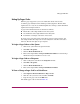


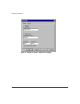
Table Of Contents
- Contents
- About this Guide
- About SWCC
- Using Command Console
- Setting Up Notification
- Required Components for Notification
- Setting Up Pager Notification
- Using SWCC with a Third-Party Storage Management Program
- Using Event Logging on the Client System to Monitor Your Subsystem
- Interpreting Agent Email Messages
- About Event Information Fields
- Mapping State Change Digits to RAID System Components
- Table 11: State Change Digit Position and Corresponding RAID system Component
- The First Digit of the State Change Field (Overall RAID System)
- The Second Digit of the State Change Field (Disks)
- The Third Digit of the State Change Field (Power Supply)
- The Fourth Digit of the State Change Field (Fans)
- The Fifth Digit of the State Change Field (Battery)
- The Sixth Digit of the State Change Field (Temperature)
- The Seventh Digit of the State Change Field (This_Controller)
- The Eighth Digit of the State Change Field (Communications LUN)
- The Ninth Digit of the State Change Field (Other_Controller)
- The 10th Digit of the State Change Field (External Factors)
- The 11th Digit of the State Change Field (Logical Units)
- Using the Storage Window
- Why Use the Storage Window?
- Configuring a Controller
- Creating Virtual Disks
- Deleting Virtual Disks
- Modifying Virtual Disks
- Configuring the Operating System to Recognize Virtual Disk Changes
- Setting Passwords and Security Options (Network Only)
- Managing and Creating Spare Devices
- Using Configuration Files
- Understanding the Icons
- CLI Window
- Integrating SWCC with Insight Manager
- Troubleshooting
- Troubleshooting Connection Problems
- Invalid Network Port Numbers During Installation
- Network Port Assignments for UNIX-Client/Server Systems
- DHCP and WINS
- Connecting Via the Host SCSI Port
- “Access Denied” Message
- Adding New System by Using Internet Protocol Address May Cause Client to Stop Responding
- “No Agent Running” Message When Adding System to the Navigation Tree
- Troubleshooting the Client
- Authorization Error When Adding an Agent System
- Cannot Open Storage Window
- Client Hangs When LUN Is Deleted
- CLI RUN Commands
- Event Notification for Subsystems Connected to a Client System
- Invalid or Missing Fault Displays and Event Logs
- Pager Notification Continues After Exiting the Command Console Client
- Reconfiguration After Controller Replacement
- Some Graphics Do Not Scale Well with Large Fonts
- Starting Client from the Command Prompt
- Warning Message Windows
- Virtual Disk Recovery from a Configuration File
- Troubleshooting the HS-Series Agents
- Cluster Integration for the HS-Series Agents
- Troubleshooting Connection Problems
- Using the Command Console LUN
- Interpreting SNMP Traps
- Glossary
- Index

Setting Up Notification
47Command Console V2.5 User Guide
Setting Up Pager Codes
Numeric pager support lets you receive notification about critical events.
A numeric pager usually has three fields separated by hyphens. The first field
signifies the area code, the second field signifies the exchange, and the third field
signifies the four-digit extension.
A page from Command Console is structured as follows:
■ First field is a three-digit number for the host system.
■ Second field is a three-digit number for the subsystem.
■ Last field is a four-digit code for the critical event.
To set up pager codes, first assign a three-digit code for each host system, and
then assign another three-digit code for each subsystem controller connected to
that host. The last four digits are pre-assigned.
To Assign a Pager Code to a Host System:
1. Click a host system in the Navigation window.
2. Click File > Properties.
3. Click the Event Notification tab.
4. Enter a three-digit number in Pager identification number. Avoid entering a
number that may be mistaken for an area code.
To Assign a Pager Code to a Subsystem:
1. Click a subsystem controller in the Navigation window.
2. Click File > Properties.
3. Click the Event Notification tab.
4. Enter a three-digit number in Pager identification number.
To View or Change a Pager Code for a Critical Event:
1. Click Options > Event Notification > Pager Codes.
2. Click the code you want to edit, and then click Edit.
3. Type the new pager code in the Edit field.
The default pager codes are listed in Table 10.