HP StorageWorks Storage Mirroring application notes Guidelines for using Oracle 10g with Storage Mirroring Linux Part number: T2558-96087 First Edition: February 2008
Legal and notice information © Copyright 2008 Hewlett-Packard Development Company, L.P. Hewlett-Packard Company makes no warranty of any kind with regard to this material, including, but not limited to, the implied warranties of merchantability and fitness for a particular purpose. Hewlett-Packard shall not be liable for errors contained herein or for incidental or consequential damages in connection with the furnishing, performance, or use of this material.
Document overview This document is a Storage Mirroring® application note. An application note provides guidelines on the use of Storage Mirroring in a specific environment. This document contains: • Document Overview—Explains what an application note contains, how it should be used, what you need to know before trying to use the application note, and where you can go for more information.
HP StorageWorks offers professional services on a fee basis to assist you in identifying the best practices for implementing a solution in your environment. Visit http://www.doubletake.com/what-we-offer/services/ for more information. Solution Overview Oracle is a scalable, reliable, flexible, and high-performance relational database management system for many server-based operating systems. Storage Mirroring provides real-time enterprise data protection and replication.
Modifying the sample script files Sample script files are available at http://support.nsisoftware.com. After you modify the sample scripts, save them with a new name to remove the SAMPLE_ prefix. Copy the scripts to the directory where Storage Mirroring is installed. The sample script files provided are only examples. Because no two environments or configurations are exactly the same, you MUST modify the sample scripts in order to make the solution work in your environment.
instance name of orcl, your init.ora file will be located in the /oracle/admin/orcl/pfile/ directory by default. Files with unique names will be identified in the table with a wildcard asterisk (*). Additionally, some of the files are identified with a number sign (#) placeholder in the file name. This placeholder identifies redundant files and/or multiple files which may exist because of tablespace configurations. For example, you may have control01.dbf, control02.dbf, undotbs01.dbf, and undotbs02.dbf.
10. Select One to One to map the replication set data from the source to an identical volume/directory structure on the target. 11. Click Connect to start the mirror and replication processes. NOTE: If you start Oracle and mount the replicated databases on the target, or if the data on the target is otherwise modified, the data on the source and target will no longer match. If the updated data on the target is not needed, perform a full or difference with block checksum mirror from the source to the target.
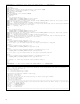
############***** BEGINING OF INIT.D SCRIPT FOR ORACLE SERVICE ***** ############# #!/bin/bash ORACLE_USER="oracle" ##### Path of installed oracle home directory in the server. ##### ORACLE_HOME="/u01/app/oracle/product/10.2.1/db_1/" ##### Set user name. ##### SYS_USER="sys" ##### Set password of the username.
3. After a failure is resolved, you will be ready to bring your source back online. At this time, you will want to stop the Oracle services on the target automatically. To do this, create a shell script file called PREFAILBACK.SH and save the script file to the /usr/bin/ directory where the Storage Mirroring commands are installed. The PREFAILBACK.SH script should include the following: ****************************************************************** #!/bin/bash /etc/init.
. You will be prompted to determine if you want to continue monitoring the source server. Do not choose Continue or Stop at this time. 11. Stop the Oracle service on the source. 12. Delete the .db and .sts files from the /var/lib/DT directory. 13. Restart the Storage Mirroring service (#service DT restart). 14. Connect the source machine to the network. 15. After the source is back online, select whether or not you want to continue monitoring this source machine (Continue or Stop).