
HP XP P9000 Remote Web Console User Guide

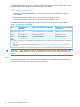

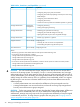
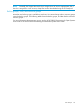

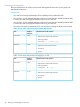
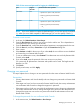
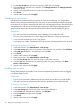

Table 9 Roles and resource groups configured in built-in groups (continued)
Resource groupRoleBuilt-in Group
Storage Administrator (Performance Management)
•
• Storage Administrator (Local Copy)
• Storage Administrator (Remote Copy)
• Support Personnel
• User Maintenance
All Resource Groups
Assigned
Maintenance
• Storage Administrator (View Only)
• User Maintenance
Creating a new user group
This topic explains how administrators can create a user group.
Prerequisites
• You must have Security Administrator (View & Modify) role to perform this task.
• A user group name consists of 1 to 64 characters, including alphanumeric characters (ASCII),
spaces, and the following symbols: ! # $ % and ' ( ) + - . = @ [ ] ^ _ ` { } ~
• The system can support a maximum of 256 user groups, including the built-in user groups.
To create a new user group:
1. In the tree, click Administration→User Groups.
2. In the User Groups tab, click Create User Groups to open the Create User Group window.
3. Enter a user group name.
4. If you use an authorization server, click Check, and verify that the entered user group name
is registered in the authorization server.
5. Click Next to open the Assign Roles window.
6. Select the roles to assign to the user group, and click Add.
7. Click Next to open the Assign Resource Groups window.
8. Select the resource groups to assign to the user group, and click Add.
NOTE: If you select a role other than the storage administrator in the Assign Roles window,
you do not need to select resource groups because all the resource groups are assigned
automatically.
9. Click Finish.
Clicking Next allows you to add a user.
10. Specify a task name, and click Apply.
Managing user accounts
This topic provides instructions for the following tasks:
• Creating user accounts (page 48)
• Changing user passwords (page 49)
• Changing user permissions (page 50)
• Disabling user accounts (page 50)
• Deleting user accounts (page 51)
Managing user accounts 47