
HP Systems Insight Manager 6.3 Installation and Configuration Guide for Microsoft Windows


7. Install the WMI Mapper:
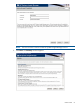
a. On the Welcome to the Pegasus WMI Mapper Setup Wizard, click Next. The End-User
License Agreement window appears.
b. After reading the license agreement, click I accept the terms in the License Agreement.
Click Next. The Choose Setup Type window appears.
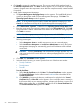
c. Select the setup type. (The basic requirement for HP Systems Insight Manager is Typical
installation. If you select Typical, omit step d.)
NOTE:
• To configure the WMI Mapper https port, you must select Custom.
• The WMI Mapper Installer does not validate the input you provide. Be sure to provide
the correct port values. If you provide a port number on which another application
is running, then the WMI Mapper Service will fail resulting in an error in the Event
log and the C:\Program Files\The Open Group\WMI Mapper\logs\
PegasusError.log file.
• You cannot change the WMI Mapper port when updating or modifying an existing
WMI Mapper. After updating or modifying the WMI Mapper, you can manually
change the port configuration by editing the C:\Program Files\The Open
Group\WMI Mapper\cimserver_planned.conf file.
d. Select the default location C:\Program Files\The Open Group\WMI Mapper or
change the destination location using Browse. Click OK. Click Next. The Ready to Install
window appears.
e. Click Install.
f. Click Finish.
8. Install HP Systems Insight Manager:
a. When the Welcome to the HP Systems Insight Manager Setup Wizard appears, click
Next.
b. Select or enter a different folder name using Browse. Click Next. The Ready to Install
window appears.
c. Click Install. The Install Progress window appears.
d. Click Finish when the installation is complete to close the HP Systems Insight Manager
Installer window.
e. After the HP Systems Insight Manager installation is complete, there is a shortcut on your
desktop to the HP Software Depot site where you can download HP Insight Remote Support
Advanced. For more information about HP Insight Remote Support Advanced, see
“Installing HP Insight Remote Support Advanced” (page 39).
9. Install the HP Version Control:
a. When the HP Version Control Setup window appears, click Install. The HP Version Control
Setup Repository Directory window appears.
b. Select the directory from which HP Version Control will retrieve support pack information
using the Browse button. This directory must be manually created later if it does not exist.
Click OK. Click Next. The HP Version Control Automatic Update window appears.
c. Select the Enable Automatic Update checkbox to enable automatic downloading of ProLiant
Support Packs and components at a specified interval and time.
d. Click Finish. Installation of HP Version Control proceeds and completes.
66 Custom installation