
Deploying HP SIM 5.x on MSCS clusters on Windows 2008 with SQL Server 2005 536992-001, 02/2009
23
ix.
Click
Close
.
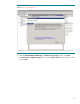
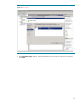
22.
Click
Next
from the
Custom Install
–
Status
window on the
HP Systems Insight Manager Insta
ller
window to close the window.
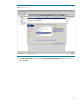
23.
Click
REGISTER LATER
from the
Registration
window.
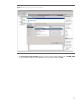
24.
Select
Yes, reboot system now
in the
Installation complete
window, and then click
Finish
.
25.
Click
OK
.
26.
Shutdown the system.
Installing HP SIM 5.x on the secondary system
To ha
ve a clustered installation of HP SIM, the secondary system in the cluster must complete the
installation process, with a few differences in the procedure to account for the existing program files
on the cluster disk.
IMPORTANT
: Be sure to specify the same
user credentials and path information that you used on the
primary system. Be sure that the secondary system owns all of the clustered disks.
IMPORTANT
: Rename the existing HP SIM 5.x folder and all its installed components folders (such as
PMP, VCRM, VMM
, and SMP) from the shared disk. For this paper, we are using
F:
\
HPSIM,
F:
\
Performance Management Pack
\
, F:
\
Virtual Machine Management, F:
\
Server
Migration Pack,
and
F:
\
VCRM
) before you continue. Be sure to specify the same locations and
same folder name o
n the shared disk as in the primary system installation.
1.
At your secondary system, repeat steps 1
-
20 in the
Error!
Reference source not found.
section.
2.
Select
No, will reboot later
. In the Installation complete window, cl
ick
Finish
.
3.
Open
~
\
HP Systems Insight Manager
\
config
\
databaseprops
file and note the
database name specified against the keyword
hp.Database.databaseName
.
4.
Shutdown the secondary system.
Adjusting the HP SIM 5.x data source name on the primary system
1.
Star
t the primary system.
2.
Click
Control Panel
Administrative Tools
Data Sources (ODBC).
3.
Select
System DSN
.
4.
Select
Insight_v50_0
and click
Configure
.
5.
Update the
Database Description
field, referring to the database name created on the secondary
system.
Note:
Us
e the database name noted in step 2 of the
Error! Reference source not found.
section.
6.
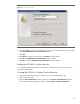
Click
Next
. The
Authentication mode selection
window appears.
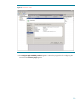
7.
Click
Next
. The
Microsoft SQL Server DSN Configuration
window appears
(Figure 14).