
Deploying HP SIM 6.x on MSCS clusters on Windows 2008 with SQL Server 2008 SP1 White Paper

43
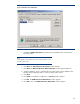
paper) and PMP is installed. When this is complete,
the
Completing the HP
Performance Management Pack setup Wizard
window appears.
iii.
Click
Finish
to exit the setup.
Note:
HP Virtual Machine Management Pack is not bundled with HP SIM 5.2 or
greater. If installing manually, complete the following steps.
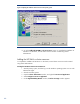
7.
From t
he Management CD, select the
Product
tab, and then click
HP Virtual Machine
Management Pack Install
.
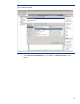
8.
The
Welcome to the HP Virtual Machine Management Pack Setup Wizard
appears.
Click
Next
to continue. The
Available Components
page appears with
Virtual
Mach
ine Management Pack 3.1
selected and in a disabled state.
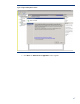
i.
Click
Next
to continue. The
Service Account credentials
page appears.
ii.
Enter the user name, password, and define the VMM port. The default is
40420.
iii.
Click
Next
.
HP Virtual Machine Management Pack
is
installed.
iv.
After the VMM installation is complete, the
Completing the HP Virtual
Machine Management Pack setup wizard
page appears. Click
Finish
to
complete the installation.
Note:
The Server Migration Pack (SMP) and VMM were previously installed as
Virtua
lization Management software. The SMP name has changed to HP
Server Migration Pack
–
Universal Edition Application.
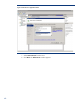
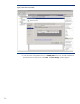
9.
From the Management CD click
Product
tab and click
HP Server Migration Pack
Install
.
A warning message appears, stating
As part of the SMP
installation,
the HP SIM service must be stopped and restarted
. Click
OK
to
continue.
i.
The
Welcome to the HP Server Migration Pack Setup Wizard
window
appears. Click
Next
to continue.
ii.
SMP is installed at this time. The
Completing the HP Server Migration Pac
k
setup wizard
page appears after the installation. Click
Finish
to complete the
installation.
iii.
The
HP
Systems Insight Manager Installation Information
window appears.
Click
OK
.
17.
Click
Next
from the
Custom Install
–
Status
window on the
HP Systems Insight Ma
nager
Installer
window to close the window.
18.
Click
REGISTER LATER
from the
Registration
window.
19.
Select
Yes, reboot system now
in the
Installation complete
window, and then click
Finish
.
20.
Click
OK
.
21.
Shut
down the system.