
HP UPD - System Administrator's Guide HP UPD 5.6.5

3. If available, click Configure to configure the settings for the specified view.
4. Click Apply, and then click Done when you are finished selecting and configuring the MPL view.
See the following topics for more information about each view type.
●
Clickable image map view
●
List with printer graphics view
●
Tabular HTML view
Clickable image map view
The clickable image map view is an interactive image-based map that lists selectable printers associated with
the specified MPL. The clickable image map allows users to drill down from a large-scale image to a local
image that provides links to local printers.
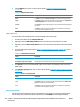
1. From the Select a view type screen, select Clickable image map.
2. Click Configure. The Image map screen displays.
3. On the View settings panel, click Select background image from library to select a background image.
The Select a background image screen displays.
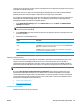
4. Select the option button above the image to apply to image-map background, and then click one of the
options listed in
Table 8-33 Clickable image map view options on page 126.
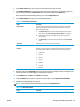
Table 8-33 Clickable image map view options
Option Description
Back Select this option to return to the Configure image map screen without applying a
new image.
Delete selected image Select this option to remove the selected image from the HP MPA software.
Upload new image Select this option to upload a new image from an external source. The Upload a
new background image screen displays.
NOTE: Images must be in the graphics interchange format (GIF) with a 68 pixel
height (preserving the original aspect ration), 256 colors, and contain a transparent
background
When the Upload new image option is selected, you must perform the following
steps.
1. Click Browse to the right of the File field. The Choose file window displays.
2. Select the file to upload and click Open. The File field populates automatically
with the file name and path.
3. Optionally, in the Description field, enter a description for the selected
background image.
4. Click Upload Image. The image becomes available for selection on the Select
a background image screen.
Select image The selected image displays in the Image map panel with graphics for added
printers on the leftmost side.
5. Select Show legend to include a legend at the bottom of the image map. (This option is not selected by
default.)
126 Chapter 8 Manage the HP UPD using HP Managed Printing Administration (HP MPA) and Active Directory
Group Policy
ENWW