
Installing and Administering HP EISA FDDI/9000 and HP HSC FDDI/9000


Chapter 4 55
Configuring and Verifying HP EISA and HSC FDDI/9000
Loading the FDDI Software
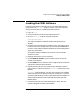
Loading the FDDI Software
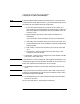
Follow the steps below to load HP EISA or HSC FDDI/9000 software
using the HP-UX swinstall program. See the note at the end of this
section for information on unloading the FDDI software.
1. Log in as root.
2. Insert the software media into the appropriate drive.
3. Run the swinstall program using the command:
/usr/sbin/swinstall
This opens the Software Selection Window and Specify Source
Window.
4. Change the Source Host Name if necessary, enter the mount point of
the drive in the Source Depot Path field, and activate the OK button
to return to the Software Selection Window. Activate the Help button
to get more information.
The Software Selection Window now contains a list of available
software to install.
5. Highlight the software you are installing.
6. Choose Mark for Install from the “Actions” menu to choose the
product to be installed.
7. Choose Install from the “Actions” menu to begin product installation
and open the Install Analysis Window.
8. Activate the OK button in the Install Analysis Window to confirm
that you want to install the software. swinstall displays the Install
Window.
swinstall loads the filesets, runs the control scripts for the filesets,
and builds the kernel. Estimated time for processing: 3 to 5 minutes.
View the Install Window to read processing data while the software is
being installed. When the Status field indicates Ready, the Note
Window opens.
9. Activate the OK button on the Note Window to reboot. The user
interface disappears and the system reboots.