More efficient high availability and resource utilization through manageability—Integrating HP-UX Clustering Solutions, HP Instant Capacity, and HP-UX Workload Manager Executive summary............................................................................................................................... 2 Introduction......................................................................................................................................... 2 HP Software Cluster products ...............
Executive summary Today, most servers are highly underutilized. While average utilization varies by customer and operating system, in the HP-UX environment, it is often around 30%. There are myriad reasons for this, but one of the primary reasons is that customers often have one application per server, and they size that server for a peak load of typically three to five times the average utilization. This means that millions of dollars in server resources—CPUs and memory—can lie idle for most of the time.
HP Software Cluster products The HP Software Cluster products include HP Serviceguard and the technologies built on top of it. These topics are discussed in the following sections. What is HP Serviceguard? HP Serviceguard is available as a stand-alone product and as part of the mission-critical operating environment (MCOE). It protects mission-critical applications from hardware and software failures. To deploy Serviceguard, you organize multiple systems into a cluster.
Technologies built on HP Serviceguard A typical Serviceguard configuration consists of nodes in a single data centerreferred to as a local cluster. Creating clusters that are resistant to multiple points of failure or single massive failures requires a different type of cluster architecture than that used in a local cluster. This architecture is called a disaster-tolerant architectureoften referred to as a disaster-tolerant solution (DTS).
configuration file and can be made available when a package fails over. If multiple users or applications within a workload are competing for resources, standard HP-UX resource management determines the resource allocation.
available, you could leave low-priority packages as they are and let WLM activate the additional TiCAP or PPU resources only if needed to achieve SLOs. • Simplifying routine/scheduled maintenance—With WLM running on a secondary server, you can fail over packages from their primary servers to perform maintenance on the primary servers, knowing WLM will ensure that the applications are allocated CPU resources based on their relative priorities.
Figure 3 shows how WLM can adjust the virtual partitions (vPars) on the secondary server. The following scenario involves six servers, each with a single application running, and one Serviceguard secondary server. The secondary server has seven virtual partitions configured to handle failovers from any of the six servers. Normally, the secondary server has a low-priority task running in vPar 6 while all the other vPars remain idle, waiting for a failover.
HP-UX Workload Manager features that support HP Serviceguard WLM has several features that simplify integration with Serviceguard and create a more efficient high-availability solution.
when its package is active on that node. WLM then allocates resources on the node to groups with active SLOs, based on the priorities you assigned. WLM provides the sg_pkg_active command to monitor Serviceguard packages to determine whether they are active. Based on the output of the sg_pkg_active command, you can enable SLOs only when a specific Serviceguard package is active on the local node.
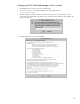
Configuring HP-UX Workload Manager with the wizard 1. Install WLM on each node in your Serviceguard cluster. 2. Be sure your DISPLAY environment variable is set, and start the wizard: # /opt/wlm/bin/wlmcw 3. Enter the maximum number of CPUs the system will have. Be sure to include TiCAP or PPU resources that you want WLM to manage when you determine this number. In this example, the value 8 was entered. 4. Read the introduction screen and click OK.
5. Specify a Workload Group Name and click Next. For this example, use the same name for your workload group as you did for the Serviceguard package: pkgA. (The same name for the workload group and the Serviceguard package is being used for convenience. You can use different names if you like.) 6. Specify the Executable Path for the application that is in the Serviceguard package, and click Add. Specify additional applications for this workload group in the same manner, or click Next.
7. Specify the SLO Name and the SLO Priority for the package. Click Next. The SLO for pkgA, named pkgA_slo, is the most important one that this example will have for any of the Serviceguard packages, so it is assigned priority 1. 8. Specify how to assign CPU resources to the application and click Next. By selecting Fixed Allocation, you can specify a set amount of CPU for WLM to give the application.
9. Set the application’s fixed allocation to the desired value and click Next. In this case, it gets 200 CPU shares, or two CPUs. 10. Select the Serviceguard package that corresponds to the application, and click Next. Here, the package is named pkgA, the same name as the package’s workload group. Selecting a package in this window results in a condition statement that disables the package’s workload group when the package is not active.
11. Because the workload group only needs one SLO, select Commit Current Workload Group, and click Next. The workload group for one package is finished. Now you must create a workload group for the second package 12. Select Add Another Workload Group and click Next.
13. Specify a Workload Group Name and click Next. Again, name the workload group for the Serviceguard package: pkgB. 14. Specify the Executable Path for the application that is in this Serviceguard package, and click Add. Specify additional applications for this workload group in the same manner, or click Next. The application here is /opt/dbase/bin/finance_dbase. Note: Be sure to specify the application and not its package startup script.
15. Specify the SLO Name and SLO Priority for pkgB. Click Next. This SLO is not quite as important as the pkgA SLO, so assign it priority 2. 16. For allocating CPU to this workload group, use CPU Usage. This type of allocation ensures that, by default, the group gets additional CPU resources if it is using at least 75% of the CPU it already has. However, if the group is using less than 50% of its assigned CPU resources, WLM takes away some of its CPU allocation. Click Next.
. With this type of allocation, you must specify what limits to place on WLM when it attempts to allocate CPU to the workload group. Use the defaults and click Next. 18. Select the Serviceguard package that corresponds to the application. The package for the current workload group is pkgB. When WLM is running, the package must be active for WLM to allocate resources to its workload group.
19. Because the workload group only needs one SLO, select Commit Current Workload Group, and click Next. 20. After defining workload groups for all the Serviceguard packages, select Proceed to Next Step and click Next.
21. You can now assign users to your workload groups. However, you are not concerned with any user that might log in to the nodes, so bypass this screen by clicking Next. 22. Select Yes under the Remove groups with no active SLOs (transient_groups)? section so that a package’s workload group is active (and therefore consuming resources) only when the package is active on the system. Click Next to continue.
23. Save the configuration. Specify a name for your configuration, using a full path name if you like, in the Save Configuration as field, and click Next. 24. Click Finish to close the wizard. 25. Validate the syntax of the configuration file and correct any errors: # /opt/wlm/bin/wlmd -c configfile 26. Distribute the WLM configuration file to all the nodes in the cluster. 27.
Configuring HP-UX Workload Manager with a text editor This procedure shows how to create a WLM configuration file using a text editor. For information about the WLM configuration file syntax, see the HP-UX Workload Manager User’s Guide, available at http://www.docs.hp.com/hpux/netsys/. 1. Install WLM on each node in your Serviceguard cluster. 2. Edit a single WLM configuration file to handle all the Serviceguard packages in the cluster as follows. a.
c. Set up slo structures for each status metric, with the SLO active when the package is active. The metrics given by the tune structures in step b are pkgA_active and pkgB_active. Use these metrics in condition statements in the SLOs you create for the packages.
transient_groups = 1; } Pulling all the pieces of the WLM configuration file together, you get the following file: prm { groups = pkgA:2, pkgB:3; apps = pkgA:/opt/dbase/bin/sales_dbase, pkgB:/opt/dbase/bin/finance_dbase; } tune pkgA_active { coll_argv = wlmrcvdc sg_pkg_active pkgA; } tune pkgB_active { coll_argv = wlmrcvdc sg_pkg_active pkgB; } slo pkgA_slo { pri = 1; cpushares = 200 total; entity = PRM group pkgA; condition = metric pkgA_active; } slo pkgB_slo { pri = 2; mincpu = 1; maxcpu = 800; entity =
Putting it all together—An example Integrating the building blocks of the HP Virtual Server Environment provides a seamless solution for high availability, disaster tolerance, workload management, and Instant Capacity. Consider an environment with two data centers. Each data center has two HP 9000 rp7420 Servers connected to an HP StorageWorks XP-series disk array. Each server has two nPartitions. Thus, the environment has a total of eight nodes.
WLM is configured with resource policies to manage the applications in the cluster. All servers have a total of eight CPUs. Each server has four licensed active CPUs and four deactivated Instant Capacity CPUs so that systems can be expanded as needed.
For more information For more information on HP-UX Workload Manager, contact any HP worldwide sales office or see the HP website at http://www.hp.com/go/wlm. To learn more about the Adaptive Enterprise and virtualization, see http://www.hp.com/go/virtualization. © 2006 Hewlett-Packard Development Company, L.P. The information contained herein is subject to change without notice.