
BIND 9.3.2 Release Notes (5900-2140, December 2011)


• The following dig features are modified in BIND 9.3.2:
The -i option in the dig command must be used for IP6.INT IPv6 reverse lookups. By
default, dig performs IP6.ARPA reverse IPv6 lookups.
◦
◦ The output of the dig name command for Not Implemented is changed from NOTIMPL
to NOTIMP.
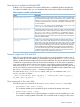
• Table 6 lists the changed command-line options for the dnssec-signzone tool in BIND
9.3.2.
Table 6 New Command-Line Options
Changed FunctionalityNew OptionOld OptionBinaries/Tools
Specifies the DNS class of the zone-c class-c cycle-timednssec-signzone
No change in the functionality for this
option
-n threads-n ncpusdnssec-signzone
Installing BIND 9.3.2
This section describes how to install BIND 9.3.2. It also lists the prerequisites for installing BIND
9.3.2.
Prerequisites
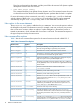
Table 7 lists the prerequisites for installing BIND 9.3.2 on the HP-UX 11i v1 and v2 operating
systems.
Table 7 BIND 9.3.2 Prerequisites
PrerequisiteOperating System
For using DNSSEC Public Key Cryptography functionality, the OpenSSL
library must be installed. However, named will continue to run without
the OpenSSL library.
1
HP-UX 11i v1
HP-UX 11i v2
No prerequisitesHP-UX 11i v3
1
For the HP-UX 11i v1 operating system, install the OpenSSL software from http://www.software.hp.com to obtain the
OpenSSL libraries. For the HP-UX 11i v2 operating system, the OpenSSL libraries are available as part of the core
operating system.
NOTE: If you have installed the Web upgrade version of BIND 9.2.0 on an HP-UX 11i v1 system,
ensure that you remove the BIND 9.2.0 depot before installing BIND 9.3.2.
Installation instructions
To install BIND 9.3.2, complete the following steps:
1. Review to ensure that your system meets BIND 9.3.2 installation requirements.
2. Go to the HP Software Depot website at:
http://h20293.www2.hp.com/
3. Use the Search button to browse for BIND. The product catalog page is displayed.
4. Select BIND in the product catalog. The BIND page is displayed.
5. Read the “Overview” and “Installation” pages for BIND.
6. Select the Receive for Free>> option at the bottom right of any of these pages.
7. Select the appropriate release of HP-UX operating system.
8. Enter the registration information. Read and accept the terms and conditions statements.
9. Click Next>>. The Electronic Delivery Receipt page is displayed.
12 BIND 9.3.2 Release Notes