
HP-UX 11i v3 Installation and Update Guide, March 2012

7. Use the System tab to configure system parameters such as security levels, host name, IP
address, root password, and the time zone. You must set the appropriate security setting for
your system at this time. You can choose to set the other system parameters now or at the first
boot of your system, using set_parms(1M).
To set the appropriate security settings for your system, do the following.
IMPORTANT: You should become familiar with the security levels before you set them. For
more information about setting appropriate security levels, see “Securing your system when
installing and updating” (page 29).
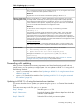
a. Navigate to the System tab and select Security Choices.
The four security levels appear. By default, Sec00Tools is selected.
b. Select the appropriate security setting for your system.
c. Select OK.
8. Use the File System tab to perform a variety of file system and disk-configuration tasks: for
example, resizing file systems, and adding and removing disks. You can also reconfigure the
volume structure and associated file system mount points. The File System tab will differ in
appearance, depending on whether you previously selected LVM or whole disk on the Basic
tab.
Note that renaming or changing any disk file system structure on which Ignite-UX installs file
system content causes the old file system on that disk to be lost. For more information on using
the File System tab, see the Ignite-UX Administration Guide (http://www.hp.com/go/
ignite-ux-docs).
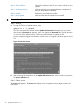
9. Use the Show Summary button to view a summary of how your system will be configured. If
you see any problems, or want to change any of your selections, back up to the appropriate
step, and make the needed changes. Otherwise, select Go! (at the bottom of the screen) to
initiate the installation.
Ignite-UX executes a pre-installation consistency check to identify any errors that must be
corrected before the installation can proceed.
10. The system typically displays the Confirmation Dialog box that lists errors, warnings, and notes
for the configuration settings. (For information on these messages, see “Messages: errors,
warnings, and notes” (page 28).) Review any errors, warnings, or notes displayed in the
Confirmation Dialog box. If there are any errors, they will need to be resolved before the
installation can continue.
Warning messages will list which disks (ones that currently contain a recognized file system)
will be overwritten during the install process. If you see a disk in the list that you do not want
included, back up to the root disk selection and choose another disk. If the settings are correct,
continue on to the next step.
11. After you have reviewed all of the information on the Confirmation Dialog box and resolved
any errors, select Go! (at the bottom of the screen) to initiate the installation.
As the installation proceeds, you will see a log detailing output from the software installation.
After the software is installed, the system will reboot prior to configuring the software and
once again after installation is complete.
If your system was factory integrated, or if you chose to set the system parameters at the first
boot of your system, the system will power down after the installation and ask for these system
parameters at the next boot of your system.
Finishing your installation
Reboot your system. The Welcome to HP-UX screen is displayed and you will be prompted through
a series of screens.
Proceeding with the installation 41