
Installation and Upgrade Guide


Returning Firmware to Previous Versions
G06.24 Software Installation and Upgrade Guide—528593-005
15-5
Returning SP Firmware to the Previous Version
(Using OSM)
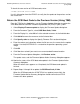
Returning SP Firmware to the Previous
Version (Using OSM)
1. Select Display>Multi-Resource Actions. The Multi-Resource Actions dialog box
appears with unselected fields.
2. From the Resource Type list, select SP.
3. From the Action list, select SP Firmware Update.
4. From the Filter by list, select the appropriate filter, Logical:Fabric Side-Y first.
5. Click Add All or Add to add the SPs you want to update to the lower list.
6. Click Perform action.
7. Click OK when the Confirm SP Firmware Update dialog box appears.
The SP - Parameter Input dialog box appears.
8. Enter the previous file location. Use the $volume.subvolume.filename and
select OK.
As the firmware update is performed, information about it appears in the Progress
list.
9. You are then asked to reset the SP. Click OK.
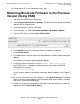
The firmware update needs to reset the Service Processor
to activate the updated firmware. Would you like to
reset the Service Processor?
The Reset Progress bar keeps track of the number of SPs that pass the firmware
reset. After a few minutes, the SP is reset.
10. To verify that firmware updates are in progress, select Action Summary. The
Action Status Summary window appears with information about recent actions,
including their status and overall progress.
11. (Optional) Select Action Summary if a firmware update or reset fails.
a. Select the action that failed.
b. Select Details.
12. Update the X-fabric for the SP code. From the Filter by list, select the appropriate
filter, Logical:Fabric Side-X.
When you change the filter from Y-side to X-side, the following message appears:
Changing a required filter results in your
selections being cleared.
Do you still wish to change the filter?
13. Click OK.
14. Repeat Steps 5 through 10 to update the SP firmware, X-side.