
Manual


Scanning from the all-in-one control panel (Windows)
NOTE Scanning from the all-in-one control panel is only supported with a full software
installation. HP ToolboxFX must be running to scan by using the Scan To button or the Start
Scan button.
NOTE For installations in which the all-in-one is directly connected to the computer, some
scan destinations are set up by default . For installations in which the all-in-one is connected
through a network, scanning from the all-in-one control panel is turned off .
NOTE For the best scan quality, place your originals onto the flatbed scanner (on the
HP LaserJet 3052/3055/3390/3392 all-in-one), rather than loading them into the automatic
document feeder (ADF) input tray.
The computer that is connected to the all-in-one must be turned on.
Programming the all-in-one Scan To button
NOTE The Scan To button must be programmed before you can use it. However, some
destinations are programmed by default if the all-in-one is directly connected to the computer.
To program the Scan To button
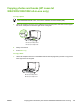
1. In the Hewlett-Packard program group, select Scan to start HP LaserJet Scan.
NOTE Pressing Start Scan on the all-in-one control panel also starts HP LaserJet Scan
when the all-in-one is directly connected to the computer.
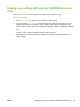
2. Click Setup to open the Scan To Setup Wizard.
3. Select Change the destinations that show up on the all-in-one control panel when I press
the Scan to Button and then click Next.
4. Check the Allow me to scan by pressing the Scan To button on the all-in-one... check box.
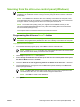
5. Choose destinations by moving them from the PC window (the left window) to the All-in-one
window (the right window).
NOTE The All-in-one window might contain items set up by other computers that are
connected to the all-in-one. You cannot make changes to these items.
NOTE Click New to create a new destination.
6. Click Update.
ENWW Scanning from the all-in-one control panel (Windows) 141