
Smart Array P600 User Guide


10 HP Smart Array P600 Controller for Integrity Servers User Guide
3. Power down all peripheral devices that are attached to the server.
4. Unplug the AC power cord from the outlet and then from the server.
5. Disconnect all peripheral devices from the server.
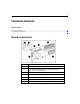
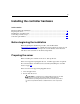
Installing the controller board
WARNING: To reduce the risk of personal injury or damage to
the equipment, consult the safety information and user
documentation provided with the server before attempting the
installation.
Many servers are capable of providing energy levels that are
considered hazardous and are intended to be serviced only by
qualified personnel who have been trained to deal with these
hazards. Do not remove enclosures or attempt to bypass any
interlocks that may be provided for the purpose of removing these
hazardous conditions.
1. Remove or open the access panel.
2. Select an available 3.3-V, 64-bit full-length PCI or PCI-X slot.
3. If the controller is being hot-plugged, power down the slot.
4. Remove the slot cover or open the hot-plug latch. Save the retaining screw if
one is present.
5. Slide the controller board along the slot alignment guide, and press the board
firmly into the slot so that the contacts on the board edge are properly seated
in the system board connector.
6. Secure the controller board in place with the hot-plug latch or retaining
screw. If there is a guide latch on the rear of the board, close the latch.
7. Connect storage devices to the controller. (For details of the procedure, refer
to "Connecting storage devices ("Connecting external storage" on page 11
).")
NOTE: Drives that are to be grouped in the same array should all
have comparable capacity for efficient use of total storage capacity.
8. Close or replace the access panel, and secure it with thumbscrews, if any are
present.