
Owner's manual

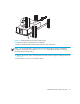


Table Of Contents
- Contents
- Introduction
- Installation
- Library Configuration
- Changing Default Configuration Settings
- Setting a SCSI ID
- Setting Up a Reserved Slot
- Reserved Slot Numbering
- Figure 24 Reserved slot locations, SDLT
- Figure 25 Reserved slot locations, Ultrium (MSL6030)
- Figure 26 Reserved slot locations, lower module, SDLT
- Figure 27 Reserved slot locations, lower module, Ultrium (MSL6060)
- Figure 28 Total reserved slots screen
- Figure 29 Reserved slots numeric keypad screen
- Figure 30 Total reserved slots confirmation screen
- Reserved Slot Numbering
- Configuring the Network Settings
- Operation
- Front Panel
- Library Display Screens and Options
- Menu Selections
- Inserting and Removing Tape Cartridges
- Remote Management Interface
- Maintenance
- Troubleshooting
- Regulatory compliance notices
- Regulatory compliance identification numbers
- Federal Communications Commission notice
- Canadian notice (Avis Canadien)
- European Union notice
- Japanese notices
- Korean notices
- Taiwanese notices
- Laser compliance notices
- Recycling notices
- Disposal of waste equipment by users in private household in the European Union
- Danish notice
- Dutch notice
- Czecholslovakian notice
- Estonian notice
- Finnish notice
- French notice
- German notice
- Greek notice
- Hungarian notice
- Italian notice
- Latvian notice
- Lithuanian notice
- Polish notice
- Portuguese notice
- Slovakian notice
- Slovenian notice
- Spanish notice
- Swedish notice
- Specifications
- Electrostatic Discharge
- Configuration Examples
- Optional Fibre Channel Card
- Index
MSL6000 series tape library user guide 33
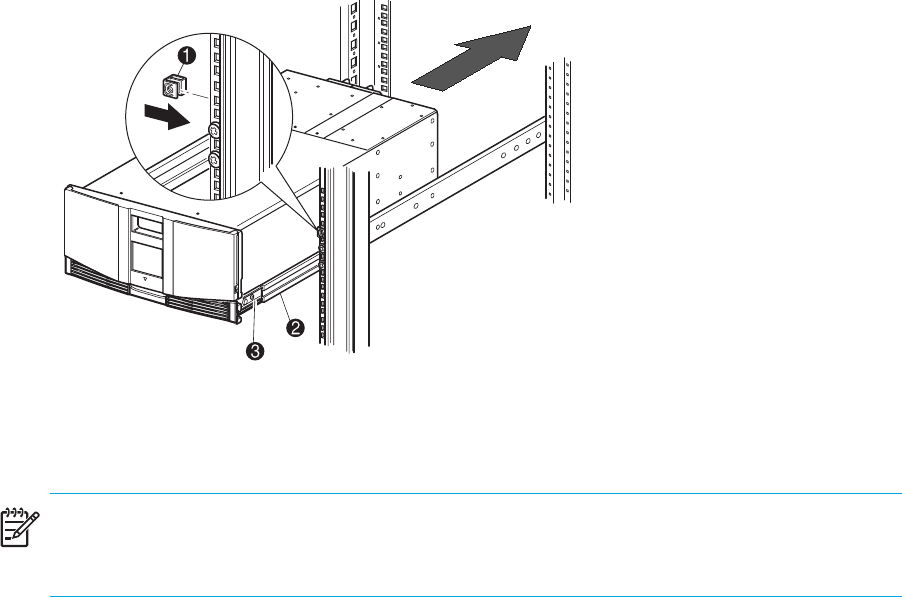
Figure 14 Installing the library (two-drive model shown)
9. Remove the tape to open the doors for installation.
10.Remove and discard the pull-tabs used to block the latch mechanism.
NOTE: Do not close the doors. You must have access to the retaining screws to complete the
installation. (If necessary, see Chapter 4, ”Operation” on page 49 for information on how to
manually open the library doors.)
11.With the doors open, secure the front panel to the rack enclosure using the retaining screws (see
Figure 15).
12.Close the doors. You can now cable the library.