Internet Express Version 6.
© Copyright 2008 Hewlett-Packard Development Company, L.P. Confidential computer software. Valid license from HP required for possession, use or copying. Consistent with FAR 12.211 and 12.212, Commercial Computer Software, Computer Software Documentation, and Technical Data for Commercial Items are licensed to the U.S. Government under vendor's standard commercial license. The information contained herein is subject to change without notice.
Table of Contents About This Manual.............................................................................................................5 Audience.................................................................................................................................................5 Organization...........................................................................................................................................5 Related Documentation.....................................
3 Completing the Installation.........................................................................................35 3.1 Verifying the Installation.................................................................................................................35 3.2 Connecting to the Secure Web Server.............................................................................................35 3.3 Using the Cleanup Script..................................................................................
About This Manual This manual explains how to install and configure components included with Internet Express Version 6.8 on a system running HP Tru64 UNIX Version 5.1B and higher. Audience To use this manual, you should be familiar with installing software on an AlphaServer running the Tru64 UNIX operating system.
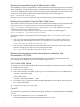
Reading Documentation Using the Administration Utility After installation of the Secure Web Server subset (IAEAPCH), the Internet Express Documentation subset (IAEDOC), and the Internet Express Administration utility (IAEADM subset), you need access to the Administration utility for Internet Express (as described in the Administration Guide), so that you can read the documentation following the link from the Web page at: http://hostname.domain:8081 where hostname.
If the Bookshelf does not appear, open the following URL, replacing drive with the letter of your CD–ROM drive: file:drive:\index.htm 2. Click on the book you want to open. Reading Reference Pages for Internet Express Components Reference pages for Internet Express components are available in HTML format from the Internet Express Reference Pages index page. These HTML reference pages can be viewed using a Web browser.
Ctrl+x Key User input Variable A key sequence. A sequence such as Ctrl+x indicates that you must hold down the key labeled Ctrl while you press another key or mouse button. The name of a keyboard key. Return and Enter both refer to the same key. Commands and other text that you type. The name of a placeholder in a command, function, or other syntax display that you replace with an actual value. HP Encourages Your Comments HP encourages your comments concerning this document.
1 Installation Overview You can run the Internet Express installation procedure in a Web browser or on the command line. You choose the method you want to use early in the installation process. Chapter 2 explains how to use a Web browser to install Internet Express. After completing the installation, perform some of the tests described in Chapter 3 to verify the installation. For troubleshooting information, see Chapter 4.
http://h18010.www1.hp.com/java/download/index.html If Internet Express is already installed on your system, you do not need to remove it before installing Version 6.8 of the product. The Version 6.8 installation procedure updates your earlier version, preserving configuration files and user data. Updates from Versions 6.4 and 6.5 to 6.8 are supported, and updates from earlier versions should also work. (Earlier versions of this product are named Open Source Internet Solutions.) 1.
Use the following worksheet to gather DNS client configuration data before installing Internet Express: Type of Information Example Is the system a DNS server or client? client Domain name site.org.com Host name of primary name server dnssrvr1 IP address of primary name server 10.55.39.186 Entry The Internet Express installation procedure invokes the bindconfig utility and allows you to configure a primary name server.
— — — login authentication (rlogin, ftp, and telnet) POP and IMAP authentication transparent LDAP database access for the getpw*() and getgr*() routines in the libc library The LDAP Module for System Authentication subset includes tools designed to query the LDAP server for user and group information. You can choose the LDAP Module for System Authentication as an option during installation. • FreeRADIUS Server (IAEFRAD) The FreeRADIUS Server configures user authentications services.
— — — — — • Restricted guest accounts Directory alias Directory alias File name filter Virtual host support Curl (IAECURL) Curl is a command line tool for transferring files with URL syntax. Firefox browser: • Mozilla Firefox (IAEFIREFOX) Firefox is a free open source Web browser based on the Mozilla code base. E-Mail Servers — E-mail servers provide electronic mail services to clients.
The Internet Express installation configures the system to use Sendmail instead of the older version of Sendmail installed with the Tru64 UNIX operating system. Choosing this option also installs the bogofilter spam-filtering software. • University of Washington IMAP4 Mail Server (IAEIMAP) Networking Services: • DNS/BIND (IAEBIND) The Berkeley Internet Name Domain (BIND) service is a client/server model that allows client systems to obtain host names and addresses from DNS servers.
Service Location Protocol Services: • OpenSLP Server (IAESLP) OpenSLP is an implementation of the Service Location Protocol (SLP), a protocol that provides a framework to allow networking applications to discover the existence, location, and configuration of networked services in enterprise networks. Software Development: • Perl Practical Extraction and Report Language (IAEPERL) Perl is an interpreted scripting language commonly used to write Common Gateway Interface (CGI) programs for Web servers.
• • Tomcat Java Servlet and JSP Engine (IAETOMCAT) ht://Dig – A World Wide Web indexing and searching tool (IAEHTDIG) The ht://Dig system is a complete indexing and searching system for a domain or intranet. It can search through many servers on a network by acting as a Web browser. XML (Extensible Markup Language) Tools: • Apache Cocoon Servlet (IAEXML) The IAEXML subset installs and configures Apache Cocoon as a servlet in Tomcat.
Axis Client - SOAP Client Libraries — Developed as an IBM Open Source Project: UDDI4J - UDDI Client Libraries — Various supplemental libraries required by Axis, UDDI4J and Cocoon: JavaMail JavaBeans Activation Framework Bean Scripting Framework Java Secure Socket Extension - global version Note: All these tools require Java (Version 1.2.* or higher). The Axis Client and UDDI4J require Java 1.3.1 or higher. See Section 1.1: Installation Prerequisites for more information.
2 Installing Internet Express You can use either a browser-based interface or a command-line interface to perform the Internet Express installation. This chapter shows the browser-based procedure. To control the progress of the browser-based installation procedure, and for data collection on some of the forms in the Administration utility for Internet Express, your browser must be enabled to use JavaScript. Section 1.
If Tru64 UNIX is already installed on your system, you can verify the version number by entering the following command: # /usr/sbin/sizer -v HP Tru64 UNIX V5.1B (Rev. 2650); Thu Apr 24 14:34:37 EDT 2008 The version of Tru64 UNIX must be 5.1B (Revision 2650) or higher. 2.3 Starting the Installation Procedure Insert the CD–ROM labeled Internet Express for Tru64 UNIX Installation and Documentation into the CD–ROM drive on your system.
Example 2-1 Setting Up the Internet Express Account # /mnt/ix_install ******************* Internet Express Installation ******************* ******************* Tue Oct 14 10:19:10 EDT 2003 ******************* You must now specify one password to be used in all of the following cases: 1. Access to the Internet Express installation (if you choose the web-browser installation mode) 2.
Table 2-1 Choosing an Installation Interface Prompt New Web Browser DISPLAY not defined DISPLAY defined Would you like to use the Internet Express Installation graphical user interface? y Would you like to specify an X Window System Display? y y Existing Web Browser Command-Line Interface y n If you want to use a new Web browser and your X Windows display (DISPLAY environment variable) is not defined, the installation procedure prompts you to specify one.
Example 2-2 Choosing to Install Internet Express from a Remote Netscape Browser You must now specify one password to be used in all of the following cases: 1. Access to the Internet Express installation (if you choose the web-browser installation mode) 2. The login password for the 'iass' administrator's account (if it needs to be created -- existing passwords are not changed) 3.
that information sent over the network is not secure. You can shut off this warning; however, it is good practice to reset the browser preferences after the installation to display this warning. Notes: If a step in the browser-based installation procedure appears to be taking a long time to complete, scroll to the bottom of the form to check its status. You can stop the browser-based installation at any time by pressing Ctrl/C in the terminal window from which you started the installation. 2.
3. 4. Indicate whether you want to continue the installation using a Web browser. Specify the user name iass and the password you specified. The procedure verifies the required Tru64 UNIX kernel options and continues. 2.8 Verifying PAK Information The installation procedure verifies the presence of Product Authorization Key (PAK) information required for the OSF_BASE and OSF_USR licenses. If any PAK information is missing, the script displays a form that prompts you for the missing information.
2.11 Configuring the SMTP Server If the procedure detects that mail has been configured, it proceeds with Internet server performance tuning (Section 2.12: Tuning Internet Server Performance). If the installation procedure detects that mail needs to be configured for the system, the procedure displays a form prompting you for mail configuration information. Use the Configure SMTP Server form to set up the routing and delivery of mail for your system.
• • 4. 5. None — Send mail directly to the addresses. (So not use routing.) Internet — Forward addresses outside your corporation (top domain) to the host specified in the Relay Hostname field. • Nonlocal — Forward addresses outside your local site to the host specified in the Relay Hostname field. • Local — Forward all mail with destinations other than this server to the host specified in the Relay Hostname field. If you choose None, go to step 5; otherwise, go to step 4.
Note: The kernel subsystem attribute settings described in Tuning Tru64 UNIX for Internet Servers are meant for use on systems that are primarily used as Web servers (or other servers that handle a large number of connections, such as a proxy/caching server, mail server, news server, or FTP server) and that are configured with an adequate amount of RAM. In some cases, settings that differ from those recommended in this document could improve the performance of a Web service.
2. Choose the disk partition where you want to allocate the /data directory and click on Continue. If any disks on your system are unlabeled, a form is displayed at the top of the disk partition selection page that allows you to write default labels on the unlabeled disks. If you want to choose a partition from the unlabled disks, select the checkbox next to the disk name and click on the Write Disk Labels button.
The installation procedure displays information on each subset as it installs it. Scroll down to the bottom of the page to monitor the progress of the installation. After the selected subsets are installed, scroll to the bottom of the page and click on Continue. To rerun the installation procedure (for example, to change the selections you made from the list of subsets or to remove an installed subset), click on Reinstall.
can enable only one IMAP server on the system at any given time. You can switch from one server to another at any time. See the Administration Guide for more information. This section compares and contrasts the UW-IMAP server with the Cyrus server by considering several factors (mail file format, user setup, administrative overhead, mail folder sharing, and disk quota management).
Mail folder names are constructed using the slash (/) as a separator, usually as children of the top-level mail directory (for example, mail/save/stuff). The UW-IMAP server uses the special name INBOX for the user's mail spool file, which is the name expected by all mail clients. The Cyrus server does not require a top-level mail directory. Folder names are constructed using the period (.) as a separator and are generally children of the INBOX folder (for example, INBOX.save.stuff). 2.19.
it is set to diradmin. It is strongly recommended as a security precaution that you do not use the default password of diradmin. Note: You should not use the system's root password for the Root DN password. 2.
connection information. You control the daemon's caching activity through definitions in the /etc/ldapcd.conf file. See the Administration Guide for more information. Click on Continue to begin the installation of the software for all the subsets you selected. When subset installation is complete, a button labeled Continue is displayed at the bottom of the page. Click on the Continue button to formally exit the installation procedure (Section 2.23: Exiting the Installation Procedure). 2.
3 Completing the Installation After the installation procedure finishes, Verify the installation of Internet Express components (see Section 3.1: Verifying the Installation) to make Internet Express software secure and operational. Note: To ensure a secure system, you can access the Administration utility on port 8081 only from the local system (that is, the system on which you installed Internet Express). You can, however, use the Administration utility to allow access to these ports from remote systems.
http://host.domain.name:8081/ The installation procedure initially assigns the user name admin and the password you specified during installation to the server administrator. See the Web Server documentation for the parameters you can tune to improve the server's performance. The installation procedure creates a link in the /sbin/rc3.d directory to the appropriate start procedure, which enables the Secure Web Server you installed to automatically start when the system reboots. 3.
4 Troubleshooting the Installation This chapter describes problems you might encounter during the installation and configuration of Internet Express software and suggests corrective action. Delayed response If a step in the browser-based installation procedure appears to be taking a long time to complete, scroll to the bottom of the form to check its status. The step may be complete but the status message might not be visible unless you scroll to the bottom of the page.
Index Symbols /data directory creating, 28 /data/spool directory creating, 28 /data/spool/news directory establishing a file system for, 29 /etc/gated.
converting mail folders, 32 disk quota management, 32 enabling during installation, 30 mail file format, 31 mail folder sharing, 32 setting up user accounts, 31 IMP IMAP program, 13 installation, 9 (see also installation procedure) (see also update installation) browser-based, 9 checking for service conflicts, 30 choosing an interface, 21 configuring DNS client, 25 configuring SMTP server, 26 configuring the network, 25 disk space requirements, 9 error message, 37 Internet Monitor, 9 memory requirements, 9
during installation, 25 network configuration, 10 choosing the gated daemon, 25 choosing the routed daemon, 25 during installation, 25 minimal, 10 news reader TIN, 12 news server, 14 newsfeed, 29 establishing a separate file system for external, 29 Nikto, 14 O OpenLDAP Directory Server, 12 setting up, 32 OpenSLP, 15 P PAKs entering information during installation, 25 verifying, 25 password changing defaults, 35 creating during installation, 20 iass account, 20 Perl, 15 PHP hypertext preprocessor, 15 Pico