User Guide HUAWEI Ascend Q Welcome to HUAWEI
Contents 1 Reading Before Proceeding...................................................1 1.1 Safety Precautions....................................................................... 1 1.2 Personal Information and Data Security ...................................... 2 1.3 Legal Notice................................................................................. 3 2 Getting Started.......................................................................6 2.1 2.2 2.3 2.4 2.5 2.6 2.7 2.8 Appearance ........
4.8 Deleting a Contact ..................................................................... 25 4.9 Streams ..................................................................................... 25 4.10 Managing Groups .................................................................... 26 4.11 Joining and Separating Contacts............................................. 27 4.12 Sending Contacts .................................................................... 28 5 Using the Onscreen Keyboard.............
10.1 Managing Your Accounts......................................................... 52 10.2 Customizing Your Account Synchronization............................ 53 11 Using Other Applications ...................................................54 11.1 11.2 11.3 11.4 11.5 11.6 11.7 Traffic Manager........................................................................ 54 All Backup................................................................................ 55 Calendar ..................................
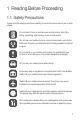
1 Reading Before Proceeding 1.1 Safety Precautions Please read the safety precautions carefully to ensure the correct use of your mobile phone. Do not crash, throw, or puncture your mobile phone. Avoid the falling, squeezing, and bending of your mobile phone. Do not use your mobile phone in a moist environment, such as the bathroom. Prevent your mobile phone from being soaked or washed in liquid.
Do not place your mobile phone or its accessories in containers with a strong electromagnetic field. Do not place magnetic storage media near your mobile phone. Radiation from the phone may erase the information stored on them. Do not put your mobile phone in a high-temperature place or use it in a place with flammable gas such as a gas station. Keep your mobile phone and its accessories away from children. Do not allow children to use your mobile phone without guidance.
• Periodically back up personal information kept on your memory card, or stored in your device memory. If you change to a different device, be sure to move or delete any personal information on your old device. • If you are worried about viruses when you receive messages or emails from a stranger, you can delete them without opening them. • If you use your device to browse the Internet, avoid websites that might pose a security risk to avoid theft of your personal information.
Trademarks and Permissions , , and are trademarks or registered trademarks of Huawei Technologies Co., Ltd. Android is a trademark of Google Inc. Other trademarks, product, service and company names mentioned are the property of their respective owners. Notice Some features of the product and its accessories described herein rely on the software installed, capacities and settings of local network, and therefore may not be activated or may be limited by local network operators or network service providers.
This product uses the open-source Android™ platform. Huawei Technologies Co., Ltd. has made necessary changes to the platform. Therefore, this product may not support all the functions that are supported by the standard Android platform or may be incompatible with third-party software. Huawei Technologies Co., Ltd. shall not be liable for any of such situation. DISCLAIMER OF WARRANTIES THE CONTENTS OF THIS MANUAL ARE PROVIDED “AS IS”.
2 Getting Started All the pictures in this guide are for your reference only. Your phone’s actual display features may be different to those described here, depending on its software version. 2.1 Appearance 2.1.1 Phone at a Glance Power key Headset jack Back camera Speaker Volume keys Menu Home Back Alt Cap Delete Enter Smiley Space Symbol 2.1.2 Key Functions at Your Fingertips • Press and hold to power on your mobile phone. • Press and hold to open the Phone options menu.
Touch to open the menu on an active screen. • Touch to return to the previous screen. • Touch to exit any application you are running. • Touch to hide the keyboard. 2.2 Setting Up Your Mobile Phone 2.2.1 Charging the Battery Before charging the battery, ensure that it has been properly installed on your phone. 1. Connect the USB cable that came with your mobile phone to the charger. 2. Connect the other end of the USB cable to your mobile phone.
Status Indicator The color of the status indicator tells you the status of your mobile phone’s battery. Status Indicator Green: Fully charged (when connected to charger). Orange: Charging in progress (when connected to charger). Red: Battery low. 2.2.2 Important Information About the Battery • If the battery has not been used for a long time, you may not be able to power on your mobile phone immediately after you begin charging the battery.
2.2.3 Power Saving Tips The longevity of battery power depends on the network to which you connect, and how you use your mobile phone. Try the following to conserve battery power: • When your mobile phone is not in use, turn off the screen backlight. • Reduce the time it takes for your screen backlight to turn off when your phone is idle. • Lower the screen brightness. • Turn off Bluetooth when you are not using it.
Do not turn on Fast boot while on an airplane. 2.3.4 Powering Off Your Mobile Phone 1. Press and hold to open the Phone options menu. 2. Touch Power off. If Fast boot is enabled, the phone will enter the deep sleep mode. If Fast boot is disabled, touch OK to shut down the phone. 2.4 Using the Touchscreen 2.4.1 Touchscreen Actions • Touch: Tap the screen with your finger to select an item, confirm a selection, or start an application.
• If your phone is idle for a while, the screen will lock automatically. 2.5.2 Unlocking the Screen 1. Press to wake up the screen. 2. Drag the lock icon from left to right to unlock the screen. If you have set up a screen unlock pattern, you will be prompted to draw the pattern on the screen to unlock it. 2.6 Home Screen 10:23 Notifications bar: Displays the reminders and status icons of your phone. Flick down to open the notifications panel.
Touch and hold a shortcut until the mobile phone vibrates, you can then drag it to your desired location or move it to the trash. You can also drag an icon from another area of the screen to the shortcut position. 2.6.
New text or multimedia message Problem with text or multimedia message delivery New chat message New email New voicemail Connected to a PC Open Wi-Fi network available Upcoming event Uploading Downloading Memory full Sign-in or synchronization problem Preparing the mircoSD card More undisplayed notifications Synchronizing data Synchronization failed Connected to a VPN USB tethering on Disconnected from a VPN 2.6.
Opening the Notification Panel 1. When a new notification icon appears on the notification bar, place your finger on the notification bar and flick down to open the notification panel. You can also open the notification panel from the Home screen: Touch Notifications to open the panel. 2. On the panel, you can: • Touch a notification to open the related application. • Touch Clear to clear all notifications. Closing the Notification Panel Touch and hold the bottom of the panel. Then flick up to close it. 2.
2.6.4 Customizing the Home Screen Adding a New Home Screen Item 1. Touch and hold a blank area on the Home screen until the Add to home screen menu is displayed. You can also touch home screen menu. > Add on the Home screen to display the Add to 2. Select an item to add it to the Home screen. Moving a Home Screen Item 1. Touch and hold an item on the Home screen until the item expands in size and the mobile phone vibrates. 2.
2.6.7 Changing the Wallpaper 1. On the Home screen, touch > Wallpaper. 2. Touch the following menu items to select a picture and set it as the wallpaper: • Gallery • Live wallpapers • Wallpapers 2.6.8 Changing the Theme 1. On the Home screen, touch > Home settings. 2. Do any of the following: • Touch Theme to select a theme. • Touch Application icons to select a series of application icons. 3. Touch Save. 2.
2.8 Using a microSD Card 2.8.1 (Optional) Installing the microSD Card Your mobile phone is already equipped with a large-volume built-in embedded MultiMediaCard (eMMC). If you want to expand your phone memory, you can also insert a microSD card 1. Remove the battery cover. 2. Insert the microSD card into the card slot as shown in the diagram. 2.8.
2.8.3 Removing the microSD Card 1. On the Home screen, touch > Settings. 2. Scroll down the screen, and then touch Storage > Unmount SD card. 3. Carefully remove the microSD card. 3 Calling To make a phone call, you can dial a number using the keypad or touch a number saved in your contact list, on a webpage, or in a document. When you are in a call, you can answer other incoming calls or redirect them to your voicemail. You can also set up conference calls with several participants. 3.
3.1.2 Making a Call from Contacts 1. On the Home screen, touch > Contacts to display the contact list. If you are already working with Dialer or Call log, touch the Contacts tab. 2. In the list, touch the contact you want to call. 3. Touch to dial the phone number. 3.1.3 Making a Call from Call log 1. If you are already working with Contacts or Dialer, touch the Call log tab. 2. Touch to the right of the log entry to dial. If you touch and hold a log entry, the options menu will open. 3.
3.2.3 Rejecting an Incoming Call Drag to the left to reject the call. You can also drag up the bar at the bottom of the screen to reject a call and send the caller a message. 3.3 Other Operations During a Call 3.3.1 Making a Conference Call If you receive a new call while you are already on a call, you can connect the second call to the call you are on. This feature is known as conference calling. You can also set up a conference call with multiple callers.
3.3.2 Switching Between Calls If you receive a new call while you are already in a call, you can switch between the two calls. 1. While you are in the first call and the second call comes in, answer the incoming call, and then touch Manage calls. 2. The current call is placed on hold and you are connected to the first call. 3.4 Using the Call log The Call log contains a list of calls that you have dialed, received, and missed.
1. Connect the TTY device to the headset jack of the phone and set the phone to the TTY mode. 2. Make or answer calls as normal. 3. When the call is put through, use the TTY device to send or receive the letters. 4. Press the End to end the call. 3.6.2 Setting the TTY Mode 1. Touch > Settings > Call settings > TTY mode. 2. Select one TTY mode. • TTY Off: The standard voice speaking mode and the listening mode. • TTY Full: Transmit and receive the TTY characters.
4.2 Adding a Contact 1. In the contact list, touch > Create contact. 2. If you have more than one account with contacts, touch the account to which you want to add the contact. 3. Enter the contact's name, and then add detailed information such as phone number and address. 4. When you are finished, touch Save to save the contact information. 4.3 Adding a Contact to Your Favorites • Touch and hold the contact you want to add to Favorites. Then touch Add to Favorites.
4.6 Editing a Contact You can make changes to the information you have stored for a contact at any time. 1. In the contacts list, touch and hold the contact whose details you want to edit, and then touch Edit contact in the options menu. 2. Touch the category of contact information you wish to change: name, phone number, email address, or any other information you recorded earlier. 3. Make the desired changes to the contact information, and then touch Save. To cancel all of your changes, touch Cancel. 4.
4.8 Deleting a Contact 1. In the contacts list, touch and hold the contact that you want to delete, and then touch Delete contact in the options menu. 2. Touch OK to confirm that you want to delete the contact. 4.9 Streams Streams is a client that integrates social networking service (SNS) functions of Facebook and Twitter. Using Streams, your SNS accounts can be closely linked with Contacts. To access the Streams screen, touch > Streams.
2. On the account screen, touch Social Preference Settings to configure the settings. 4.9.4 Adding the Streams Widget to the Home Screen Touch and hold the blank area of the Home screen. In the displayed menu, touch Add widget > Streams to add Streams to the Home screen. Using the widget, you can quickly access Streams, or directly browse the latest events and update the status of your friends on the Home screen. 4.10 Managing Groups 4.10.1 Creating a Group 1. On the Home screen, touch touch Groups. 2.
• When editing a group, touch , and then touch Add Members to select the contacts you want to add to group. 4.11 Joining and Separating Contacts You may have duplicate contacts if you import contacts by: • Adding an account, such as a Gmail account. • Using the social networking services such as Facebook or Twitter. (If your phone has the Streams function, you can use it to access Facebook or Twitter.) • Using other methods, such as exchanging emails.
4.12 Sending Contacts You can send contacts as a .vcf file via Bluetooth or Email. 1. In the contacts list, touch . 2. Select contacts that you want to send. 3. Touch Send. 4. Select the way you prefer to send the contacts you have selected, for example Bluetooth or Email. You can send one contact by another way. Touch and hold a contact, touch Send contact, and then select the way you prefer to send. 5 Using the Onscreen Keyboard 5.1 Displaying the Keyboard To enter text, use the onscreen keyboard.
5.1.2 Using the Android Keyboard q w e r t y u i o p a s d f g h j k l z x c v b n m ?123 ... .... :-) ... Touch to delete a character to the left of the cursor. Touch and hold to delete all characters to the left of the cursor. Touch to insert a space. Touch to enter text by voice. Touch to change from the text mode to the symbol/number mode. Touch once to capitalize the next letter you type. Touch twice to capitalize all letters to be entered.
5.1.4 Using the Landscape Keyboard To enter an upper character of one key, Cursor: press first and then the desired key. To enter only upper characters, press Cursor: Cursor: twice before typing. Press again to switch back to lower-case letters. To enter one upper-case letter, press aA first and then a key. To enter only upper-case letters, press Cursor: twice before typing. Press lower-case letters. again to input Press to display all expressions. Press to display all symbols. 5.
6 Messaging The Messaging application allows you to exchange text messages (SMS) and multimedia messages (MMS) with anyone using an SMS-or-MMS-capable phone. With the Email application you can read and send emails. 6.1 SMS and MMS 6.1.1 Opening Messaging Touch > Messaging. 6.1.2 Creating and Sending a Text Message 1. Touch > Messaging > New message. 2. Enter a phone number or a contact's name in the To field, or touch contact from Contacts or Groups.
6.1.3 Creating and Sending a Multimedia Message 1. Touch > Messaging > New message. 2. Enter a phone number in the To field, or touch Contacts or Groups. to select a contact from 3. Touch the composition text box to start entering your message. 4. Touch to display the options panel.Touch Add subject to add the message subject. Your mobile phone is now in multimedia message mode. 5. When the message is ready to be sent, touch . On the message editing screen, you can also touch desired files to add.
6.1.5 Replying to a Message 1. In the message list, touch a text or multimedia message thread to open it. 2. Touch the text box to compose your message. Once finished, touch You can also do the following to reply to a message: Touch select one or more message threads, and touch Reply. . > Multiselect, 6.1.6 Copying a Text Message to Notepad or Calendar 1. In the message list, touch a text message thread to open it. 2. Touch and hold one of the messages, and then touch Copy message to. 3.
3. Enter the account name and the name you want other people to see when they receive an email from you. 4. Touch Done. Adding Other Email Accounts 1. After creating your initial email account, touch on the Inbox screen, and then touch More > Accounts to access the accounts screen. 2. Touch on the accounts screen, and then touch Add account to create another email account. When adding an additional email account, you have the option to use the new account to send all outgoing messages. 6.2.
6.2.5 Replying to an Email Message 1. On the accounts screen, touch the email account you want to use. 2. Touch the email message to which you want to reply. 3. Touch Reply or Reply all to reply to the email message. 6.2.6 Deleting an Email Account 1. On the accounts screen, touch and hold the email account you want to delete. 2. Touch Remove account. 3. Touch OK. 6.2.
7 Getting Connected 7.1 Mobile Networks Your mobile phone will be automatically configured to use your network operator’s 2G/3G service (if available) when you turn on the phone for the first time. Note that the SIM/UIM card must be inserted (some CDMA mobile phones have an integrated UIM card and do not need a separate UIM card) 7.1.1 Checking the Network Connection 1. Touch > Settings. 2. Touch Wireless & networks > Mobile networks. 3.
7.2.2 Connecting to a Wireless Network 1. After turning on Wi-Fi, touch > Settings. 2. Touch Wireless & networks > Wi-Fi settings. You will see a list of detected Wi-Fi networks in the Wi-Fi networks section. 3. Touch a Wi-Fi network to connect to it. • If you select an open network, you will be automatically connected to the network. • If you select a network that is secured with Wired Equivalent Privacy (WEP) and connect to it for the first time, enter the password as prompted, and then touch Connect.
7.3 WPS The Wi-Fi Protected Setup (WPS) function simplifies the operations to set up Wi-Fi networks and configure network security settings. When connecting to a Wi-Fi network via WPS, ensure that the Wi-Fi access point to be connected supports the WPS function. 7.3.1 Connecting to a Wireless Network via the WPS Button 1. Turn on Wi-Fi, and then access the Wi-Fi settings screen. 2. Touch WPS button connection. 3. Press the WPS button of the Wi-Fi access point.
7.4 Browser Your mobile phone comes with an Internet browser pre-installed. 7.4.1 Opening the Browser Touch > Browser to open the home page. When known or open Wi-Fi networks and mobile data networks are available at the same time, your phone will preferably select a Wi-Fi network for Internet access. Touch to open the browser options menu and perform one of the following operations: • New window: Touch to open a new window. • Bookmarks: Touch to display bookmarks.
7.4.3 Setting a Home Page 1. In a browser window, touch . 2. Touch More > Settings > Set home page. 3. Enter the address of the desired home page, and then touch OK. 7.4.4 Managing Bookmarks You can store as many bookmarks as you want on your mobile phone. Adding a Bookmark 1. In a browser window, go to the webpage you want to save as a bookmark. 2. Touch , and then touch Bookmarks > Add. 3. Edit the bookmark name and then touch OK. Opening a Bookmark 1.
7.5.1 Turning On Bluetooth 1. Touch > Settings. 2. Touch Wireless & networks, and then select the Bluetooth check box to turn on Bluetooth. When Bluetooth is turned on, the Bluetooth icon appears in the notification bar. 3. Touch Bluetooth settings, and then select the Discoverable to make your mobile phone visible to other Bluetooth devices. 7.5.
7.5.3 Sending Files via Bluetooth With Bluetooth, you can share pictures, videos, or music files with your family and friends. To send files via Bluetooth: 1. Touch and hold the file to be sent in your mobile phone or SD card. The active options menu is displayed. 2. Touch Share, then Bluetooth to select a paired device. 7.5.4 Disconnecting from or Unpairing with a Bluetooth Device 1. Touch > Settings > Wireless & networks > Bluetooth settings. 2.
Capture Screen Thumbnail of the 3 last photo. Touch to preview the photos or videos. Slide up to record videos; slide down to take photos. Touch to take a 5 photo. Touch to customize the camera settings. On the capture screen, touch to show the capture panel. 8.1.2 Taking a Photo 1. Open your camera application and switch it to camera mode. 2. If necessary, change the camera settings. The preview changes as you change the settings. 3. Frame your photo within the photo capture screen. 4. Touch and hold .
8.1.4 Recording a Video 1. Open the camera application, and then switch it to camcorder mode. 2. If necessary, change the camcorder settings. 3. Frame the scene with which you want to start your video. 4. Touch to start recording a video. 5. Touch to stop recording. 8.1.5 Viewing Your Videos 1. After recording a video, a thumbnail of the video you have just recorded is shown in the upper right corner of the capture screen. Touch the thumbnail to view it. 2.
3. Touch the screen. Then the zoom panel appears. You can zoom in or zoom out on the picture. The picture viewer supports the automatic rotation function. When you rotate your mobile phone, the picture adjusts itself to the rotation. 8.2.3 Rotating a Picture 1. When viewing a picture, touch to display the operations panel. 2. Touch More. 3. Select either Rotate Left or Rotate Right. The picture is saved with the new orientation. 8.2.4 Cropping a Picture 1. When viewing a picture, touch More > Crop.
9 Google Services Availability of Google applications, services, and features may vary according to your country or carrier. Please follow local laws and regulations to use them. When you turn on your mobile phone for the first time, touch a Google services such as Talk, Gmail, or Play Store, and you will be prompted to sign in to your Google account. Ensure that your mobile phone has an active data connection (3G) before you sign in to your Google account.
9.2 Gmail Gmail is Google’s web-based email service. When you first set up your phone, you may have configured it to use an existing Gmail account or create a new account. The first time you open the Gmail application on your phone, your Inbox will contain the messages from your Gmail web account. 9.2.1 Opening Gmail On the Home screen, touch > Gmail. The Inbox mail list appears. Any emails you decide to keep on your mobile phone will go to your Inbox folder. 9.2.2 Switching Between Accounts 1.
• If you selected Reply or Reply all, enter your message. • If you selected Forward, specify the message recipients and add any additional text you want to include in the forwarded message. 4. Touch to send, or touch to save as a draft. 9.2.5 Customizing Your Gmail Settings In the mail list, touch Gmail. , and then touch More > Settings to customizing your 9.3 Talk Talk is Google’s instant messaging service.
3. After entering your message, touch Send. 9.3.5 Setting Notifications for New Instant Messages Whenever you receive an instant message, your mobile phone can play a sound, vibrate, or display an icon. To set up one of these handy notifications, start in the friends list, and then touch following: . Then touch Settings. Now choose from one of the Notifications Select the check box to receive a notification on the notification bar when you receive an instant message.
3. In the My Location section, select the Use wireless networks check box, the Use GPS satellites check box, or both. 9.4.2 Opening Maps On the Home screen, touch > Maps to open the application. 9.4.3 Searching for Places of Interest 1. On the map, touch , and then touch Search. 2. Enter the place you want to search for in the search box, and then touch the Search icon. 3. Your search results will then be displayed.
2. Enter a search keyword, and then touch the Search icon. 3. You will see a number of search results displayed below the notification bar. Scroll through the results and touch a video to watch it. 9.5.3 Sharing a Video From the video list on the YouTube screen, select a video clip and touch More > Share. 9.6 Play Store Android Market provides direct access to applications and games which you can download and install on your phone. 9.6.1 Opening Play Store 1. On the Home screen, touch > Play Store. 2.
phone is synchronizing, a data synchronization icon will be shown in the notification bar. 10.1 Managing Your Accounts You can synchronize contacts, email, and other information on your mobile phone with multiple Google accounts or other kinds of accounts, depending on the applications installed on your mobile phone. For example, you can start by adding your personal Google account, so your personal email, contacts, and calendar are always available.
10.1.2 Adding an Exchange Account 1. On the Home screen, touch > Settings > Accounts & sync. 2. Touch Add account > Corporate. 3. Follow the instructions and enter the required information about the exchange account you want to add. For details, contact the server administrator. 4. Touch Next to display the Account options screen. Configure the synchronization settings for this account. 5. Touch Next to finish configuring the account settings.
10.2.1 Configuring General Synchronization Settings On the Accounts & sync settings screen, do the following: • Select or clear the Background data check box to control whether applications and services can transmit data when you are not working with them directly (that is, when they are running in the background). If you clear this option, Gmail stops receiving new mail, Calendar stops synchronizing events, and so on, until you touch the Refresh option or send an email.
1. On the Home screen, touch > Traffic Manager. 2. Enter the monthly traffic limit in the Monthly package field. 3. Touch Next. 4. Enter the notification thresholds in the Set daily traffic reminder and Set monthly traffic reminder fields. 5. Touch Finish. 6. You can now view your data traffic in Traffic statistics. You can modify the monthly traffic limit and notification thresholds in Settings. 11.
11.3.1 Opening Calendar Touch > Calendar to open the application. When you add a Google Account that includes a calendar service to your phone, you can access Google calendar: Touch Calendars. , and then touch More > 11.3.2 Creating an Event 1. In any calendar view, touch details screen. , and then touch New event to open the Event If you have more than one calendar, select the calendar where you want to save the event. 2. Enter the event name.
11.3.4 Setting Synchronization and Display 1. In any calendar view, touch . Then touch More > Calendars. The Calendars screen displays all the calendars you have added or subscribed to for each account that is configured to synchronize events to your phone, organized by account. (Calendars for accounts you have configured not to synchronize Calendar events are not included in the list.) 2. Touch the icon next to a calendar to change whether it is synchronize and whether it is displayed.
11.4.2 Creating a Folder 1. On the File Manager screen, access the directory in which you want to create a new folder. 2. Touch to open the options panel, and then touch New folder. 3. Enter the name of the new folder in the text box. 4. Touch Save. 11.4.3 Moving or Copying a File 1. On the File Manager screen, press touch Multiselect. to show the options panel, and then 2. Touch the file or folder you want to move or copy. When a file or a folder is selected, a check mark will appear.
You can only compress files and folders into .zip files, but can extract both .zip and .rar files. Compressing Files 1. On the File Manager screen, Touch , and then touch Multiselect. 2. Select the files or folders you want to compress. When a file is selected, a check mark will appear. To select all files and folders, touch Select all or Unselect all to cancel the selection. 3. Touch Compress. 4.
Clock opens with the date and time displayed on your Home screen wallpaper, along with your local weather and other useful information. 11.5.2 Opening the Alarms On the Clock screen, touch to open the Alarms. Adding an Alarm 1. On the alarm list screen, touch Add alarm. 2. Set the alarm, and then touch Done. Setting an Alarm 1. On the alarm list screen, touch one of the alarms on the screen. 2. Touch Time to set the time of the alarm. 3. Touch Repeat to set the days when you want the alarm to sound. 4.
11.6.2 Switching Between Basic and Advanced panel On the Calculator screen, flick the screen to the right or left to switch between Advanced panel and Basic panel. 11.7 Notepad Notepad features a simple text processor. In the note list, you can add, edit, and delete notes. 1. On the Home screen, touch > Notepad to open the application. 2. Touch , and then touch Add note to create a note. 3. Touch to save the note. 12 Managing Your Mobile Phone To configure your mobile phone, touch > Settings. 12.
6. Select or clear the Use 24-hour format check box to switch between 24-hour and 12-hour formats. 7. Touch Select date format to select how you want the date to display on your mobile phone. 12.2 Setting the Display 12.2.1 Adjusting the Screen Brightness 1. On the Settings screen, touch Display > Brightness. 2. Drag the slider left to make the screen darker, or right to make it brighter. 3. Touch OK to save the adjustment. 12.2.
3. Touch OK to save the adjustment. 12.3.3 Changing the Phone Ringtone 1. On the Settings screen, touch Sound > Phone ringtone. 2. Touch the ringtone you want to use, and then touch OK. The ringtone plays when selected. 12.3.4 Changing the Message Ringtone 1. On the Home screen, touch 2. In the message list, touch > Messaging. > Settings > Select ringtone. 3. Touch the ringtone you want to use, and then touch OK. The ringtone plays when selected. 12.4 Setting Phone Services 12.4.
12.5 Configuring Text-to-Speech Use the Text-to-Speech settings to configure the Android text-to-speech synthesizer, for applications that can take advantage of this feature. 12.5.1 Installing Voice Data 1. On the Settings screen, touch Voice input & output > Text-to-speech settings > Install voice data. 2. If your mobile phone does not have speech synthesizer data installed, connect to Android Market and let it guide you through the process of downloading and installing the data. 3.
12.6.2 Protecting Your Mobile Phone with a Numeric PIN You can set up a numeric PIN to lock your phone. 1. On the Settings screen, touch Location & security > Set up screen lock > PIN. 2. Enter at least four characters. 3. Touch Continue. 4. Enter the same characters again and touch OK. To change your PIN, touch Location & security > Change screen lock. 12.6.
2. Touch an application, and then touch Uninstall. 12.7.3 Moving an Application to the microSD Card Some applications are designed to be stored on your phone’s USB storage or microSD card (depending on the model of your phone), rather than in its internal storage. Others are designed so you can change where they are stored. You may find it helpful to move large applications off your internal storage, to make more room for other applications that do not offer the option. 1.
12.8.2 Restoring Factory Data If you reset your phone to the settings that were configured at the factory, all of your personal data stored on the phone, including information about your Google Account, any other accounts, your system and application settings, and any applications you have downloaded will be erased. Resetting the phone does not erase any system software updates you have downloaded or any files on your microSD card, such as music clips or photos. 1.
13 Appendix 13.1 FAQ How Can I Use a microSD Card to Import Contacts to My Phone from a Different Mobile Phone? Your mobile phone only supports contact files in the .vcf format. 1. Save the contacts you want to import to your mobile phone to a microSD card as a .vcf file. 2. Insert the microSD card into your mobile phone and find the .vcf file using the File Manager. 3. Touch the .vcf file. The phone displays a prompt asking whether you want to import the contacts. 4. Touch OK to import the contacts.
How do I return to the calling screen? While on a call, if you’re on another screen, you can touch the notification bar, and drag downwards to open the notifications panel. Then touch the current call notification to return to the calling screen. How do I create an application shortcut on the Home screen? Touch and hold an application icon on the application screen until the Home screen is displayed. Then drag the icon where you want it to go and release your finger.
Manufactured under license from DTS Licensing Limited. DTS, the Symbol, & DTS and the Symbol together are registered trademarks & DTS Envelo | Headphone is a trademark of DTS, Inc. Product includes software. © DTS, Inc. All Rights Reserved. All the pictures in this guide are for your reference only. The actual appearance and display features depend on the mobile phone you purchase. Android is a trademark of Google Inc. Use of this trademark is subject to Google Permissions. © Huawei Technologies Co., Ltd.
Guía del usuario HUAWEI Ascend Q Bienvenido a HUAWEI
Contenido 1 Lectura previa a las operaciones...........................................1 1.1 Precauciones de seguridad ......................................................... 1 1.2 Seguridad de datos e información personal ................................ 2 1.3 Aviso legal ................................................................................... 4 2 Introducción ...........................................................................7 2.1 2.2 2.3 2.4 2.5 2.6 2.7 2.8 Aspecto.................
4.7 Cómo comunicarse con los contactos ....................................... 27 4.8 Eliminación de contactos ........................................................... 27 4.9 Redes sociales .......................................................................... 28 4.10 Administración de Grupos ....................................................... 29 4.11 Asociación y separación de contactos..................................... 30 4.12 Envío de contactos ..............................................
10 Sincronización de información...........................................56 10.1 Administración de las cuentas ................................................. 57 10.2 Personalización de la sincronización de cuentas .................... 58 11 Uso de otras aplicaciones..................................................60 11.1 11.2 11.3 11.4 11.5 11.6 11.7 Gestor de tráfico ...................................................................... 60 Cop seg de tod los arch....................................
1 Lectura previa a las operaciones 1.1 Precauciones de seguridad Lea las precauciones de seguridad cuidadosamente para garantizar el uso correcto del teléfono móvil. No lo golpee, no lo deje caer ni lo perfore. Evite que el teléfono móvil se caiga, no lo doble ni ejerza presión sobre éste. No utilice el teléfono móvil en ambientes húmedos, por ejemplo, en un cuarto de baño. Evite mojar o lavar el teléfono móvil con líquidos.
No coloque el teléfono ni sus accesorios en recipientes con presencia de campos electromagnéticos de gran potencia. No coloque medios de almacenamiento magnético cerca del teléfono. La radiación del teléfono podría borrar la información almacenada en éstos. No exponga el teléfono a temperaturas elevadas ni lo utilice en lugares con presencia de gases inflamables, por ejemplo, en gasolineras. Mantenga el teléfono móvil y sus accesorios fuera del alcance de los niños.
• En forma periódica, realice un backup de la información personal almacenada en la tarjeta de memoria o en la memoria del dispositivo. Si cambia de dispositivo, asegúrese de transferir o eliminar toda la información personal del dispositivo anterior. • Ante la duda de la existencia de virus en correos electrónicos o mensajes enviados por un desconocido, elimínelos sin abrirlos.
1.3 Aviso legal Copyright © Huawei Technologies Co., Ltd. 2012 Todos los derechos reservados. Este documento no podrá ser reproducido ni transmitido de ninguna manera sin el consentimiento previo escrito de Huawei Technologies Co., Ltd. El producto que se describe en este manual puede contener software cuyos derechos de autor pertenecen a Huawei Technologies Co., Ltd. y sus posibles licenciantes.
soporte técnico a los clientes que utilizan el software y las aplicaciones de terceros, ni será responsable respecto de las funciones de dicho software y dichas aplicaciones. La provisión de servicios de aplicaciones y software de terceros puede interrumpirse en forma temporal o permanente en cualquier momento. Huawei Technologies Co., Ltd. no garantiza el suministro del mismo contenido o servicio durante el período de disponibilidad de éstos.
EMERGENTES, NI POR EL LUCRO CESANTE, LA PÉRDIDA DE OPORTUNIDADES COMERCIALES, LA PÉRDIDA DE INGRESOS, DE DATOS O DE BUEN NOMBRE, NI POR LA PÉRDIDA DE AHORROS PREVISTOS. LA RESPONSABILIDAD DE HUAWEI TECHNOLOGIES CO., LTD. DERIVADA DEL USO DEL PRODUCTO DESCRITO EN ESTE DOCUMENTO SE LIMITARÁ A LA SUMA ABONADA POR LOS CLIENTES AL ADQUIRIR ESTE PRODUCTO (ESTA LIMITACIÓN NO SE APLICARÁ A LA RESPONSABILIDAD POR LESIONES YA QUE LA LEY APLICABLE PROHÍBE DICHA LIMITACIÓN).
2 Introducción Las imágenes de este documento se presentan sólo a modo de referencia. Las funcionalidades de pantalla del teléfono adquirido pueden no coincidir con las descripciones de este documento y dependen de la versión de software del equipo. 2.1 Aspecto 2.1.
2.1.2 Funciones táctiles clave • Mantenga presionada esta tecla para encender el teléfono móvil. • Mantenga presionada esta tecla para abrir el menú Opciones de teléfono. • Presione esta tecla para bloquear la pantalla del teléfono móvil cuando éste se encuentre activo. • Presione esta tecla para volver a la pantalla principal. • Mantenga presionada esta tecla para activar el Reciente. Presione esta tecla para acceder al menú en la pantalla activa. • Presione esta tecla para volver a la pantalla anterior.
2. Conecte el extremo opuesto del cable USB al teléfono móvil. Luego, para iniciar la carga, inserte el cargador en un tomacorriente. Si el teléfono móvil está encendido durante la carga, el ícono de la batería muestra el progreso de la carga en la barra de notificaciones. Cuando el ícono de la batería cambia a , esto significa que el teléfono móvil está completamente cargado. Indicador de estado El color del indicador de estado muestra el estado de la batería del teléfono móvil.
• El tiempo necesario para cargar la batería en forma completa depende de la temperatura ambiente y de la antigüedad de la batería. • Cuando el nivel de carga de la batería es bajo, el teléfono da un aviso y muestra un mensaje en pantalla. Cuando la batería se haya descargado casi por completo, el teléfono se apagará en forma automática. 2.2.
El asistente de configuración permite: • Crear la cuenta o iniciar sesión en ésta • Tomar decisiones iniciales sobre cómo desea utilizar el teléfono móvil 2.3.3 Activación del inicio rápido 1. Presione > Configuraciones > Aplicaciones. 2. Seleccione la casilla de verificación Reinicio rápido. No active la función Reinicio rápido a bordo de una aeronave. 2.3.4 Cómo apagar el teléfono móvil 1. Mantenga presionada la tecla para acceder al menú Opciones de teléfono. 2. Presione Apagar.
2.4.2 Rotación de la pantalla del teléfono móvil La orientación de la mayoría de las pantallas cambiará de modo horizontal a modo vertical al rotar el teléfono. En la pantalla principal, presione > Config. > Mostrar > Rotación aut. de pant. para deshabilitar esta función. 2.5 Bloqueo y desbloqueo de la pantalla 2.5.1 Bloqueo de la pantalla • Cuando el teléfono móvil está encendido, presione para bloquear la pantalla. Aunque la pantalla esté bloqueada, se pueden recibir mensajes y llamadas.
2.6 Pantalla principal 10:23 Barra de notificaciones: Muestra los recordatorios e íconos de estado del teléfono. Deslice el dedo hacia abajo para acceder al panel de notificaciones. Área de visualización: Área principal de visualización del teléfono. Pantalla principal e indicador de extensión. Accesos directos Presione aquí para ver todas las aplicaciones. Mantenga presionado uno de los accesos directos hasta que el teléfono móvil vibre.
14 Bluetooth activado Área de acceso inalámbrico Wi-Fi portátil activada Altavoz activado Alarma activada Modo vibración Tono silenciado Llamada silenciada Cargando batería Batería llena Batería extremadamente baja Llamada en curso Llamada perdida Llamada en curso con auriculares Bluetooth Nuevo correo de Gmail Mensaje de texto o multimedia nuevo Problema con la entrega del mensaje de texto o multimedia Mensaje de chat nuevo Correo electrónico nuevo Correo de voz nuevo Conectado a una PC
Preparando la tarjeta microSD Más notificaciones no desplegadas en pantalla Sincronizando datos No se pudo realizar la sincronización Conectado a una VPN Función tethering USB activada Desconectado de la VPN 2.6.2 Panel de notificaciones El teléfono móvil notificará al usuario la recepción de un mensaje nuevo o la existencia de un evento próximo. El panel de notificaciones también informa al usuario acerca de las alarmas y configuraciones; por ejemplo, cuando se activa la función Desvío de llamadas.
2.6.3 Cómo ver otras partes de la pantalla principal 10:23 Deslice el dedo hacia la izquierda o derecha sobre la pantalla principal. 2.6.4 Personalización de la pantalla principal Cómo agregar elementos a la pantalla principal 1. Mantenga presionada un área en blanco de la pantalla principal hasta que aparezca en pantalla el menú Seleccionar acción. También es posible presionar > Agregar en la pantalla principal para visualizar el menú Seleccionar acción. 2.
2. Sin levantar el dedo del elemento, arrástrelo hasta la papelera. Cuando el elemento y la papelera se pongan de color rojo, el elemento podrá ser eliminado. 3. Libere el elemento para eliminarlo de la pantalla principal. 2.6.5 Accesos directos de servicio 1. Abra la barra de notificaciones. 2. Presione que aparece en la parte superior de la pantalla para activar o desactivar los servicios de datos. También es posible presionar los servicios correspondientes. , , o para activar o desactivar 2.6.
2.7 Pantalla de aplicaciones La pantalla de aplicaciones incluye íconos de todas las aplicaciones del teléfono. Es posible presionar aplicaciones. en la pantalla principal para acceder a la pantalla de 2.7.1 Cómo mover íconos de la pantalla de aplicaciones 1. En la pantalla de aplicaciones, presione . 2. Mantenga presionado el ícono de la lista de aplicaciones que desea mover hasta. 3. Sin levantar el dedo, arrastre el ícono hasta la posición deseada y luego suéltelo.
2.8.2 Uso de la tarjeta microSD como dispositivo de almacenamiento masivo USB Para transferir todos los archivos favoritos de música e imágenes de la PC a la tarjeta microSD del teléfono móvil, configure la tarjeta microSD como dispositivo de almacenamiento masivo USB. 1. Conecte el teléfono móvil a la PC con el cable USB provisto. La PC detectará la tarjeta microSD como un disco de almacenamiento extraíble. 2. Abra la barra de notificaciones y luego presione la opción conectado al USB. 3.
3.1 Cómo realizar llamadas Para hacer una llamada, es posible utilizar la aplicación Teléfono o seleccionar un número de teléfono desde Contactos o Registro de llamadas. Durante una llamada en curso, se puede presionar para utilizar otras funciones. Para volver a la pantalla de la llamada, deslice la barra de notificaciones hacia abajo y presione Llamada actual. Asegúrese de no bloquear el micrófono, que está en la parte inferior del teléfono, para que la voz se escuche en forma clara durante la llamada.
3. Presione para marcar el número de teléfono. 3.1.3 Cómo realizar llamadas desde Registro de llamadas 1. Si ya se encuentra dentro de las opciones Contactos o Teléfono, presione la pestaña Registro de llamadas. 2. Presione a la derecha de la entrada del registro para marcar el número correspondiente. Si mantiene presionada la entrada del registro, se abrirá el menú de opciones. 3.2 Cómo responder o rechazar llamadas 3.2.
3.2.2 Cómo finalizar llamadas Durante el transcurso de una llamada: presione Finalizar para cortar la comunicación. 3.2.3 Cómo rechazar llamadas entrantes Arrastre hacia la izquierda para rechazar la llamada. También es posible arrastrar hacia arriba la barra que se encuentra en la parte inferior de la pantalla para rechazar la llamada y enviar un mensaje al usuario llamante. 3.3 Otras operaciones que se pueden realizar durante una llamada 3.3.
1. Para iniciar una llamada en conferencia, marque el número del primer usuario en participar. Después de que el primer usuario se haya conectado, mantenga la conexión abierta, presione Agreg. Llam.. 2. Ingrese el número de teléfono de la siguiente persona que desea agregar a la , o seleccione a alguna persona de Registro de conversación y presione llamadas. o Contactos. De esta forma, se retiene en forma automática la llamada del primer usuario en participar. 3.
4. Presione Nuevo contacto o desplácese por la lista de contactos, y presione el nombre de un contacto existente. 3.5 Uso del modo avión En algunos lugares, se le pedirá que desactive las conexiones inalámbricas del teléfono. En lugar de apagar el teléfono, se puede utilizar en Modo avión. 1. Mantenga presionada la tecla . 2. Presione Modo avión en el menú de opciones. 3.6 Operación TTY 3.6.1 Cómo utilizar el dispositivo TTY El Teletipo (TTY) es un dispositivo telegráfico.
4 Contactos La aplicación Contactos permite guardar y administrar información, como los números de teléfono y las direcciones de los contactos. Después de guardar la información de contactos en el teléfono móvil, el usuario podrá acceder con facilidad a los contactos con los que se desee comunicar. 4.1 Cómo acceder a Contactos Si aún no ha agregado ningún contacto al teléfono móvil, Contactos mostrará un mensaje con sugerencias sobre cómo comenzar a agregar la información de los contactos.
4.4 Índice de contactos Es posible crear un índice de los Contactos para buscar en forma rápida el contacto deseado. 1. En la pantalla principal, presione > Contactos. 2. Presione o mueva cualquier letra del alfabeto para crear una lista de todos los contactos que empiezan con la letra elegida. 4.5 Búsqueda de contactos 1. En la lista de contactos, presione > Buscar. 2. Ingrese el nombre del contacto que está buscando.
4.7 Cómo comunicarse con los contactos Desde la pestaña Contactos o Favoritos, es posible llamar o enviar un mensaje de texto (SMS) o un mensaje multimedia (MMS) al número de teléfono predeterminado de un contacto en forma rápida. También es posible acceder a los detalles para visualizar la lista de todos los modos en los que se puede comunicar con ese contacto. Esta sección describe cómo comunicarse con un contacto cuando se accede a la lista de contactos. 4.7.
4.9 Redes sociales Con el término "Redes sociales", se denomina al cliente que integra funciones de servicio de redes sociales (SNS) de Facebook y Twitter. Utilizando Flujos, las cuentas SNS pueden vincularse con los Contactos. Para acceder a la pantalla Flujos, presione > Redes sociales. También es posible presionar Contactos y luego deslizar el dedo hacia la izquierda para pasar a la pantalla Flujos. 4.9.1 Inicio de sesión en una cuenta 1.
4.9.4 Cómo agregar el widget Flujos a la pantalla principal Mantenga presionada el área en blanco de la pantalla principal. En el menú que aparece en pantalla, presione Agregar widget > Redes sociales para agregar Flujos a la pantalla principal. Por medio de este widget, es posible acceder en forma rápida a Flujos, o buscar directamente las últimas eventos y actualizar el estado de sus amigos en la pantalla principal. 4.10 Administración de Grupos 4.10.1 Creación de grupos 1.
4.10.3 Cómo agregar contactos a los Grupos Para agregar un contacto a los grupos, se pueden llevar a cabo los siguientes pasos: • Mantenga presionado el contacto que desee agregar a Grupos. Luego presione Agregar a grupos. • Al editar un grupo, presione y luego Agregar miembro para seleccionar los contactos que desea agregar al grupo. 4.11 Asociación y separación de contactos Es posible que los contactos se dupliquen si se importan de los siguientes modos: • Agregando una cuenta, como una cuenta de Gmail.
4.11.2 Separación de los contactos Si la información de los contactos de diferentes fuentes se asoció por error, es posible separar los contactos. 1. En la pantalla principal, presione > Contactos. 2. Presione el contacto asociado que desea separar. 3. Presione la opción de separación de contactos. 4. Seleccione el contacto que desee separar del contacto asociado. El contacto asociado se mostrará como dos contactos separados en Contactos. 4.
5.1.1 Selección de un modo de ingreso 1. Mantenga presionado un campo de texto hasta que el menú Editar texto aparezca en pantalla. 2. Presione Selec. método de ingreso. 3. Seleccione el modo de ingreso. El panel del teclado aparecerá en pantalla automáticamente. 5.1.2 Uso del teclado Android q w e r t y u i a s d f g h j o p k l z x c v b n m ?123 ... .... :-) ... Presione esta tecla para borrar el carácter que se encuentra a la izquierda del cursor.
5.1.4 Cómo usar el teclado del teléfono Cursor: Para ingresar un carácter que se encuentra en la parte superior de una tecla, presione primero y luego la tecla deseada. Para ingresar sólo los caracteres que aparecen en la parte superior de una tecla, Cursor: presione dos veces antes de tipear el texto. Presione nuevamente para volver al modo de ingreso de texto en minúsculas. Para ingresar una letra en mayúsculas, Cursor: presione primero y luego la tecla.
6 Mensajería La aplicación Mensajería permite el intercambio de mensajes de texto (SMS) y de mensajes multimedia (MMS) con quienes utilizan teléfonos que soportan SMS o MMS. Por medio de la aplicación Correo electrónico, es posible leer y enviar mensajes de correo electrónico. 6.1 SMS y MMS 6.1.1 Acceso a Mensajería Presione > Mensajería. 6.1.2 Creación y envío de mensajes de texto 1. Presione > Mensajería > Mensaje nuevo. 2.
6.1.3 Creación y envío de mensajes multimedia 1. Presione > Mensajería > Mensaje nuevo. 2. Ingrese un número de teléfono en el campo Para o presione un contacto desde Contactos o Grupos. para seleccionar 3. Presione el cuadro de texto de creación de mensajes para comenzar a ingresar el mensaje. 4. Presione para acceder al panel de opciones.Presione Agregar asunto para agregar el asunto del mensaje. Al realizar estos pasos, el teléfono móvil entrará en modo de mensajes multimedia. 5.
6.1.4 Cómo abrir y ver mensajes multimedia 1. En la lista de mensajes, presione el hilo de mensajes que desea ver. 2. Presione el mensaje multimedia para verlo. 6.1.5 Contestación de mensajes 1. En la lista de mensajes, presione el hilo de mensajes de texto o multimedia para abrirlo. 2. Presione el cuadro de texto para redactar el mensaje. Cuando haya finalizado, presione .
6.2.1 Cómo agregar cuentas de correo electrónico Cuando se utiliza la aplicación Correo electrónico por primera vez, se debe configurar la cuenta de correo electrónico. El asistente de configuración de correo electrónico guía al usuario durante la configuración de su cuenta. Se soporta una cantidad de sistemas de correo electrónico de uso generalizado.
4. Seleccione una ruta para guardar el adjunto y presione Advertencia. 6.2.4 Creación y envío de correos electrónicos 1. En la pantalla de cuentas de correo electrónico, mantenga presionada la cuenta que desea utilizar. 2. En la pantalla Bandeja de entrada, presione de opciones. y luego, Redactar en el panel 3. En el campo Para, ingrese el nombre o la dirección de correo electrónico del destinatario. 4. Ingrese el asunto del mensaje y redacte el mensaje.
nuevos y los detalles de los servidores que utiliza la cuenta para enviar y recibir correos electrónicos. Las configuraciones de entrada y salida de la cuenta dependen del tipo de servicio de correo electrónico que se esté utilizando. Se pueden ingresar los detalles necesarios en forma manual, aunque es posible que deba comunicarse con el proveedor de servicios de correo electrónico para obtener la información correcta. 1. Presione > Correo electrónico. 2.
2. Presione Redes inalám. y redes > Redes de celulares. 3. Seleccione la casilla de verificación Datos habilitados para activar la conexión de datos. 7.2 Wi-Fi La función Wi-Fi provee acceso inalámbrico a Internet por banda ancha. Para utilizar la función Wi-Fi en el teléfono móvil, se debe tener acceso a un punto de acceso inalámbrico (hotspot). El alcance de la señal Wi-Fi se ve afectado por los obstáculos que se le interpongan. 7.2.1 Activación de la función Wi-Fi 1. Presione > Config.. 2.
7.2.3 Uso compartido de la conexión de datos del teléfono como punto de acceso inalámbrico portátil 1. Presione > Config.. 2. Presione Redes inalám. y redes > Anclaje a red y pto. de acc. inalám. portátil. 3. Seleccione la casilla de verificación Zona activa Wi-Fi portátil para compartir la conexión de datos. Cuando se selecciona Zona activa Wi-Fi portátil, es posible presionar Conf. del pto. de acceso inalám. port. para cambiar el nombre de la red o configurar la seguridad de ésta. 7.2.
7.3.1 Conexión a una red inalámbrica por medio del botón WPS 1. Active la función Wi-Fi y luego acceda a la pantalla Configuración Wi-Fi. 2. Presione la opción Botón de conexión WPS. 3. Presione el botón WPS del punto de acceso Wi-Fi. Cuando el teléfono se conecta a la red, aparece un mensaje en pantalla. 7.3.2 Conexión a una red inalámbrica por medio del PIN WPS 1. Active la función Wi-Fi y luego acceda a la pantalla Configuración Wi-Fi. 2.
• Ventanas: presione esta opción para ver las vistas en miniatura de las ventanas del navegador. Puede pasar a otra ventana del navegador o abrir una ventana nueva en esta pantalla. • Actualizar: presione esta opción para actualizar la página web actual. • Adelante: presione esta opción para navegar hacia la próxima página web. • Más: presione esta opción para abrir otros menús y realizar operaciones de búsqueda, selección de texto, descarga y configuración. 7.4.2 Cómo abrir páginas web 1.
Cómo abrir marcadores 1. En la ventana del navegador, presione y luego presione Marcadores. En la pantalla Marcadores presione la pestaña Historial para ver las páginas que ha visitado, o presione la pestaña Más visitados para ver las páginas que ha visitado con mayor frecuencia. 2. Presione el marcador del sitio web que desea abrir. 7.4.5 Personalización de las configuraciones del navegador El navegador se puede personalizar según las preferencias de navegación del usuario.
• Perfil de manos libres (HFP): permite utilizar el dispositivo Bluetooth en modo manos libres. • Perfil de Auriculares (HSP): permite utilizar auriculares Bluetooth mono. • Perfil de Transferencia de Objetos (OPP): permite transferir archivos a través de una conexión Bluetooth. • Perfil Avanzado de Distribución de Audio (A2DP): permite utilizar auriculares Bluetooth estéreo.
3. Presione Desvincular para desconectarse del dispositivo. 8 Entretenimiento Además de ser un dispositivo de comunicación y un asistente personal, el teléfono móvil también provee una amplia gama de posibilidades de entretenimiento. Se pueden tomar fotografías, grabar clips de audio y video, y descargar y escuchar música. 8.1 Cómo tomar fotografías y grabar videos La cámara es una combinación de cámara fotográfica y grabadora de video, que se puede utilizar para capturar y compartir imágenes y videos.
8.1.2 Cómo tomar fotografías 1. Active la cámara y seleccione el modo cámara. 2. De ser necesario, modifique la configuración de la cámara. La vista previa cambia al modificar las configuraciones. 3. Encuadre la imagen que desea fotografiar en la pantalla de captura de imágenes. 4. Mantenga presionada la tecla . 5. Presione para tomar la fotografía. Las fotografías tomadas aparecen en pantalla un momento. Es posible tomar otras fotografías o ver fotografías ya tomadas. 8.1.
2. Presione el botón de la pantalla para realizar cualquiera de las siguientes acciones: • Presionar Compartir para enviar el video en un mensaje o publicarlo en línea. • Presionar Eliminar para eliminar el video. En la pantalla de reproducción de video, presione los controles para adelantar, retroceder, reproducir o pausar el video. 3. Si desea ver más videos, deslice el dedo hacia la izquierda o derecha sobre la pantalla. 8.
3. Seleccione Girar hacia la izquierda o Girar hacia la derecha. La imagen se guardará con la nueva orientación. 8.2.4 Cómo recortar una imagen 1. Cuando visualiza una imagen, presione para visualizar el panel de operaciones, y luego presione Más > Recortar. 2. Utilice la herramienta que permite recortar para seleccionar la parte de la imagen que desea recortar. • Arrastre la herramienta para recortar desde la parte interna para moverla.
9 Servicios de Google La disponibilidad de los servicios, las funciones y las aplicaciones de Google pueden variar según el país o el proveedor de servicios del que se trate. Cumpla con las disposiciones y leyes locales para utilizar dichos servicios, funciones y aplicaciones. Cuando se enciende el teléfono móvil por primera vez, presione un servicio de Google, como Talk, Gmail o Play Store y el dispositivo le pedirá que inicie sesión en su cuenta de Google.
cuentas y sincronización y presione Agregar cuenta para seleccionar el tipo de cuenta que desea agregar. 9.2 Gmail Gmail es el servicio de correo electrónico de Google basado en la Web. Durante la primera configuración del teléfono, se puede establecer el uso de una cuenta de Gmail existente o crear una cuenta nueva. La primera vez que se accede a la aplicación Gmail en el teléfono, la carpeta Bandeja de entrada contendrá los mensajes de la cuenta web Gmail. 9.2.
4. Una vez que haya finalizado la redacción del mensaje, presione . 9.2.4 Cómo contestar o reenviar correos electrónicos 1. Desde la lista de correo electrónico, presione el mensaje de correo electrónico que desee contestar o reenviar. 2. Presione para contestar. También es posible presionar Responder, Responder a todos o Reenviar. y luego 3. Lleve a cabo una de las siguientes acciones: • Si ha seleccionado Responder o Responder a todos, ingrese el mensaje que desee.
2. Ingrese la ID de mensajería instantánea de Talk o la dirección de Gmail del amigo que desee agregar. 3. Presione Enviar invitación. 9.3.3 Cómo aceptar invitaciones 1. Si ha invitado a alguien a chatear o si alguien le ha enviado una invitación para chatear, la invitación aparecerá en la lista de amigos. 2. Presione la invitación pendiente y luego, Aceptar. 9.3.4 Cómo iniciar una conversación por chat 1. En la lista de amigos, presione el nombre de un amigo. 2.
9.3.6 Cierre de sesión en Talk En la pantalla de la lista de amigos, presione de Talk. y luego Cerrar sesión para salir 9.4 Maps La aplicación Maps permite conocer la ubicación actual del usuario, ver el estado del tránsito en tiempo real (según la disponibilidad del lugar donde se encuentre), y obtener instrucciones detalladas para llegar a distintos destinos. Es posible ver imágenes satelitales, así como mapas de tránsito o de otro tipo con la ubicación actual u otras ubicaciones. 9.4.
2. Ingrese el punto de inicio del recorrido en el primer cuadro de texto y luego ingrese el punto de destino en el segundo cuadro de texto. 3. Presione el ícono correspondiente a automóvil, transporte público o a modo de a pie. 4. Presione Cómo llegar. Las instrucciones aparecerán en una lista. 5. Presione un elemento de las instrucciones de la lista para que se muestre en el mapa. 6. Cuando haya terminado de ver el mapa o de seguir las indicaciones, presione y luego Limpiar mapa para restablecer el mapa.
9.6 Play Store Android Play Store ofrece acceso directo a las aplicaciones y los juegos que se pueden descargar e instalar en el teléfono. 9.6.1 Acceso a Play Store 1. En la pantalla principal, presione > Play Store. 2. La primera vez que se accede a la aplicación Play Store, aparecerá en pantalla la ventana Condiciones del servicio de Google Play. Presione Aceptar para continuar. 9.6.
10.1 Administración de las cuentas Se pueden sincronizar contactos, correos electrónicos y otro tipo de información que se encuentra en el teléfono móvil con varias cuentas de Google o con otros tipos de cuentas, dependiendo de las aplicaciones instaladas en el teléfono. Por ejemplo, se puede comenzar por agregar la cuenta personal de Google, de manera que el correo electrónico, los contactos y el calendario estén siempre disponibles.
10.1.2 Cómo agregar una cuenta de Exchange 1. En la pantalla principal, presione > Config. > Cuentas y sincronización. 2. Presione Agregar cuenta > Corporativo. 3. Siga las instrucciones e ingrese la información requerida sobre la cuenta de exchange que desea agregar. Para obtener mayores detalles, comuníquese con el administrador del servidor. 4. Presione Siguiente para visualizar la pantalla Opciones de cuenta. Establezca las configuraciones de sincronización para esta cuenta. 5.
la copia de dicha información que aparece en la Web. Algunas cuentas sólo soportan sincronización unidireccional; es decir, la información del teléfono móvil es de sólo lectura. 10.2.
11 Uso de otras aplicaciones 11.1 Gestor de tráfico Gestor de tráfico permite ingresar el volumen total de tráfico correspondiente al paquete mensual 2G/3G y configurar los umbrales de notificación de tráfico. El equipo notificará al usuario cuando el valor de la utilización de tráfico alcance estos umbrales. 11.1.1 Uso de Gestor de tráfico Cuando se accede a Gestor de tráfico por primera vez, la aplicación solicitará el ingreso de los umbrales de notificación y del límite de tráfico mensual. 1.
3. Ingrese el nombre del archivo en el campo Nombre del archivo:. 4. En el campo Contenido de la copia de seguridad:, seleccione los contenidos de los que desee crear copias de seguridad. 5. Presione Backup para crear una copia de seguridad de los datos seleccionados. Para cancelar la creación de copias de seguridad, presione Cancelar. 11.3 Calendario Utilice el Calendario para crear y administrar eventos, reuniones y citas.
4. Configure la fecha y hora del recordatorio del evento en Recordatorios, y luego especifique en Repetición si el recordatorio se debe repetir y la frecuencia de repetición. 5. Presione Listo. Para crear un evento rápidamente en la vista Día, Semana o Mes, mantenga presionado un intervalo de tiempo vacío y luego presione Nuevo evento. Se mostrará la pantalla de detalles del evento nuevo junto con la fecha y el intervalo de tiempo seleccionados en los campos Desde y Hasta. 11.3.
11.3.5 Personalización de las configuraciones del calendario En cualquier vista del calendario, presione . Luego presione Más > Configuraciones y seleccione entre las siguientes opciones: • Ocultar eventos rechazados: seleccione esta opción para ocultar eventos de los cuales ha rechazado invitaciones. • Configurar alertas y notificaciones: presione esta opción para configurar recordatorios de los eventos, para recibir una notificación o para desactivar la notificación de eventos en el teléfono móvil.
11.4.3 Cómo mover o copiar archivos 1. En la pantalla Gestor de archivos, presione opciones y luego presione Selec múlt. para acceder al panel de 2. Presione el archivo o la carpeta que desea mover o copiar. Cuando se selecciona un archivo o una carpeta, aparecerá una marca de verificación. Para seleccionar todos los archivos, presione Selec. todo para seleccionar todos los archivos de una carpeta (presione Des. selec. para cancelar la selección). 3.
2. Seleccione los archivos o las carpetas que desea comprimir. Cuando se seleccione un archivo, aparecerá una marca de verificación. Para seleccionar todos los archivos y las carpetas, presione Selec. todo. Presione Des. selec. para cancelar la selección. 3. Presione Comprimir. 4. Seleccione la ruta de almacenamiento y el nombre del archivo, y luego presione Aceptar para comenzar a comprimir los archivos y las carpetas. Extracción de archivos 1. Mantenga presionado el archivo comprimido. 2.
Cómo agregar alarmas 1. En la pantalla de las listas de alarmas, presione Agregar alarma. 2. Configure la alarma y luego presione Listo. Configuración de alarmas 1. En la pantalla de listas de alarmas, presione una de las alarmas. 2. Presione Hora para configurar la hora de la alarma. 3. Presione Repetir para configurar los días en los que desea que suene la alarma. 4. Presione Tono para seleccionar un tono de timbre para la alarma. 5.
11.7 Bloc de notas Bloc de notas es un simple procesador de texto. En la lista de notas, se pueden agregar, editar y eliminar notas. 1. En la pantalla principal, presione aplicación. > Bloc de notas para acceder a la 2. Presione y luego presione Agregar nota para crear una nota. 3. Presione para guardar la nota. 12 Administración del teléfono móvil Para configurar el teléfono móvil, presione la opción > Config.. 12.
7. Presione Sel. el formato de fecha para seleccionar la forma en que se mostrará la fecha en el teléfono móvil. 12.2 Configuración de la pantalla 12.2.1 Ajuste del brillo de la pantalla 1. En la pantalla Configuración, presione Mostrar > Brillo. 2. Arrastre el deslizador hacia la izquierda para oscurecer la pantalla, o hacia la derecha para aumentar el brillo. 3. Presione Aceptar para guardar el ajuste realizado. 12.2.
2. Arrastre el deslizador hacia la izquierda para bajar el volumen o hacia la derecha para subirlo. 3. Presione Aceptar para guardar el ajuste realizado. 12.3.3 Cambio del tono de llamada del teléfono 1. En la pantalla Configuración, presione Sonido > Tono de llamada del tel.. 2. Presione el tono de llamada que desea utilizar, y luego presione Aceptar El tono de llamada se escuchará al ser seleccionado. 12.3.4 Cambio del tono de timbre para mensajes 1. En la pantalla principal, presione 2.
Consulte al proveedor de servicios inalámbricos sobre el costo del servicio de roaming de datos. 12.4.3 Desactivación del servicio de datos 1. En la pantalla Configuración, presione Redes inalám. y redes > Redes de celulares. 2. Deseleccione la casilla de verificación Datos habilitados. 12.5 Configuración de la función texto a voz Se puede utilizar la función de configuración de texto a voz para configurar el sintetizador de texto a voz Android, para las aplicaciones que pueden hacer uso de esta función.
12.6 Protección del teléfono móvil 12.6.1 Protección del teléfono móvil por medio del bloqueo de pantalla Para brindar mayor seguridad a los datos, se puede bloquear la pantalla y/o solicitar un patrón de desbloqueo de la pantalla cada vez que el teléfono móvil se enciende o sale del modo de suspensión. 1. En la pantalla Configuración, presione Ubicación y seguridad > Configurar bloqueo de pantalla > Patrón. 2.
12.6.3 Desbloqueo del teléfono móvil en caso de no recordar el patrón de bloqueo de la pantalla Si ya ha creado una cuenta en Google, puede desbloquear el teléfono móvil utilizando uno de los siguientes métodos. • Después de ingresar una secuencia equivocada cinco veces seguidas, aparecerá en pantalla el botón ¿Olvidaste el patrón? Presione este botón para ingresar en la interfaz de la cuenta de Google. Después de ingresar la contraseña de la cuenta de Google, podrá restablecer el patrón de desbloqueo.
12.7.3 Cómo mover una aplicación a la tarjeta microSD Algunas aplicaciones están diseñadas para ser almacenadas en la tarjeta microSD o en el dispositivo USB del teléfono (dependiendo del modelo del teléfono) y no en el dispositivo interno de almacenamiento. Otras están diseñadas para poder cambiar el lugar de almacenamiento. Es posible que le sea útil eliminar aplicaciones de gran tamaño de su dispositivo de almacenamiento interno para crear espacio para otras aplicaciones que no ofrezcan esta opción. 1.
12.8 Restablecimiento de las configuraciones de fábrica del teléfono móvil 12.8.1 Copia de seguridad de los datos Se puede realizar una copia de seguridad de las configuraciones del teléfono móvil en los servidores de Google mediante una cuenta de Google. En caso de reemplazar el teléfono móvil, las configuraciones de las que se hizo copia de seguridad se transferirán al teléfono nuevo la primera vez que se inicie sesión en la cuenta de Google. 1. En la pantalla Configuración, presione Privacidad. 2.
12.10 Actualización en línea El teléfono móvil viene equipado con la función de actualización en línea. Cuando exista una nueva versión de software, se visualizará la información respectiva y se recibirá un aviso de actualización. También es posible presionar Configuración > Acerca del teléfono > Actualización en línea para verificar si hay nuevo software disponible. Al actualizar: 1. Haga una copia de seguridad de la información personal.
contactos. ¿Cómo se puede evitar que cambie la orientación de la pantalla en forma automática al rotar el teléfono? En la pantalla principal, presione para deshabilitar esta función. > Config. > Mostrar > Rotación aut. de pant. ¿Cómo se configura el patrón de desbloqueo? En la pantalla principal, presione > Config. > Ubicación y seguridad > Configurar bloqueo de pantalla > Patrón.
Fabricado bajo licencia de DTS Licensing Limited. DTS, el Símbolo, y DTS y el Símbolo en conjunto son marcas comerciales registradas, y DTS Envelo | Headphone es una marca comercial de DTS, Inc. Producto incluye software. © DTS, Inc. Todos los derechos reservados. Las imágenes de este documento se presentan sólo a modo de referencia. El aspecto y la presentación reales dependen del teléfono móvil adquirido. Android es marca registrada de Google Inc.