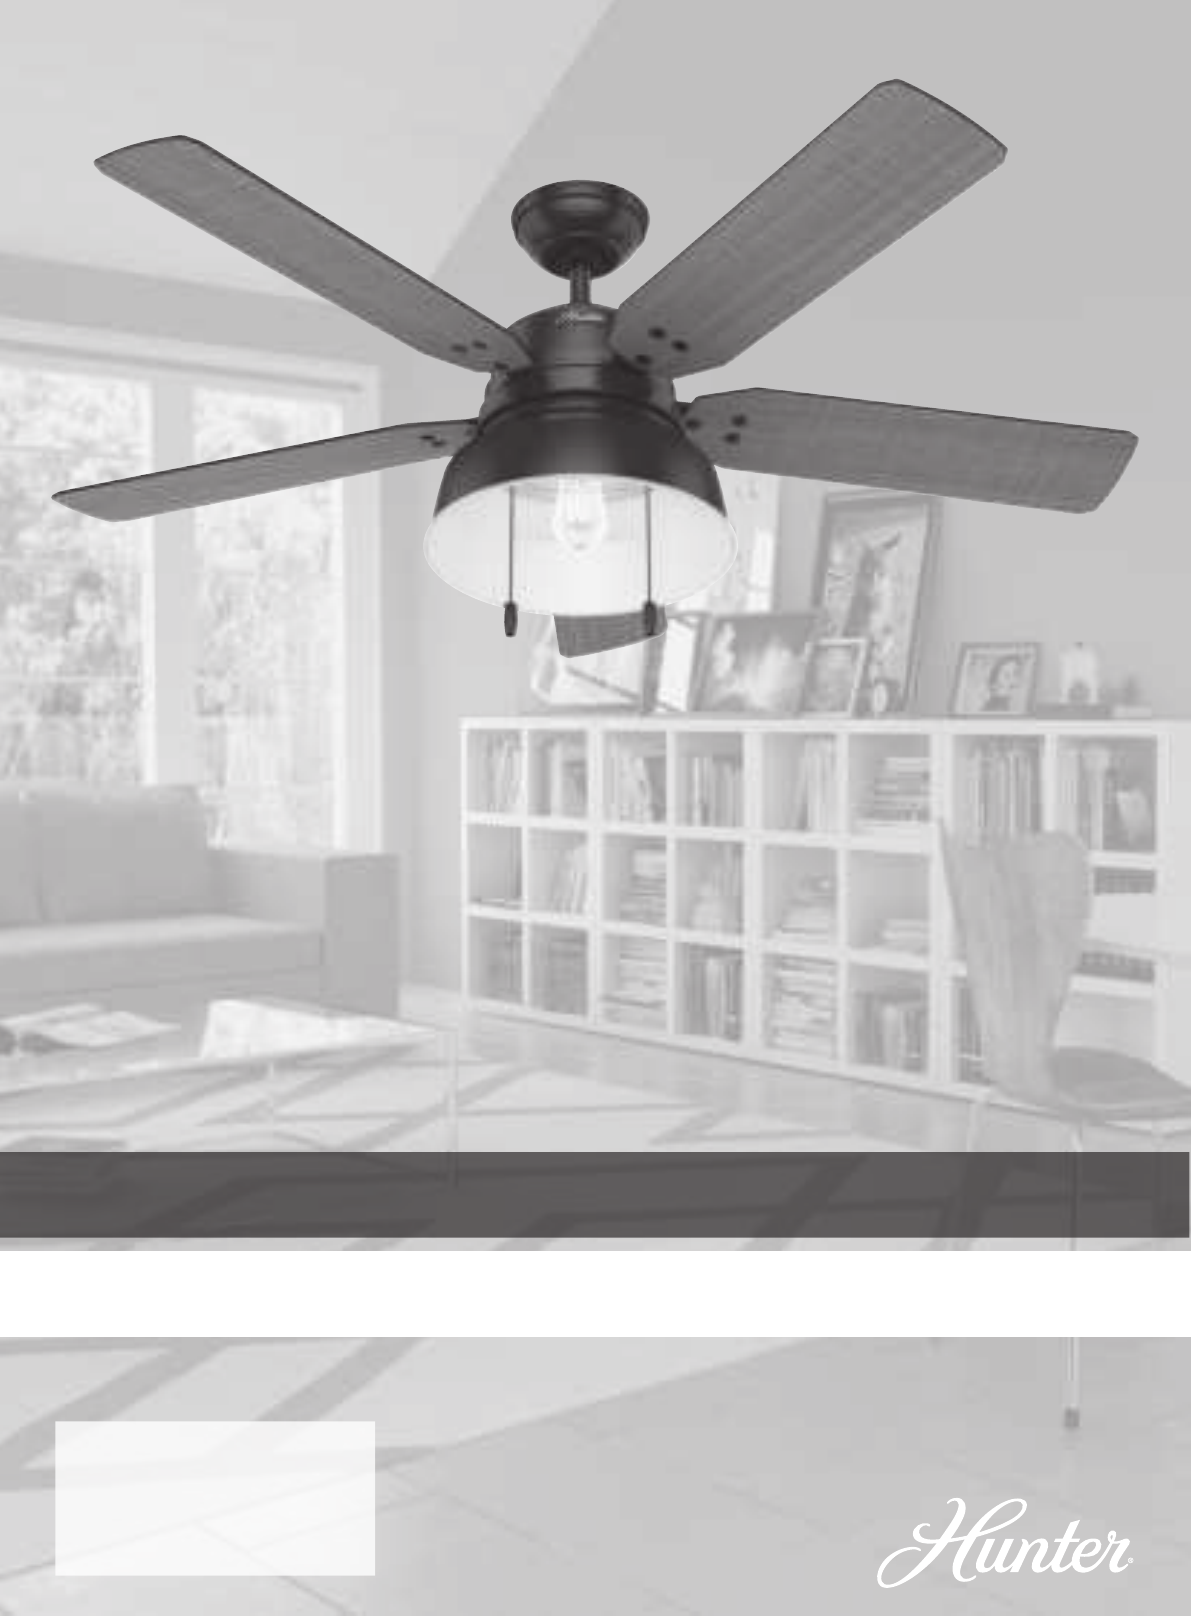
Mill Valley Collection Installation Manual Model: 59307 Matte Black 59308 Brushed Slate 59309 Red 50252 Indigo Blue Fan weight ±2 lbs: 23.0 lbs (10.5 kg) ©2019 Hunter Fan Co.
Congratulations on purchasing your new Hunter® ceiling fan! The ceiling fan you purchased will provide comfort and performance in your home or office for many years. This instruction manual contains complete instructions for installing and operating your fan. We are proud of our work and appreciate the opportunity to supply you with the best ceiling fan available anywhere in the world. We are here to help! This Instruction Manual is designed to make installation as simple as possible.
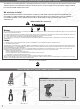
Here is what comes in your box: 1886 Hunter Pro Tip: We recommend that you pull everything out of the box and lay it out. We have grouped the drawn components below with the hardware you’ll need for those parts. The screws below are drawn to scale to make it easier to identify what piece of hardware is needed to install each component. Do not discard the hardware bags or mix parts from different bags. Make note of the symbol printed on each hardware bag.
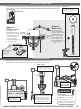
1886 Choosing the Right Installation Location You probably bought this fan with a location in mind. Let’s check below to make sure it is a good fit. Check the room dimensions: Check the outlet box: You must be able to secure the fan to building structure or fan-rated outlet box.
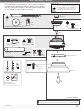
1886 Installing the Ceiling Bracket You have two options for installation. Pick which one works best for your location. Remove any existing bracket prior to installation. Only use the provided Hunter ceiling bracket that came in your fan’s box. Hunter Pro Tip: The machine screws are the ones that came with your outlet box.
1886 Hanging the Fan S li d e c a n o p y ove rd o wn ro d NOTICE an d To prevent damage to fan, ALWAYS lift holding either the fan housing or the downrod. w i re s . Place the downrod ball into the slot in the ceiling bracket. Progress Check: Your fan should look like this.
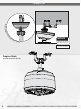
1886 Wiring the Fan We know wiring is hard. Let’s make it easier. Follow these steps to get your fan wired quickly and safely. Follow the route below that best matches your wall switch setup. If you are unfamiliar with wiring or uncomfortable doing it yourself, please contact a qualified electrician. You are going to need these: Hunter Pro Tip: Here is how to connect the wires: Push the bare metal ends of the wires together and slide a wire nut over them. Then, twist the wire nut clockwise until tight.
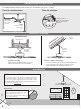
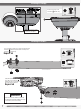
1886 Installing the Canopy Insert the two canopy screws hardware bag. found in the x2 BAG Canopy Screw op Fi t t h e c a n yi n pla ce as s h o w n. Lift the canopy into place so that the screw holes are aligned. Installing the Blades: Secure each blade to a blade iron as shown using the blade nuts, found in the hardware bag, and the blade assembly screws, found in the hardware bag.
1886 Preparing the Light Fixture Follow these steps to prepare the light fixture for installation. x3 KEEP Fixture Screw Repeat x2 Remove the pre-installed fixture screws from the light kit assembly. Save the screws. It will be needed for light kit installation. Remove and discard the plastic connectors from the ends of the two pull chains. Note: The screws were installed for shipping purposes only. Carefully remove the light kit assembly from the light fixture hood and set the light fixture aside.
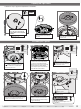
1886 Installing the Bulbs and Glass Tighten all screws securely by hand. Lift the shade and attach it to the upper switch housing using the thumbscrews. Install the included bulb into the socket. When necessary, replace with bulb of same wattage. NOTE: Check to ensure proper engagement. Installing the Pull Chains The fan pull chain controls the speed: from high to off. The light pull chain controls the light fixture: on and off.
1886 Troubleshooting Fan Doesn’t Work Excessive Wobbling • Make sure power switch is on. • Make sure the blades are properly installed on the blade iron posts. • Check the circuit breaker to ensure the power is turned on. • Turn the power off, support the fan carefully, and check that the hanger ball is properly seated. • Make sure the blades spin freely. • Turn off power from the circuit breaker, then loosen the canopy and check all the connections according to the wiring diagram.
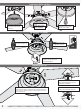
1886 Downrod If you need a different downrod length follow these steps: Follow steps 1-5 to remove standard downrod pipe 1 10 2 3 9 4 8 Follow steps 6-10 to reassemble with new downrod 5 7 6 WARNING FAN FALL HAZARD To prevent SERIOUS INJURY or DEATH: • ALWAYS follow the downrod assembly instructions exactly. • VERIFY the downrod is assembled correctly by firmly pulling on the hanger ball.