
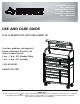
Instructions / Assembly
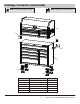


Assembly
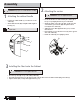
1
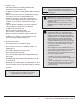
Attaching the cabinet handle
□ Position the cabinet handle (C) over the holes on the
cabinet (B).
□ Attach with the bolts (BB) and tighten with supplied
hex key (CC).
NOTE:
The holes in the cabinet are tapped and do not
require nuts.
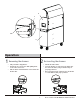
2
3
6
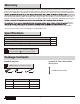
□ Be sure the drawers are locked and lay the cabinet (B) on
its top. Use packaging material to protect the finish.
□ Attach the swivel casters (E) to the unit, on the same side
as the handle (C), insert bolts (AA) through the swivel
caster (E) into the cabinet (B).
□ Tighten all casters with supplied hex key (CC) or 12 mm
wrench/socket.
□ Repeat this process for the fixed casters (D) on the opposite
side of the cabinet (B).
□ Return the cabinet (B) to its upright position.
CAUTION: Do not over tighten the bolts.
CAUTION:
Two people are recommended for assembly.
Installing the Chest onto the Cabinet
□ Place the top chest (A) on top of the rolling cabinet (B).
□ Attach the two brackets (F) over the holes at back of the product and secure with four bolts (BB) per bracket (F).
□ Tighten all bolts (BB) securely with supplied hex key (CC).
CAUTION: Do not over tighten the bolts.
Attaching the casters
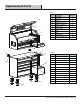
B
C
BB
B
E
AA