
Corp. Refrigerator User Manual


Rev.0303
5
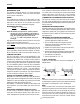
Do not use cam locks to pull cases together.
2. Secure joint backer. Located behind cart bumper
suport at joints. To adjust screws holding bumper
cart to case on either side or the joint and slide
extrusion to center of joint. This piece supports the
fornt panel at the joint.
3. Apply bead of silicone to top of bulkheads.
4. Slip on stainless steel bulkhead cap. Also apply
silicone to seam between overhead light tubes.
5. Recheck all camlocks.
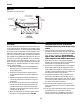
CORNER WEDGES
If a wedge is used in the middle of the lineup, the wedge
must be set off the highese point on the floor FIRST, with
the rest of the lineup being leveled from that point.
If an outside corner display is used, it must be mounted
and set before attaching any joint trim parts. Set the front
stainless steel bumper so it aligns with bumpers on the
two cases.
ESSS
Anchor woth bolts through bracket hjoles on legs of cases.
Install rear stianless steel plate with shelf standards to back
edge of ends with screws. Install brackest and shelves.
Next, connect applicable electrical, refrigeration, water, and
drain lines throug the access panels in the side of the stand.
After the cases have been leveled and joined, and refrig-
eration, electrical, and waste paping work completed, in-
stall the splashguards. (See instructions in the “Finishing
Touches” section of this booklet). Fasten along the top
edge, or center, with #10 x 3/4” sheet metal screws in the
pre-drilled holes.
ESS
REFRIGERATED
Inside Wedge: Line up taper pins with holes on adjoining
case. Turn camlock to lock in. Two camlocks are located at
the rear of the case behind the air discharge and behind
the lower electrical raceway panel. Bolt the front of the
wedge into the adjoining case. In refrigerated cases, the
bolt is located under the pans in the front. In the hot case,
the cases are bolted together by means of a bracket lo-
cated behind the front panel. Remove the front panel by
lifting up and then sliding out.
Outside wedge: Taper pin and camlock locations are the
same as a standard case.
DRY
Inside Wedge: Bolt the wedge into the sides of the adjoin-
ing case. Use bolts provided.
Inside Pedestal Wedge: Set wedge on the adjoining case’s
mounting brackets located at the base of the unit, and
bolt down. Drive screws provided through the sides of
the wedge (4 screws per side), accessible through the back
of the wedge.
COMMON END BETWEEN UNLIKE CASES AND HOT
CASES
Bolt end onto case using bolts provided in pre-drilled holes
behind front panel through brakcet provided and in the
rear behind the rear access panel on the bottom. Hot
cases are onlu bolted in two places. Common ends be-
tween refrigerated cases are bolted together the air dis-
charge panel. Remove air discharge panel by lifting up and
out.
Nex connect applicable electrical, refrigeration, water, and
drain lines.
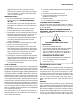
JOINT TRIM
After cases have been leveled and joined, and refrigera-
tion, electrical, and wasted piping work completed, install
the splashguards. Fasten along the top edge, or center, with
#10 X 3/3" sheet metal screws.
D
O NOT SEAL JOINT T RIM T O FLOOR!
Installation (cont.)