
User's Manual


ViVOpay Kiosk III User Manual
Page 11 of 19
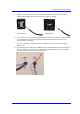
10. Attach the RJ45 connector coming from the ViVOpay Kiosk III Antenna to the RJ45
receptacle on the 220-2457-00 cable.
2.2.1 Flush-Mounting the Square Bezel Antenna
The RF field of the antenna is sensitive to the proximity of metal. If you are flush-mounting the
antenna in a metal surface or bezel, you have three options:
• Mount with the RF emitting surface of the antenna at least 1cm forward of any metal.
• Mount with the RF emitting surface of the antenna at least 1cm behind any metal. This will
reduce the effective range of the antenna.
• Mount flush with the metal but allow a minimum of 1cm spacing between the antenna and the
metal.
In all cases, test the antenna mounting before engaging in a full scale installation.
2.3 Mounting the ViVOpay Kiosk III Controller
Note: The ViVOpay Kiosk III Controller must be mounted within 1 meter of the antenna. If the
antenna is mounted of a surface that opens (such as a door), make sure the controller and
antenna are close enough that there is no tension on the cable when the enclosure is open.
If it is acceptable, the installer can drill four holes for mounting the controller if screw heads can
appear on the outside of the kiosk. In this case, it would be advisable to use security screws to
prevent tampering with the screws.
If drilling additional holes on the outside of the kiosk surface is not acceptable, the installer can use
double-sided tape to mount the controller to any clean surface.
2.3.1 Mounting the ViVOpay Kiosk III Controller Using Screws
1. Position the ViVOpay Kiosk III Controller on the interior of the kiosk making sure that there
is sufficient room for the antenna mounting surface to be fully opened.