Concord Express User Instructions P/N 466-1667 • REV J • OCT12
Copyright Trademarks and patents Manufacturer Contact information Customer support © 2012 UTC Fire & Security Americas Corporation, Inc. Interlogix is part of UTC Climate Controls & Security, a unit of United Technologies Corporation. All rights reserved. Concord is a trademark of UTC Fire & Security. All other trademarks are property of their owners. UTC Fire & Security Americas Corporation, Inc. 1275 Red Fox Rd., Arden Hills, MN 55112-6943, USA www.utcfireandsecurity.com or www.interlogix.com www.
Notices FCC Notices FCC Part 15 Information to the User Changes or modifications not expressly approved by UTC Fire & Security can void the user’s authority to operate the equipment. FCC Part 15 Class B This equipment has been tested and found to comply with the limits for a Class B digital device, pursuant to part 15 of the FCC Rules. These limits are designed to provide reasonable protection against interference in a residential installation.
If this equipment causes harm to the telephone network, the telephone company may temporarily disconnect your service. If possible, you will be notified in advance. When advance notice is not practical, you will be notified as soon as possible. You will also be advised of your right to file a complaint with the FCC. The telephone company may make changes in its facilities, equipment, operations, or procedures that could affect the operation of the equipment.
The Load Number (LN) assigned to each terminal device denotes the percentage of the total load to be connected to a telephone loop which is used by the device, to prevent overloading. The termination on a loop may consist of any combination of devices subject only to the requirement that the total of the LNs of all the devices does not exceed 100. Load Number: .1 The term “IC:” before the certification/registration number only signif ies that the Industry Canada technical specifications were met.
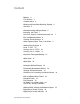
Content Notices 3 FCC Notices 3 Canada Notice 4 Getting to Know Your Security System 5 Overview 5 Communicating with the Panel 7 Instructing the Panel 7 How Your System Communicates with You 7 Fire and Smoke Alarms 9 Clearing Smoke Sensors 9 What Happens When There is an Alarm 9 Arming Your System 9 Level 1—OFF 10 Arming Level 2—STAY 10 Arming Level 3—AWAY 11 Keychain Touchpad Arming 11 Quick Arm 11 Quick Exit 12 Using the Chime Feature 12 Preventing Accidental Alarms 13 Aborting Accidental Alarms 13 Guide
Was the Bypass Successful? 19 Checking the Status of Your System 19 Short System Status 20 Full System Status 20 System Alarm Sounds 20 Panic Alarms 21 Fire Panic 21 Police Panic Alarm 21 Auxiliary Panic Alarm 21 Siren Time-out 22 Access Codes 23 System Master Code 23 Regular User Codes 23 Using the Programming Menus 23 Programming Access Codes 24 Setting the Time and Date 25 Adjusting System Sounds and Touchpad Brightness 26 Arming Your System Silently 26 Adjusting the Touchpad Beeps 27 Adjusting the Tou
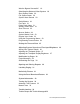
Appendix A: User Sheets 40 Account Number 40 System Sensors 40 User Codes 41 Touchpad Information 42 Accidental Smoke and Fire Alarms 43 Dialer Abort 44 Arming Information 44 Paging 45 If the Power Goes Out 45 No Activity Time 45 System information 46 Appendix B: Planning for Emergencies 46 Floor Plan Example 47 Your Floor Plan 47 Appendix C: Programming Your System 50 Two Methods to Program Your System 50 Notes 56 Concord Express User Instructions iii
Getting to Know Your Security System This manual describes how to operate your system. It describes basic arming and disarming commands as well as how to program system features. The dealer or installer may have already discussed the details of your system with you. Record your system details in the User Sheets located in Appendix A. Overview Your security system is made up of different parts. Each plays a special role in the system’s operation: Control Panel The panel is at the heart of your system.
Your system may also use wireless, handheld touchpads that can be carried from room to room. Keychain touchpads are also wireless and are handy for simple arming and disarming functions. Keychain touchpads can be carried off-site. The installer can program the keychain touchpad to send a Police or Auxiliary panic alarm. Wireless Panic Button Wireless panic button touchpads are dedicated to sending one signal only— usually a Police or Auxiliary panic alarm.
Communicating with the Panel Your system can be set up to communicate with you through: • • • • Status beeps Alarm sirens Touchpad text Pager information Instructing the Panel Not just anyone can walk up to a touchpad and operate your security system. Before the system will process most commands, users are required to enter a pre-programmed 4-digit access code. See “Access Codes” for detailed information.
Status Beeps Status beeps from touchpads or sirens sound when there is a change in the current status of the system. Status beeps are not alarms, but they do warrant your attention. There is more than one type of Status beep: • Exit Delay beeps indicate that an arming command has been entered and the countdown to arming has begun. • Entry Delay beeps indicate that you’ve entered the building and the countdown to an alarm has begun.
The arming indicator will be off when the system is disarmed. READY Note: Any time you notice that the ready light is not on, you should press the STATUS button to find out what the trouble condition is. The green LED is the READY indicator. It will be on whenever the system is functioning normally. The ready indicator shuts off if the system detects a trouble condition.
Level 1—OFF Use Level 1 when intrusion detection is not necessary. For example, on an active Saturday morning—kids playing inside and out; someone working in the garage; various house projects going on. Even though Level 1 disarms the system, your system continues to monitor for fire, smoke, carbon monoxide, and/or panic alarms if your system has these devices installed. Here are some other situations in which you’d set the system to Level 1—OFF: • Upon entering your armed home or business.
5. If leaving the premises, exit through a designated delay door immediately. Arming Level 3—AWAY At other times, you want every sensor to be alert: When the family is away from home, or, in a business, after closing time. In this and similar situations, set your system to 3—AWAY for maximum protection. All sensors are active—perimeter door and window sensors, and interior motion detectors. To arm to Level 3—AWAY using a touchpad: 1. Close all perimeter doors and windows. 2. Press 3 at any touchpad.
To use Quick Arm: • Increase the arming level by simply pressing 2 or 3 at any touchpad. • Decreasing the arming level requires that the user enter a code. Quick Exit Note: In UL Listed systems, this feature is disabled. Your system may be set up so that when your system is armed to Level 2— STAY, you’re able to press D on any touchpad and simply walk out of the door without having to disarm and rearm the system.
Chime-On-Close The Chime-On-Close feature works like the regular Chime feature, but in addition to the double beeps heard upon opening a protected door or window, the system sounds one long beep when the door or window is closed again. You can turn the Chime-On-Close feature on or off from the programming menu. Refer to Appendix C, “Programming Menus” for information on programming your system.
central monitoring station or a numeric pager to send reports. You can have your installer program this delay time between 15 - 45 seconds. To cancel an alarm: Press Code (or 1 + Code.) Guidelines for Preventing Accidental Alarms Following these guidelines will go a long way toward preventing accidental alarms. • Close doors and windows before you leave your house. • When getting ready to leave the house, gather the things you want to take with you so you can exit immediately after arming the system.
• The Entry Delay is a period of time long enough to let you unlock a designated delay door and get to a touchpad to disarm the system. Exit Delay Example You’re about to go on an errand. You are inside your house and have just armed the system to Level 3—AWAY. The interior sirens and touchpads sound three quick status beeps, telling you that the system accepted the command and has started the Exit Delay time. During the Exit Delay time, the system sounds one short beep every 4 seconds.
Extended Delay In some situations, additional time is needed to arm or disarm the system from, for example, a protected outside gate or door. In these instances, the installer can program an extended delay, giving as much as 16 minutes to exit or disarm the system before setting off an alarm. Refer to the Appendix A User Sheets, “Delay Doors and Delay Time Settings,” for a list of actual exit delay times. Exit Extension Note: In UL Listed systems, this feature is disabled.
Touchpads display an arming message, such as “Armed to STAY No Delay” or “ARMED TO AWAY NO DELAY,” for example. The ARMED indicator light on fixed display touchpads will light. Changing the arming level will restore delay doors to their normal Exit and Entry Delay times. Auto STAY Arming Feature The Auto STAY Arming feature helps cut down on false alarms in the event that you arm the system to 3—AWAY, but fail to leave during the exit delay time.
Bypassing a Sensor Directly Use this method if the system is armed and you would like to open a window without disarming. Refer to the Appendix A User Sheets to determine what the sensor number is for the sensor you wish to bypass. To bypass sensors directly: 1. Close all doors and windows. 2. Arm your system to the desired level. 3. At any touchpad, press # (labeled Bypass) + Code + sensor number. 4. Touchpads display, “Bypassed Zones 01,” or “SENSOR 01 BYPASSED,” for example.
2. Arm your system to the desired level. The touchpad emits protest beeps and displays “PROTEST,” because of the open sensor(s). 3. At any touchpad. press BYPASS. Touchpads with displays show, “Bypassed Zones 01,” or “SENSOR 01 BYPASSED,” for example. 4. The system sounds arming level beeps to indicate that the system is armed and open sensors have been successfully bypassed. To arm bypassed sensors: Arm the system again. OR At any touchpad, press # (labeled Bypass) + Code + sensor number.
Short System Status A Short Status indicates the current arming level, sensor status (whether open or bypassed), low battery, supervisory, AC power or backup battery failures. To get a Short System Status: Press *. The system sounds beeps according to the current arming level. (One for Level 1, two for Level 2, three for Level 3.) Touchpads display the status information, for example: “System is OK,” or “SENSOR 02 OPEN.
Rapid Beeps Panic Alarms Panic alarms are easily activated from any touchpad to quickly alert the central monitoring station to a Fire, Police, or Auxiliary emergency. A panic alarm can be activated at any time, regardless of the current arming level: 1—OFF, 2—STAY, or 3—AWAY. This system is designed to inform a central monitoring station of the nature of the emergency so the correct personnel can be dispatched immediately. Fire Panic The Fire panic alarm sounds from all interior and exterior sirens.
To activate an Auxiliary panic alarm from a touchpad: Press and hold the Auxiliary button(s) for 2 seconds. Siren Time-out If the system is not disarmed after an alarm, the sirens will continue to sound until the time-out period is reached. The time-out period can be programmed only by your installer or dealer. Even though reaching the end of the time-out period stops the sirens, if your system is monitored, the central station will consider the alarm in progress until the system is manually disarmed.
Access Codes The system requires a valid access code before it will process most commands. The Appendix A User Sheets provide a location for you to record the System Master and User codes. System Master Code There is one System Master code. The System Master code is used to enter the programming menus for your system. The default System Master code is 1234. It is important that you change the default code and record the new code in the Appendix A User Sheets. To change the System Master Code: 1.
Programming Access Codes User codes can be given certain attributes which determine whether the user can bypass a sensor or perform system tests. Changing a User Code To change or assign a user access code: Note: The system will not accept the same code for two different users. 1. Enter the programming menus by pressing 9 + System Master Code. 2. Press 10 nn 0 where nn is user 00 through 15. 3. Enter the desired 4-digit code, then #. 4. Press * + 4 + # to exit the programming menus.
Assigning the System Test Attribute System Tests is a user code attribute that allows the user to perform system tests. If the user code does not have this attribute turned on, the user will not be able to perform phone or sensor tests. To assign the System Testing to a user: 1. Enter the programming menus by pressing 9 + System Master Code. 2. Press 10 n n 2 where nn is user 00 through 15. 3. To turn System Testing: on, press 2 + #. off, press 1 + #. 4. Press * + 4 + # to exit the programming menus.
To set the system date: 1. Enter the programming menus by pressing 9 + System Master Code. 2. Press 01. 3. Enter the current date as 6 digits (mm/dd/yy) then press #. 4. Press * + 4 + # to exit the programming menus. Adjusting System Sounds and Touchpad Brightness Arming Your System Silently Use the Silent Arming feature to arm your system without disturbing people throughout the house with arming status beeps.
To enable Arming Always Silent: Note: Exit Delay is doubled when you enable Silent Arming. 1. Enter the programming menus by pressing 9 + System Master Code. 2. Press 2 + 1. 3. To turn Silent Arming: on, press 2 + #. No system status beeps will sound while arming. off, press 1 + #. System status beeps will sound from touchpad while arming. 4. Press * + 4 + # to exit the programming menus.
2 + # Medium 3 + # High 4. Press * + 4 + # to exit the programming menus. After dimming the display, pressing any button momentarily returns the display to full brightness. After 15 seconds without touchpad activity, the display returns to the set dimmed level. If an alarm occurs while the display is dimmed, it automatically returns to the full brightness level and stays that way until you disarm your system.
Although all three types of information can be reported on your pager, your pager service determines how the information will actually appear. Event Code in Page This part of the page let’s you know what has happened.
698 Keyswitch sensor used 699 System armed itself because it is being serviced or powered-up Account Number in Page This part of the page let’s you know where the event is occurring. Code Indicates XXXX 4-digits of account number Some pager providers transmit only numbers and not alpha-characters. If your account number contains alpha-characters, check with your provider to see exactly how your account number will appear on your pager.
See “Notification by Pager” on page 28 for more information on paging reports. Latchkey Paging The Latchkey paging feature allows up to three users (with pagers) to be notified when the system is disarmed. Latchkey pages do not report to the central station. This feature is useful when you’re at work and would like to be notified when your daughter or son arrives home and disarms the system. The Latchkey paging feature can be enabled only by the installer.
Appendix A: User Sheets” on page 40 to see if the No Activity feature is currently available to you and the duration of the No Activity setting. If the feature is not currently available to you, contact your installer. Using the Panel Download Feature To download to the panel is to replace the old information in it with new information. Downloading is performed only by your dealer using software specifically designed for this panel.
Press B to display the system number. For example, “N – nnnnnnn,” or “SYSTEM NUMBER * nnnnnnn.” Press B to display the system level. For example, “L nnnn,” or SYSTEM LEVEL nnnn.” 3. Press * + 4 + # to exit the programming menus. Testing the System The system contains a test mode that allows you to test sensors and panic signals without creating false alarms. Test your system weekly, by following the instructions in this section carefully.
minutes remain to the Test Mode time, the system sounds a short beep every 60 seconds. 2. Use the procedures listed in Table 1 to test the individual sensors. 3. If you need more time to complete testing, restart the timer by pressing 8 + Code + 3. 4. Check to see that all sensors have been tested by pressing *. Touchpads display a list of untested sensors. 5. You will know that you have finished testing when touchpads display, “SENSOR TEST OK” or “ZONES ALL TESTED.” 6. Disarm to Level 1 to exit Test Mode.
• If the phone test is unsuccessful, the touchpad displays “SYSTEM PHONE TEST ALARM,” then, “MEMORY,” and finally, “PHONE FAILURE ALARM MEMORY.” If a phone test is unsuccessful, check to see if you hear a dial tone from phones in the house. Call your dealer if you hear a dial tone, but your phone test is unsuccessful. Testing Sirens The purpose of this weekly test is to verify that the panel is activating sirens with the appropriate warning sounds. To perform an alarm siren warning sound test: 1.
Door/window sensor Smoke detector Motion detector Open the secured door or window. Press and hold the test button until the system sounds transmission beeps. Avoid the motion detector’s view for 5 minutes, then enter its view.
Silencing Trouble Beeps If possible, correct the situation which is causing the trouble beeps. If this is not possible, call for service. If the problem is not corrected, trouble beeps and messages start again 4 to 10 hours later. To stop trouble beeps: 1. Perform a system status check by pressing Ç on a touchpad, 2. Change the arming level. Table 4 on page 38 describes the conditions under which trouble beeps occur and when they begin.
Table 4: Causes of trouble beeps Touchpad feedback after pressing * Trouble condition AC POWER FAILURE The panel power transformer may be unplugged or there may be an AC power outage. If the transformer is plugged in, check the circuit breaker or fuse that controls that outlet. The backup battery will take over, but if AC power is not restored within 15 minutes, the system will alert you and the central monitoring station (if your system is monitored). It reports again when power is restored.
PHONE FAILURE TROUBLE The system can’t communicate with the central monitoring station. The system tries to report to the central station three times before indicating Phone Failure Trouble, then makes five more reporting attempts. 1. Make sure the panel is connected to the special phone jack installed by your security dealer. 2. Disconnect the panel from the special phone jack and check phones for dial tone. If you hear a dial tone, call your security dealer for service.
Appendix A: User Sheets Appendix A contains specific information about the setup of your system. The User Sheets should be completed by the installer and the user. Account Number My central station account number is: ______________________________________________ System Sensors Record the sensor number and name in the table below. Indicate whether it is a: • • • No. hardwired sensor (HW), wireless sensor (WL), or touchpad (TP).
21 22 23 24 User Codes The tables below provide space for you to record user codes and the attributes of each. If you would like the Latchkey attribute changed for any code, contact your dealer. B = User can bypass sensors. L = Users can send Latchkey pages. S = User can perform system tests. Defaults are indicated by an X No.
Touchpad Information Status beeps and Key beeps are programmable by the installer. The Silent Arming feature is user–programmable. Protest beeps upon bypassing will always sound. Location of TP Status beeps Key beeps On/Off On/Off On/Off On/Off On/Off On/Off On/Off On/Off On/Off On/Off On/Off On/Off On/Off On/Off On/Off On/Off On/Off On/Off On/Off On/Off Is Touchpad Tamper feature on? • Yes.
Keychain Touchpad 3 Keychain Touchpad 4 Accidental Smoke and Fire Alarms To silence the alarms and reset the sensor: • Press 1 + Code once to silence the alarm. • Press 1 + Code again to reset the sensor. Smoke and fire alarms cannot be cancelled and are always reported to the central station. If, after disarming the system once, the system still thinks the smoke sensor is open, disarm the system again.
________________________________________________________________ _____ ________________________________________________________________ _____ Dialer Abort Is the Dialer Abort feature enabled? • Yes. I have ____ seconds to cancel an accidental intrusion or auxiliary alarm before it is reported to the central station. • No. All alarms are reported to the central station immediately.
Keyswitch Arming Yes. I can use a key to arm the system. The switch is located: _____________________________________________________________ _____________________________________________________________ No. Auto STAY Arming Yes. I can use a key to arm the system. The switch is located: _____________________________________________________________ _____________________________________________________________ No.
• Yes. If there is no activity in my system for ____ hours (1-42, default 24), the system will send a No Activity report to the Central Station. • No. My system setup does not include this feature. System information System information Code Factory code System number System level Appendix B: Planning for Emergencies Develop plans for a variety of emergency situations. Periodically discuss and rehearse emergency plans that include the following: • Understand how to use your security system.
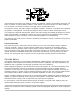
Floor Plan Example Figure 2 below shows an example of a multilevel floor plan. Use it as a guide and draw your floor plan. Figure 2: Floor plan example Your Floor Plan Use the space provided on the next page and the follow these guidelines when drawing your floor plan: • • • • Show all building levels. Show exits from each room (two exits per room are recommended). Show the location of all security system components. Show the locations of any fire extinguishers.
Floor plan for your home or business Alarm System Limitations Not even the most advanced alarm system can guarantee protection against burglary, fire, or environmental emergencies. All alarm systems are subject to possible compromise or failure-to-warn, for a variety of reasons including: • If sirens are not placed within range of persons sleeping, in remote areas of the premises, or if they are placed behind doors or other obstacles.
• If intruders have the technical means of bypassing, jamming, or disconnecting any or all parts of the system. • If power to sensors is disconnected or inadequate. • If freeze, flood, or any environmental sensors are not located in areas where the specific condition can be detected. • If smoke does not reach a smoke sensor. For example, smoke sensors cannot detect smoke in chimneys, walls, roofs, or smoke blocked by a closed door.
Appendix C: Programming Your System You can program the following items on your system: • System time and date • User codes • Downloading feature • Silent Arming feature • Brightness of touchpads • Chime feature Two Methods to Program Your System There are 2 methods for programming your system: • Programming menus, which offer visual text cues from your touchpad. • Programming shortcuts, which allow you to type in a sequence of numbers for a specific programming task.
To change or assign a user access code: Note: The system will not accept the same code for two different users. 1. Enter the programming menus by pressing 9 + System Master Code. 2. Press B until the touchpad displays “USER CODES,” then press #. 3. Press B until the touchpad displays the type of code you wish to change (Regular User codes or System Master code), then press #. 4. For example, if you want to change a Regular User code, press # when the touchpad displays “REG CODES.” 5.
Using Programming Shortcuts A programming shortcut is a number that gets you to a particular spot in the programming menus. A series of shortcut numbers takes you directly to the feature or code you want to change. The table below lists: 1. How to enter the programming menus.
2. User programming tasks. 3. The sequence of keystrokes to take you to the task. 4. Specific information to enter for the task. 5. How to accept an entry. 6. How to exit the programming menus. 1. Enter programming menus 9 + Master code 2. Choose programming task 3. Enter *+* then key sequence 4.
54 Direct Bypassing for User 04 10041 System Tests for User 04 10042 Change User code 05 10050 Direct Bypassing for User 05 10051 System Tests for User 05 10052 Change User code 06 10060 Direct Bypassing for User 06 10061 System Tests for User 06 10062 Change User code 07 10070 Direct Bypassing for User 07 10071 System Tests for User 07 10072 Change User code 08 10080 Direct Bypassing for User 08 10081 System Tests for User 08 10082 Change User code 09 10090 Direct Bypassing f
Direct Bypassing for User 11 10111 System Tests for User 11 10112 Change User code 12 10120 Direct Bypassing for User 12 10121 System Tests for User 12 10122 Change User code 13 10130 Direct Bypassing for User 13 10131 System Tests for User 13 10132 Change User code 14 10140 Direct Bypassing for User 14 10141 System Tests for User 14 10142 Change User code 15 10150 Direct Bypassing for User 15 10151 System Tests for User 15 10152 Change System Master Code 110 4-digit code Down
Notes 56 Concord Express User Instructions