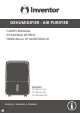
DEHUMIDIFIER - AIR PURIFIER • USER’S MANUAL • ΕΓΧΕΙΡΙΔΙΟ ΧΡΗΣΗΣ • MANUALUL UTILIZATORULUI MODELS: CF-WUHI-16L CF-WUHI-20L CF-WUHIB-20L ENGLISH | ΕΛΛΗΝΙΚΑ | ROMANA
LANGUAGES ENGLISH ......................................................................................................... 3 ΕΛΛΗΝΙΚΑ..................................................................................................... 33 ROMANA ......................................................................................................
TABLE OF CONTENTS 1. SAFETY & WARNING INSTRUCTIONS ............................................................................ 4 2. ELECTRICAL INFORMATION .......................................................................................... 6 3. SOCIABLE REMARKS ENVIRONMENTAL PROTECTION ................................................ 6 4. ADDITIONAL WARNINGS FOR APPLIANCES WITH R290 REFRIGERANT .................... 7 5. STEPS BEFORE USE ................................................................
1. SAFETY & WARNING INSTRUCTIONS For your continued safety and to reduce the risk of injury or Electric shock, please follow all the safety warnings list below. l Please be certain the power supply is 220-240V/50Hz. l To avoid possible electric shock, this device should not be placed near a window or in a bathroom. l Do not operate this unit if not in a up-right position. If the device has been tipped over it must be unplugged immediately.
l If the supply cord is damaged, it must be replaced by the manufacturer, its service agent or similarly qualified persons to avoid a hazard. Never attempt to dismantle, repair or modify the device. l Do not attempt to repair, dismantle or modify this appliance. Contact your authorized service technician for repair or maintenance of this device. l Do not operate or stop the unit by switching the power supply on or off.
2. ELECTRICAL INFORMATION The nameplate with all the electrical and technical data of this appliance, is located on the οpposite site of the unit. l The appliance should be installed in accordance with national wiring regulations. l Be sure the device is grounded properly. Proper grounding is important as it minimizes the chance of electric shock or fire. The power cord is equipped with a grounding plug for protection against electric shock hazards.
4. ADDITIONAL WARNINGS FOR APPLIANCES WITH R290 REFRIGERANT (refer to the nameplate for the type of refrigerant used) l REFER TO THE USER'S MANUAL PRIOR TO USING THIS APPLIANCE. l R290 refrigerant complies with European environmental directives. l Do not penetrate in any way or burn. l The maintenance and repairs that require the assistance of qualified personnel should be carried out under the supervision of inflammable refrigerant specialists.
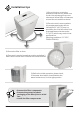
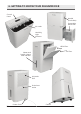
5. STEPS BEFORE USE User's manual Drain hose Dehumidifier - Air Purifier with Compressor Please refer to the electronic warranty instructions, in the last page (English section) of this manual. For warranty purposes, please note the SN (serial number) placed on the device.
Installation tips 1) Do not block or restrict the airflow around the unit. Make sure the air inlet exhaust grills are not obstructed. Allow 30cm of clearance around the unit and 40cm above. 2) Place the unit in an area where the temperature levels will not fall bellow 5ºC (41ºF) There is a possibility the coils will collect frost at temperatures that are under 5ºC (41ºF), which may result in low performance. (Working conditions: 5°C-35°C, 30%RH–90%RH). 3) Ensure the filter is clean.
6.
7. CONTROL PANEL • FUNCTIONS POWER By pressing the " " button the dehumidifier/air purifier turns ON or OFF. Once powered, the digital display is activated indicating the current settings. The default operation of the device prior to first use is the Dehumidifier in manual mode at fan speed medium. OPERATION By pressing the ‘’ ’’ button, three different operations can be selected. The device will work under the operation of an Air Purifier, Dehumidifier & Air Purifier and Dehumidifier.
will appear on the digital display. When the set humidity is reached the compressor will turn off and the dehumidification process will stop. The fan will keep operating. When the unit operates as an Air Purifier & Dehumidifier or Dehumidifier, Manual mode, Smart Dehumidification (SMD) mode, Sleep mode and Dry Clothes mode can be selected. Humidity level led light A led indicator on the unit will change color depending on the humidity level inside the room.
When sleep mode is activated and the device is operating as a Dehumidifier & Air Purifier or as a Dehumidifier, only the humidity levels can be adjusted. The fan will remain at low speed. Dry Clothes mode When this mode is selected the humidity level cannot be adjusted and the fan will operate only at high speed. After operating for approximately 2 hours the unit will check the ambient humidity level.
• Medium: When Medium Speed is selected, indicated by number ‘’02’’ on the digital display, the fan is set at medium speed. • High: When High Speed is selected, indicated by number ‘’03’’ on the digital display, the fan is set at maximum speed. This option is ideal for air purification in areas with a larger air quality issue. • Auto: When Auto is selected, indicated by the letter A on the digital display, the fan speed will be automatically adjusted based on the humidity level inside the room.
INDICATOR LIGHT Press the ‘’ ’’ button to activate/deactivate the digital display and the humidity level color indicator. • By pressing the button once, the humidity light indicator will switch off. • By pressing the button twice, the digital display indications will switch off too, allowing the device to operate with no indicators visible. • By pressing the button a third time, all indications will be activated again.
ON-DISPLAY INDICATORS P1 - AUTO DEFROST When this unit operates in very low temperatures, possible frost may build up internally. The device is equipped with an auto-defrost mode. In this event, the P1 indication will activate on the digital display panel. • Whenever the sensor which is placed on heat exchanger detects temperature under ≤0ºC, the unit enters defrost mode for 12 minutes. After 12 minutes of defrosting, the sensor checks temperature again.
Lo - Very Low Humidity When the Room Humidity is ≤31%RH, this indication activates on the digital control panel of the device. • During this condition, the compressor stops and the fan keeps operating in the selected settings. • Once room humidity ≥32%RH detected, the compressor will resume its operation in the previous settings. Hi - Very High Humidity When the Room Humidity is ≥91%RH this indication steadily appears in the monitor of the device.
9. PAIR THE DEHUMIDIFIER WITH THE INVENTOR CONTROL APPLICATION Before you start: l Verify that the router is broadcasting at 2.4GHz. l If the router has dual band broadcasting, verify that the network names (SSIDs) are different. For additional help, contact your router/internet provider. l Verify that the Wi-Fi password is WPA2-PSK encrypted, and the authorization type is set to AES. l Position the dehumidifier as close as possible to the router during the pairing process.
Step 4: Plug in the dehumidifier to a power supply and turn it on. Press on the device for the Mode button 3 seconds until the pairing indication appears on the display. Press Confirm to proceed. Note: When the dehumidifier is successfully connected and during the remote control will appear on the the wireless symbol led display. Step 5: Select the Wi-Fi Network and enter the password. Press Confirm to proceed. The pairing process may take some time.
10. WATER TANK & DRAIN HOSE There are two ways to remove collected water. Before proceeding ensure that you have switched off and unplugged the unit. 1. Usage of the water tank When unit is OFF and the tank of the dehumidifier is full, the full indicator will be lit. Additionally, when the unit is on and the tank is full, indicator will illuminate, and the unit will automatically stop operating. • Carefully remove the bucket. Slowly slide the water tank outwards to the accumulated water does not overflow.
✔ x Caution: water hose should never be bend or twisted! When the continuous drainage feature is not being used, remove the drain hose from the drain hose outlet and re-install the rubber cap.
11. MAINTENANCE & CLEANING l Maintenance & Cleaning of your air filter The air filter of the unit collects dust contained in the air. The buildup of dust reduces the efficiency of the unit. To prevent the dust from clogging up the unit always use it with the air filter in place. Always clean the air filter every 2 weeks. If the unit operates in a dusty atmosphere clean the air filter more often. • Remove the air filter. • Clean the air filter with a vacuum cleaner.
12. STORAGE When unit is inactive for an extended period of time, please make sure you follow the instructions below, for the appropriate storage of your appliance: • Turn unit off allowing one day before storage. • Remove drain hose (if attached). • Clean the removable parts of the device, water tank and air filter. • Position and secure the power cord with its band opposite the dehumidifier. • Cover the device. • Store the dehumidifier.
Why does condensation persist on windows even with dehumidifier’s use? When the desired humidity level is reached, there is a possibility of partial humidity formation on windows. This occurs due to the temperature variation between the window and the external weather conditions. Why am I not able to set the desired humidity level by using the control panel? In order to manually adjust the desired humidity level, ensure that the unit operates as a Dehumidifier & Air + are activated.
The unit does not start l Make sure the dehumidifier’s plug is placed completely into the socket. l Check the house fuse/circuit breaker box. l Check whether the power cord is damaged. l Check the water bucket, if it is full, empty it. l Check if the dehumidifier has reached its preset level. l Make sure the water bucket is positioned properly. l Room temperature is lower or higher than the advised operational range. l Check whether the humidity level has been set in high levels.
In the event of any of the above-mentioned errors, all buttons are unavailable, except for the “POWER” button so that the device can be turned off. After powering off, unplug the device for 10minutes to reset. When device is turned back on check if the error persists. In case the error persists, the unit should remain turned off and unplugged. Contact the manufacturer or a qualified technician for service. 14. INSTRUCTION FOR REPAIRING APPLIANCES CONTAINING REFRIGERANT R290 1.
6. Ventilated area Ensure that the area is in the open or that it is adequately ventilated before breaking into the system or conducting any hot work. A degree of ventilation shall continue during the period that the work is carried out. The ventilation should safely disperse any released refrigerant and preferably expel it externally into the atmosphere. 7.
11. Cabling Check that cabling will not be subject to wear, corrosion, excessive pressure, vibration, sharp edges or any other adverse environmental effects. The check shall also take into account the effects of aging or continual leaks. A halide torch (or any other detector using a naked flame) shall not be used 12. Detection of flammable refrigerants Under no circumstances shall potential sources of ignition be used in the searching for or detection of refrigerant leaks.
refrigerant contained in them. -Cylinders shall be kept upright. -Ensure that the refrigeration system is earthed prior to charging the system with refrigerant. -label the system when charging is complete (if not already) -Extreme care shall be taken not to overfill the refrigeration system. Prior to recharging the system is shall be pressure tested with OFN. The system shall be leak tested on completion of charging but prior to commissioning.
In addition, a set of calibrated weighing scales shall be available and in good working order. Hoses shall be complete with leak-free disconnect couplings and good condition. Before using the recovery machine, check that it is in satisfactory working order, has been properly maintained and that any associated electrical components are sealed to prevent ignition in the event of a refrigerant release. Consult manufacturer of in doubt.
All the pictures in the manual are for explanatory purposes only. The actual shape of the unit you purchased may be slightly different, but the operations and functions are the same. The company may not be held responsible for any misprinted information. The design and the specifications of the product for reasons, such as product improvement, are subject to change without any prior notice. Please consult with the manufacturer at +30 211 300 3300 or with the Sales agency for further details.
l l Activate your Warranty l Follow the next quick steps to activate your warranty: STEP l 1 Visit our website via the link: https://www.inventorappliances.
ΠΕΡΙΕΧΟΜΕΝΑ 1. ΟΔΗΓΙΕΣ ΑΣΦΑΛΕΙΑΣ ................................................................................................... 34 2. ΗΛΕΚΤΡΟΛΟΓΙΚΑ ΧΑΡΑΚΤΗΡΙΣΤΙΚΑ ........................................................................... 36 3. ΓΕΝΙΚΕΣ ΠΑΡΑΤΗΡΗΣΕΙΣ – ΑΠΟΡΡΙΨΗ ΣΥΣΚΕΥΗΣ .................................................... 36 4. ΠΡΟΣΘΕΤΕΣ ΠΡΟΕΙΔΟΠΟΙΗΣΕΙΣ ΓΙΑ ΣΥΣΚΕΥΕΣ ΜΕ ΨΥΚΤΙΚΟ ΜΕΣΟ R290 .............. 37 5. ΣΥΜΒΟΥΛΕΣ ΠΡΙΝ ΤΗ ΧΡΗΣΗ .........................................................
1. ΟΔΗΓΙΕΣ ΑΣΦΑΛΕΙΑΣ Για την συνεχή σας ασφάλεια και την μείωση του κινδύνου τραυματισμού ή ηλεκτροπληξίας, παρακαλώ ακολουθήστε όλες τις προειδοποιήσεις ασφαλείας της παρακάτω λίστας. l Παρακαλώ βεβαιωθείτε ότι η παροχή ηλεκτρικού ρεύματος είναι ισχύος 220-240V/50Hz. l Για την προστασία σας από ηλεκτροπληξία, μην τοποθετείτε την συσκευή κοντά σε παράθυρο ή στο μπάνιο. l Μην χρησιμοποιείτε την συσκευή σε κλίση. Εάν ανατραπεί, παρακαλώ βγάλτε την αμέσως από την πρίζα.
l Αποσυνδέστε τον αφυγραντήρα, σε περίπτωση που ακούγονται ασυνήθιστοι θόρυβοι ή εξέρχονται μυρωδιές και καπνός. l Αν το καλώδιο παροχής ρεύματος είναι κατεστραμμένο, θα πρέπει να αντικατασταθεί άμεσα από τον κατασκευαστή, το σέρβις ή άλλον αδειοδοτημένο τεχνικό, ώστε να αποφευχθούν πιθανά ατυχήματα. l Μην επιχειρήσετε ποτέ να επέμβετε και να επισκευάσετε μόνοι σας τη συσκευή. Επικοινωνήστε με αδειοδοτημένο τεχνικό για την συντήρηση και επισκευή της μονάδας.
2. ΗΛΕΚΤΡΟΛΟΓΙΚΑ ΧΑΡΑΚΤΗΡΙΣΤΙΚΑ Η ετικέτα των τεχνικών και ηλεκτρολογικών χαρακτηριστικών του αφυγραντήρα, βρίσκεται στο πίσω μέρος της συσκευής. l Η συσκευή πρέπει να εγκατασταθεί σύμφωνα με τους εθνικούς ηλεκτρολογικούς κανονισμούς. l Βεβαιωθείτε ότι η συσκευή είναι σωστά γειωμένη για την αποφυγή ηλεκτροπληξίας και πυρκαγιάς. Το καλώδιο τροφοδοσίας είναι εφοδιασμένο με γείωση για προστασία έναντι της ηλεκτροπληξίας. l Θα πρέπει να χρησιμοποιηθεί πρίζα γειωμένη.
4. ΠΡΟΣΘΕΤΕΣ ΠΡΟΕΙΔΟΠΟΙΗΣΕΙΣ ΓΙΑ ΣΥΣΚΕΥΕΣ ΜΕ ΨΥΚΤΙΚΟ ΜΕΣΟ R290 (παρακαλώ ανατρέξτε στην ετικέτα της συσκευής για τον τύπο του χρησιμοποιούμενο ψυκτικού μέσου) l ΔΙΑΒΑΣΤΕ ΠΡΟΣΕΚΤΙΚΑ ΤΟΝ ΟΔΗΓΟ ΠΡΙΝ ΤΗ ΧΡΗΣΗ ΤΗΣ ΣΥΣΚΕΥΗΣ. l To ψυκτικό μέσο R290 συμμορφώνεται με τις Ευρωπαϊκές περιβαλλοντικές οδηγίες. l Μην τρυπάτε τη μονάδα και μην την καίτε.
5. ΣΥΜΒΟΥΛΕΣ ΠΡΙΝ ΤΗ ΧΡΗΣΗ Εγχειρίδιο Χρήσης Αγωγός Aποστράγγισης Αφυγραντήρας - Καθαριστής Αέρα με Συμπιεστή Στη τελευταία σελίδα (ελληνικό μέρος) αυτού του εντύπου θα βρείτε οδηγίες σχετικά με την υποβολή της εγγύησης. Για την υποβολή της εγγύησης θα πρέπει να συμπληρώσετε τον Σειριακό Αριθμό (SN) που βρίσκεται στην συσκευή.
Συμβουλές Εγκατάστασης 1) Μην φράζετε και μην εμποδίζετε την κυκλοφορία του αέρα γύρω από τον αφυγραντήρα. Βεβαιωθείτε ότι η είσοδος και η έξοδος του αέρα πραγματοποιείται αβίαστα και επιτρέψτε απόσταση 30cm περιμετρικά της συσκευής και 40cm από το επάνω μέρος της. 2)Τοποθετήστε τη μονάδα σε μια περιοχή όπου η θερμοκρασία δεν θα πέσει κάτω από 5ºC. Υπάρχει πιθανότητα μειωμένης απόδοσης όταν η συσκευή λειτουργεί σε θερμοκρασία περιβάλλοντος κάτω από 5ºC.
6.
7. ΠΑΝΕΛ ΧΕΙΡΙΣΜΟΥ • ΛΕΙΤΟΥΡΓΙΕΣ ΕΝΕΡΓΟΠΟΙΗΣΗ/ΑΠΕΝΕΡΓΟΠΟΙΗΣΗ Πατώντας το πλήκτρο " " ο αφυγραντήρας και καθαριστής αέρα ενεργοποιείται ή απενεργοποιείται. Όταν ενεργοποιηθεί, η οθόνη φωτίζεται και απεικονίζει την τρέχουσα λειτουργία. Η προεπιλεγμένη λειτουργία κατά την εκκίνηση της συσκευής είναι αυτή του αφυγραντήρα, με δυνατότητα χειροκίνητης επιλογής του επιπέδου υγρασίας, ενώ η ένταση του ανεμιστήρα θα είναι στη μεσαία ταχύτητα. ΛΕΙΤΟΥΡΓΙΕΣ " μπορούν να επιλεχθούν τρεις διαφορετικές λειτουργίες.
& Αφυγραντήρας & Καθαριστής Αέρα Λειτουργία σαν αφυγραντήρας και καθαριστής αέρα: Όταν επιλέγετε την ταυτόχρονη και αλλά και η λειτουργία του Αφυγραντήρα και Καθαριστή Αέρα οι ενδείξεις υγρασία του χώρου θα αναγράφονται στην οθόνη. Κατά τη διάρκεια της λειτουργίας αυτής ο συμπιεστής και ο ανεμιστήρας λειτουργούν μαζί ώστε να επιτύχουν το επιθυμητό επίπεδο υγρασίας στο χώρο.
Λειτουργία έξυπνης αφύγρανσης Στην έξυπνη αφύγρανση η συσκευή μπορεί να πραγματοποιήσει αυτόματα τη διαδικασία αφύγρανσης ώστε να επιτύχει τις ιδανικές συνθήκες υγρασίας μέσα στο χώρο, ανάλογα με τα επίπεδα υγρασίας και θερμοκρασίας που επικρατούν. Η συσκευή θα ορίσει ένα επίπεδο υγρασίας σαν στόχο μεταξύ 45% και 55% ανάλογα με τη θερμοκρασία με σκοπό να εξασφαλίσει εξαιρετικές συνθήκες διαβίωσης υψηλή ενεργειακή απόδοση.
ΠΛΗΚΤΡΟ ΡΥΘΜΙΣΗΣ ΥΓΡΑΣΙΑΣ Πατώντας αυτό το πλήκτρο η σχετική υγρασία RH (Relative Humidity) μπορεί να ρυθμιστεί σε ποσοστό από 40% έως 80% και στην επιλογή συνεχούς λειτουργίας CO, με μεταβολή . Η επιλογή είναι διαθέσιμη 5% κάθε φορά που πιέζετε το πλήκτρο ρύθμισης μόνο κατά τη λειτουργία της συσκευής σαν Αφυγραντήρα μόνο ή Καθαριστή Αέρα και Αφυγραντήρα, και μπορεί να εφαρμοστεί μόνο κατά τις επιλογές χειροκίνητη λειτουργία και λειτουργία ύπνου .
• Κάθε φορά που πατάτε αυτό το πλήκτρο, η ρυθμιζόμενος χρόνος αυξάνεται κατά 1 ώρα, για την αυτόματη απενεργοποίηση της συσκευής. Αυτή η επιλογή σας προσφέρει ένα χρονικό εύρος από 1 έως 9 ώρες. • Μόλις επιλέξετε την επιθυμητή ώρα/ώρες, περιμένετε για 3 δευτερόλεπτα χωρίς να πατήσετε τίποτα μέχρι να εμφανιστεί στη οθόνη η ένδειξη του για να υποδείξει ότι ο χρονοδιακόπτης έχει ενεργοποιηθεί. • Για αυτόματη απενεργοποίηση θα πρέπει να αφήσετε την συσκευή να συνεχίσει να λειτουργεί. .
+ Σίγαση πλήκτρων Ό ήχος από τα πλήκτρα του control panel μπορεί να μπει σε σίγαση πιέζοντας ταυτόχρονα και . Όταν η συσκευή είναι στη σίγαση οι ηχητικές για 3 δευτερόλεπτα τα πλήκτρα προειδοποιήσεις θα λειτουργούν κανονικά. Πατήστε ξανά τα δυο πλήκτρα για να αφαιρέσετε τη σίγαση των πλήκτρων. ΙΟΝΙΣΤΗΣ για να ενεργοποιείστε ή να Κρατήστε πατημένο για 3 δευτερόλεπτα το πλήκτρο απενεργοποιήσετε τη λειτουργία του Ιονιστή.
ΕΝΔΕΙΞΕΙΣ ΟΘΟΝΗΣ P1 - ΑΥΤΟΜΑΤΗ ΑΠΟΠΑΓΩΣΗ Όταν η συσκευή χρησιμοποιείται σε χαμηλές θερμοκρασίες περιβάλλοντος, είναι πιθανή η δημιουργία πάγου στο εσωτερικό της. Η συσκευή είναι εξοπλισμένη με μία λειτουργία απόψυξης, η οποία ενεργοποιείται αυτόματα. Σε αυτή τη περίπτωση η ένδειξη "P1" θα εμφανιστεί στην οθόνη της συσκευής. • Όταν ο αισθητήρας που είναι τοποθετημένος στον εναλλάκτη θερμότητας, ανιχνεύσει θερμοκρασίες υπό του μηδενός (≤0ºC) , η συσκευή εισέρχεται στο πρόγραμμα απόψυξης για 12 λεπτά.
Η τακτική αντικατάσταση του φίλτρου HEPA, προσφέρει καλύτερη απόδοση και καθαρό και υγιή αέρα. O περιοδικός καθαρισμός του φίλτρου HEPA κάθε 30 ημέρες, μπορεί να εφαρμοστεί με την χρήση ηλεκτρικής σκούπας. Lo -Πολύ Χαμηλή Υγρασία Όταν η υγρασία του δωματίου είναι ≤31% σχετικής υγρασίας, η ένδειξη Lo εμφανίζεται σταθερά στην οθόνη της συσκευής. • Σε αυτές τις συνθήκες, ο συμπιεστής σταματά ενώ ο ανεμιστήρας συνεχίζει να λειτουργεί στις προεπιλεγμένες ρυθμίσεις.
9. ΣΥΝΔΕΣΤΕ ΤΟΝ ΑΦΥΓΡΑΝΤΗΡΑ ΣΑΣ ΜΕ ΤΗΝ ΕΦΑΡΜΟΓΗ INVENTOR CONTROL Πριν ξεκινήσετε: l Βεβαιωθείτε ότι η συχνότητα του δικτύου στο router είναι 2,4 GHz. l Εάν το router είναι διπλής ζώνης (dual band), βεβαιωθείτε ότι οι ονομασίες των δικτύων (SSID) έχουν διαφορετική ονομασία. Για περισσότερες πληροφορίες επικοινωνήστε με τον πάροχο του δικτύου η τον κατασκευαστή του router. l Βεβαιωθείτε ότι ο κωδικός πρόσβασης Wi-Fi διαθέτει κρυπτογράφηση WPA2-PSK και πρωτόκολλο AES.
Βήμα 4: Συνδέστε τον αφυγραντήρα στην πρίζα και ενεργοποιήστε την συσκευή. επάνω στην Πιέστε το κουμπί MODE συσκευή για 3 δευτερόλεπτα μέχρι να εμφανιστεί η ένδειξη ζεύξης στην οθόνη. Επιλέξτε Confirm για να συνεχίσετε. Σημείωση: Όταν ο αφυγραντήρας συνδεθεί επιτυχώς και κατά τη διάρκεια της απομακρυσμένης λειτουργίας το σύμβολο (βάζουμε συμβολάκι για το wifi) θα εμφανιστεί στην οθόνη LED. Βήμα 5: Επιλέξτε το δίκτυο Wi-Fi και εισαγάγετε τον κωδικό πρόσβασης. Πατήστε Confirm για να συνεχίσετε.
10. ΔΟΧΕΙΟ ΝΕΡΟΥ & ΑΓΩΓΟΣ ΑΠΟΣΤΡΑΓΓΙΣΗΣ Υπάρχουν δυο τρόποι απομάκρυνσης του νερού που συλλέγεται. Προτού αδειάσετε το δοχείο νερού, βεβαιωθείτε ότι έχετε απενεργοποιήσει και αποσυνδέσει τη μονάδα από το ρεύμα. 1. Χρήση του Δοχείου Νερού Όταν η συσκευή είναι απενεργοποιημένη και το δοχείο νερού του αφυγραντήρα είναι γεμάτο, θα ανάψει η ένδειξη του γεμάτου δοχείου.
✔ x Προσοχή: Δεν πρέπει να τεντώνετε ή να λυγίζετε τον αγωγό αποστράγγισης! Όταν δεν γίνεται χρήση της συνεχούς αποστράγγισης, αφαιρέστε τον αγωγό από τη συσκευή και κλείστε πάλι την υποδοχή με το λαστιχένιο πώμα.
11. ΣΥΝΤΗΡΗΣΗ & ΦΡΟΝΤΙΔΑ l Συντήρηση και καθαρισμός του φίλτρου αέρα. Το φίλτρο αέρα της συσκευής συλλέγει την σκόνη που υπάρχει στον αέρα. Η συσσώρευση σκόνης μειώνει την απόδοσης της συσκευής. Για να αποφύγετε τo φράξιμο της συσκευής από τη σκόνη, χρησιμοποιήστε τη συσκευή πάντα με το φίλτρο αέρα στη θέση του. Καθαρίζετε πάντα το φίλτρο αέρα κάθε δύο εβδομάδες. Εάν η συσκευή λειτουργεί σε σκονισμένη ατμόσφαιρα καθαρίστε το φίλτρο αέρα συχνότερα. • Αφαιρέστε το φίλτρο αέρα.
12. ΑΠΟΘΗΚΕΥΣΗ ΣΥΣΚΕΥΗΣ Όταν δεν σκοπεύετε να χρησιμοποιήσετε τον αφυγραντήρα για μεγάλο χρονικό διάστημα, παρακαλούμε ακολουθήστε τις παρακάτω οδηγίες αποθήκευσης της συσκευής: • Απενεργοποιήστε τη συσκευή και αναμένεται ένα 24ωρο προτού την αποθηκεύσετε. • Αφαιρέστε τον αγωγό αποστράγγισης (σε περίπτωση που είναι εγκατεστημένος). • Καθαρίστε όλα τα αποσπώμενα μέρη του αφυγραντήρα, όπως το δοχείο νερού και το φίλτρο. • Τυλίξτε το καλώδιο γύρω από τη στήριξη του καλωδίου τροφοδοσίας. • Καλύψτε τη συσκευή.
Γιατί συνεχίζει να εμφανίζεται στα παράθυρα υγρασία, ενώ χρησιμοποιώ τον αφυγραντήρα? Όταν στο χώρο επιτευχθεί η επιθυμητή σχετική υγρασία, υπάρχει περίπτωση να συνεχίζει να εμφανίζεται υγρασία στα παράθυρα. Αυτό μπορεί να συμβεί λόγω της διαφοράς της εξωτερικής θερμοκρασίας με αυτή του δωματίου. Συνεχίστε να λειτουργείτε τον αφυγραντήρα και όταν αυξηθεί η εξωτερική θερμοκρασία, τα παράθυρα θα καθαρίσουν πλήρως.
Ο αφυγραντήρας δεν εκκινεί l Βεβαιωθείτε ότι ο αφυγραντήρας είναι σωστά συνδεδεμένος στην πρίζα. l Ελέγξτε τον ηλεκτρολογικό πίνακα του σπιτιού σας. l Ελέγξτε αν το καλώδιο τροφοδοσίας ρεύματος έχει καταστραφεί. l Ελέγξτε το δοχείο νερού -αν είναι γεμάτο, αδειάστε το. l Ελέγξτε αν ο αφυγραντήρας έχει φτάσει τα επιθυμητά επίπεδα υγρασίας. l Βεβαιωθείτε ότι το δοχείο νερού είναι σωστά τοποθετημένο. l Η θερμοκρασία του δωματίου είναι χαμηλότερη ή υψηλότερη από το προτεινόμενο θερμοκρασιακό εύρος.
Σε περίπτωση οποιουδήποτε από τα παραπάνω αναφερθέντα σφάλματα, όλα τα κουμπιά δεν είναι διαθέσιμα, εκτός από το κουμπί “POWER” ώστε να μπορεί να απενεργοποιηθεί η συσκευή. Αφού απενεργοποιήσετε την συσκευή, αποσυνδέστε το καλώδιο από την πρίζα για 10 λεπτά, ώστε να επανέρθει η συσκευή. Όταν θέσετε τη συσκευή ξανά σε λειτουργία, ελέγξτε εάν ο κωδικός σφάλματος παραμένει. Σε περίπτωση που το σφάλμα παραμένει, η συσκευή πρέπει να μείνει απενεργοποιημένη και αποσυνδεδεμένη από την πρίζα.
ώστε να μπορεί να οδηγήσει σε κίνδυνο πυρκαγιάς ή έκρηξης. Όλες οι δυνατές πηγές ανάφλεξης, συμπεριλαμβανομένου του καπνίσματος, πρέπει να κρατηθούν επαρκώς μακριά από τον τόπο εγκατάστασης, επισκευής, αφαίρεσης ή απόθεσης κατά την διάρκεια του οποίου εύφλεκτα ψυκτικά μέσα μπορούν πιθανόν να απελευθερωθούν στον περιβάλλοντα χώρο. Πριν από τη διεξαγωγή εργασίας, η περιοχή γύρω από τον εξοπλισμό πρέπει να επιθεωρηθεί για την διασφάλιση δεν υπάρχουν κίνδυνοι ανάφλεξης.
διατρέχουν κάποιον κίνδυνο. Αυτό περιλαμβάνει τις βλάβες στα καλώδια, υπερβολικό αριθμό συνδέσεων, ακροδέκτες που δεν είναι σχεδιασμένοι βάσει των αρχικών προδιαγραφών, οποιαδήποτε ζημιά στις μονώσεις, λανθασμένη τοποθέτηση των συνδέσμων, κλπ. Βεβαιωθείτε ότι η μονάδα είναι τοποθετημένη με ασφάλεια. Βεβαιωθείτε ότι οι μονώσεις ή οποιοδήποτε υλικό σφράγισης δεν έχουν φθαρεί με τέτοιο τρόπο ώστε να μην εξυπηρετούν πλέον το σκοπό τους.
Ωστόσο, είναι σημαντικό να ακολουθείται η βέλτιστη πρακτική, λαμβάνοντας υπόψιν το ενδεχόμενο ανάφλεξης. Εφαρμόστε την ακόλουθη διαδικασία: Αφαίρεση του ψυκτικού μέσου Καθαρισμός του κυκλώματος με αδρανές αέριο Εκκένωση Καθαρισμός ξανά με αδρανές αέριο Άνοιγμα του κυκλώματος με περικοπή ή χαλκοσυγκόλληση. Η ποσότητα ψυκτικού μέσου πρέπει να ανακτηθεί στους σωστούς κυλίνδρους. Το σύστημα πρέπει να “ξεπλυθεί” με άζωτο χωρίς οξυγόνο, για να κατασταθεί η μονάδα ασφαλής.
η ανάκαμψη των φιαλών πρέπει να συμμορφώνονται με τα σχετικά πρότυπα. δ) Αντλήστε το ψυκτικό σύστημα, αν αυτό είναι εφικτό. ε) Εάν η εξαέρωση δεν είναι εφικτή, ρυθμίστε το μανόμετρο ώστε να μπορούν να απομακρυνθούν τα διάφορα στοιχεία από το σύστημα. στ) Βεβαιωθείτε ότι η φιάλη είναι σωστά τοποθετημένη προτού ενεργήσετε. ζ) Ξεκινήστε τη διαδικασία ανάκτησης βάσει των οδηγιών του κατασκευαστή. η) Μη γεμίζετε υπερβολικά τις φιάλες. (Όχι περισσότερο από 80% φορτίο υγρού).
19. Μεταφορά εξοπλισμού που περιέχει εύφλεκτα ψυκτικά μέσα Καθορίζεται από τις τοπικές διατάξεις. 20. Απόρριψη συσκευών που περιέχουν εύφλεκτα ψυκτικά μέσα Δείτε παρακαλώ τις ανάλογες εθνικές διατάξεις. 21. Αποθήκευση εξοπλισμού/συσκευών Η αποθήκευση του εξοπλισμού πρέπει να γίνεται σύμφωνα με τις οδηγίες του κατασκευαστή. 22.
Όλες οι εικόνες στο παρόν εγχειρίδιο εξυπηρετούν επεξηγηματικούς σκοπούς. Το προϊόν που προμηθευτήκατε μπορεί να εμφανίζει ορισμένες διαφορές ως προς το σχήμα, ωστόσο οι λειτουργίες και τα χαρακτηριστικά παραμένουν ίδια. Η εταιρεία δεν φέρει ευθύνη για τυχόν τυπογραφικά λάθη. Ο σχεδιασμός και οι προδιαγραφές του προϊόντος μπορεί να τροποποιηθούν χωρίς προηγούμενη ειδοποίηση με σκοπό τη βελτίωση των προϊόντων. Για λεπτομέρειες, απευθυνθείτε στον κατασκευαστή στο 211 300 3300 ή στον αντιπρόσωπο.
Επισκεφθείτε τη ενεργοποιήστε σελίδα μας και ενεργοποιήστε εφθείτεlτη σελίδα μας και την εγγύησή σα του ή παρακάτω ή σκανάροντας το αρακάτω link σκανάροντας το l Συμπληρώστε όλαlink τα πεδία όπως φαίνονται παρακ Υποβολή Εγγύησης Υποβολή Εγγύησης Υποβολή Εγγύησης του παρακάτω link ή σκανάροντας το Για να ενεργοποιήσετε την μας εγγύηση, παρακαλούμε συμπληρώστε πεδία l Επισκεφθείτε τη σελίδα και ενεργοποιήστε την εγγύησή τα σαςπαρακάτω μέσω Ακολουθήστε τα παρακάτω σύντομα βήματα για να ενεργοποιήσετε την ε
CUPRINS 1. AVERTISMENTE SI INSTRUCTIUNI DE SIGURANTA .................................................... 66 2. INFORMATII CU PRIVIRE LA PARTEA ELECTRICA ....................................................... 68 3. OBSERVATII • PROTECTIA MEDIULUI .......................................................................... 68 4. INFORMATII SUPLIMENTARE CU PRIVIRE LA APARATELE CARE FOLOSESC AGENT FRIGORIFIC R290 .......................................................................... 69 5.
1. AVERTISMENTE SI INSTRUCTIUNI DE SIGURANTA Pentru siguranta dvs si pentru a evita riscul de accidentare sau soc electric, va rugam sa urmati toate sfaturile de mai jos. l Va rugam sa va asigurati ca sursa de electricitate este de 220-240V/50Hz. l Pentru a va proteja de socul electric, nu plasati unitatea langa fereastra sau langa baie. l Nu folositi unitatea daca se afla pe o suprafata inclinata. Daca e cazul, va rugam sa o scoateti din priza.
l Daca ati deteriorat cablul de alimentare, acesta trebuie inlocuit doar de catre producator, reprezentatul de service al acestuia sau persoane calificate. Este interzisa demontarea, repararea sau modificarea unitatii. l Nu demontati, reparati sau modificati aparatul. Pentru orice lucrare asupra acestui aparat, contactati un centru de service autorizat. l Nu porniti si nu opriti aparatul prin conectarea/deconectarea stecherului la priza.
2. INFORMATII CU PRIVIRE LA PARTEA ELECTRICA Datele tehncie si electrice ale acestui aparat sunt inscrise pe placuta de identificare situata pe spatele aparatului. l Aparatul va fi instalat respectand normele si reglementarile locale cu privire la cablaje. l Asigurati-va ca aparatul este impamantat corect. Impamantarea este importanta, aceasta reducand riscul socurilor electrice si a incendiilor. Cablul de alimentare este echipat cu stecher cu impamantare.
4. INFORMATII SUPLIMENTARE CU PRIVIRE LA APARATELE CARE FOLOSESC AGENT FRIGORIFIC R290 (verificati eticheta aparatului pentru a vedea tipul de agent frigorific folosit) l CITITI MANUALUL CU ATENTIE INAINTE DE A UTILIZA UNITATEA l Agentul frigorific R290 este compatibil cu directivele Uniunii Europene cu privire la mediu. Acest aparat contine aproximativ 95g agent frigorific R290. l Nu strapungeti si nu utilizati surse de foc in apropierea unitatii.
5. INAINTE DE FOLOSIRE Manualul utilizatorului Furtun scurgere Dezumidificator – Purificator aer cu compressor Va rugam sa faceti referire la certificatul de garantie electronic, la ultima pagina (sectiunea limbii engleze) a acestui manual Pentru a beneficia de garantie, va rugam sa notati seria si numarul aparatului (SN), situate in partea din spate a aparatului.
Sfaturi de instalare 1) Nu blocati si nu obturati fluxul de aer. Asigurati-va ca grilele de admisie/evacuare a aerului nu sunt acoperite. Asigurati cel putin 30cm de spatiu liber in jurul aparatului si 40 cm deasupra. 2) Montati aparatul intr-o incapere in care temperatura nu va scadea sub 5ºC (41ºF). Aparatul poate acumula straturi de gheata pe componentele interne, ceea ce ii va reduce eficienta.
6.
7. PANOUL DE CONTROL • FUNCTII PUTERE ", dezumidificatorul / purificatorul de aer se aprinde sau se Prin apasarea butonului " opreste. Odata alimentat, afisajul digital este activat, indicand setarile actuale. Operatia implicita a dispozitivului inainte de prima utilizare este Dezumidificatorul in modul manual si viteza medie a ventilatorului. OPERATIUNE Prin apasarea butonului „ ”, pot fi selectate trei operatiuni diferite.
& Dezumidificator si purificator de aer Functionare ca dezumidificator si purificator de aer: Cand este selectata aceasta + vor aparea pe afisajul digital. In cadrul acestei operatiuni, atat operatiune indicatorii compresorul, cat si ventilatorul functioneaza impreuna pentru a atinge nivelul de umiditate dorit. Nivelul de umiditate al camerei va fi apar pe afisajul digital. Cand umiditatea setata este atinsa, compresorul se va opri si procesul de dezumidificare se va opri.
Modul SLEEP In modul SLEEP dispozitivul va functiona silentios cu ventilatorul la viteza mica. Acest mod poate sa fie selectat in cadrul celor trei operatiuni din seria Comfort. Cand modul SLEEP este activat si dispozitivul functioneaza ca dezumidificator si purificator de aer sau ca dezumidificator, numai nivelurile de umiditate pot fi reglate. Ventilatorul va functiona la viteza mica.
VITEZA VENTILATORULUI Prin apasarea butonului „ ”, sub functia Purificator, viteza aerului ventilatorului poate fi: Scazuta (1) / Medie (2) / Inalta (3). Prin apasarea butonului „ ”, in functia Dezumidificator si Purificator de aer + , viteza aerului ventilatorului poate fi: Scazuta (1) / Medie (2). • Scazuta: Cand este selectat Viteza Scazuta, indicata de numarul „01” pe afisajul digital, functionarea este silentioasa si se aplica conditii standard de functionare.
FUNCTIA DE ECONOMISIRE A ENERGIEI Functia de economisire a energiei este activata in mod implicit in dispozitivul dvs. In timpul acestei functii, dezumidificatorul se va opri automat dupa 12 ore de functionare, indiferent de orice setari ale temporizatorului. Pentru a o dezactiva, apasati continuu timp de 2 secunde butoanele, '' '', '' '', '' '' si '' ''.
FUNCTIE ANTIBACTERIANA de 3 secunde, va fi selectata functia Prin apasarea continua a butonului timp antibacteriana. Dupa finalizarea fiecarei operatiuni, dispozitivul nu se va opri, iar functia antibacteriana va fi initiata. Ventilatorul va functiona timp de 90 de minute, asigurand ca nu va ramane apa in interiorul rezervorului ce ar putea determina cresterea concentratiei de bacterii sau mucegai, punandu-va astfel sanatatea in pericol.
P4 - Memento de inlocuire a filtrului HEPA Memento-ul de inlocuire a filtrului HEPA va fi activat pe panoul digital al dispozitivului, dupa finalizarea a 2160 ore de functionare. • Cand apare acest indicator, filtrul HEPA trebuie inlocuit cu unul nou. • Dupa inlocuirea filtrului HEPA, butonul „ ” trebuie apasat continuu timp de 3 secunde pentru ca temporizatorul sa fie resetat si indicatorul sa dispara. Inlocuirea la timp a filtrului HEPA va garanta performante optime, aer curat si sanatos.
9. ASOCIEREA DEZUMIDIFICATORULUI CU APLICATIA “INVENTOR CONTROL” Inainte de a incepe: l Verificati daca routerul transmite la 2.4GHz. l Daca routerul are transmisie cu banda dubla, verificati daca numele retelei (SSID) este diferita. Pentru ajutor suplimentar, contactati furnizorul dvs. de internet. l Verificati daca parola Wi-Fi este criptata WPA2-PSK si daca este setat tipul de autorizare catre AES. l Pozitionati dezumidificatorul cat mai aproape de router in timpul procesului de asociere.
Pasul 4: Conectati dezumidificatorul la o sursa de alimentare si porniti-l. Apasati pe dispozitiv timp de butonul Mod 3 secunde pana cand pe afisaj apare indicatia de asociere. Apasati Confirm pentru a continua. Pasul 5: Selectati reteaua Wi-Fi si introduceti parola. Apasati Confirm pentru a continua. Procesul de asociere poate dura Nota: Indicatia de asociere de pe afisajul dezumidificatorului poate disparea in timpul acestui pas.
10. REZERVORUL PENTRU APA & FURTUNUL DE SCURGERE Exista doua moduri de a elimina apa colectata. Inainte de a continua, asigurati-va ca ati oprit si deconectat aparatul. 1. Utilizarea rezervorului de apa Cand unitatea este OPRITA si rezervorul dezumidificatorului este plin, indicatorul va fi aprins. In plus, cand unitatea este pornita si rezervorul este plin, indicatorul se va aprinde si unitatea va inceta automat sa functioneze. • Scoateti cu grija galeata.
✔ x Atentie: urtunul nu ar trebui sa fie indoit sau rasucit! Cand drenajul continuu nu este utilizat, scoateti furtunul de evacuare din orificiul de evacuare si reinstalati capacul de cauciuc.
11. MENTENANTA SI CURATIRE l Intretinerea si curatarea filtrului de aer Filtrul de aer al unitatii colecteaza praful continut in aer. Acumularea de praf reduce eficienta unitatii. Pentru a preveni infundarea, utilizati-l intotdeauna cu filtrul de aer. Curatati intotdeauna filtrul de aer la fiecare 2 saptamani. Daca unitatea functioneaza intr-o atmosfera prafuita, curatati filtrul de aer mai des. • Scoateti filtrul de aer. • Curatati filtrul de aer cu un aspirator.
12. DEPOZITAREA Cand unitatea este inactiva pentru o perioada lunga de timp, asigurati-va ca urmati instructiunile de mai jos, pentru depozitarea corespunzatoare a aparatului: • Opriti unitatea, cu o zi inainte de depozitare. • Scoateti furtunul de scurgere (daca este atasat). • Curatati partile detasabile ale dispozitivului, rezervorul de apa si filtrul de aer. • Pozitionati si fixati cablul de alimentare pe partea opusa a dezumidificatorului. • Acoperiti dispozitivul. • Pastrati dezumidificatorul.
De ce condensarea persista chiar si cu utilizarea dezumidificatorului? Cand se atinge nivelul de umiditate dorit, exista posibilitatea formarii partiale de umiditate pe ferestre. Acest lucru se datoreaza variatiei temperaturii dintre fereastra si conditiile meteorologice externe.
Dezumidificatorul nu usuca aerul la fel de eficient l Asigurati-va ca dezumidificatorul a functionat suficient timp pentru a scoate umiditatea. l Asigurati-va ca nu exista perdele, jaluzele sau mobilier care sa blocheze partea din fata sau din spatele dezumidificatorului. l Este posibil ca senzorul de umiditate sa nu fie setat suficient. l Asigurati-va ca ati curatat filtrul corect. Filtrul infundat poate duce la reducerea performantei. l Toate iesirile din casa (usile, ferestrele, etc.
14. INSTRUCTIUNI PENTRU REPARATIA APARATELOR CE CONTIN AGENT FRIGORIFIC R290 1. Verificari in zona Inainte de a incepe lucrarile la sistemele care contin agenti frigorifici inflamabili, sunt necesare verificari de siguranta pentru a se asigura ca riscul de aprindere este minimizat. Pentru repararea sistemului frigorific, trebuie respectate urmatoarele precautii inainte de efectuarea lucrarilor in sistem.
• dimensiunea incarcarii este in conformitate cu dimensiunea camerei in care sunt instalate piesele care contin agent frigorific; • masinile si prizele de ventilatie functioneaza corespunzator si nu sunt obstructionate; 8. Verificari la dispozitivele electrice Repararea si intretinerea componentelor electrice trebuie sa includa verificari initiale de siguranta si proceduri de inspectie a componentelor.
(Echipamentele de detectare trebuie calibrate intr-o zona fara agent frigorific.) Echipamentele de detectare a scurgerilor trebuie sa fie setate la un procent din LFL ale agentului frigorific si sa fie calibrate la agentul frigorific utilizat si se confirma procentul corespunzator de gaz (maxim 25%).
frigorific recuperat. Este esential ca puterea electrica sa fie disponibila inainte de inceperea sarcinii. a) familiarizati-va cu echipamentul si functionarea acestuia. b) Izolati sistemul electric. c) Inainte de a incepe procedura, asigurati-va ca; Echipamentele de manipulare mecanica sunt disponibile si sunt utilizate corect; procesul de recuperare este supravegheat in orice moment de o persoana competenta; echipamentele de recuperare si cilindrii sunt in conformitate cu standardele corespunzatoare.
Doar incalzirea electrica catre corpul compresorului trebuie utilizata pentru a accelera acest proces. Atunci cand uleiul drenat formeaza un sistem, acesta trebuie realizat in siguranta. 19. Transportul de echipamente care contin agenti frigorifici inflamabili Determinat de reglementarile locale. 20. Aparatele aruncate furnizeaza agenti frigorifici inflamabili A se vedea reglementarile nationale. 21.
Toate imaginile din acest manual, au scop pur informativ. Forma reala a produsului pe care l-ati cumparat poate fi usor diferita insa functiile si operatiile sunt aceleasi. Compania nu isi asuma nici o responsabilitate pentru greselile de tipar. Aspectul fizic si specificatiile tehnice se pot schimba fara o notificare prealabila datorita imbunatatirii continue a echipamentelor noastre.
l l Activeaza-ti garantia w.inventoraerconditionat.ro/certificatul-de-garantie-inventor-aer-conditionat-si-e https://www.inventoraerconditionat.ro/certificatul-de-garantie-invento l Urmeaza pasii de mai jos pentru activarea garantiei: https://www.inventoraerconditionat.ro/certificatul-de-garantie-inventor-aer-conditionat-si-electrocasnice PASUL 1 l Viziteaza site-ul nostru urmand linkul: https://www.inventoraerconditionat.
DEHUMIDIFIER - AIR PURIFIER V:2.0.052022 Manufacturer: INVENTOR A.G. S.A. 24th km National Road Athens - Lamia & 2 Thoukididou Str., Ag.Stefanos, 14565 Tel.: +30 211 300 3300, Fax: +30 211 300 3333 - www.inventor.