System User Manual 3985 Sorrento Valley Blvd. San Diego, California 92121 U.S.A. Telephone (for US): 1-800-643-1640 Outside US: +1-858-643-1600 Email address: support@accumetrics.com Website: www.accumetrics.
Table of Contents Accumetrics Standard Terms and Conditions............................................ 1 About this Manual........................................................................................ 2 Intended Use................................................................................................. 2 Document Conventions............................................................................................ 2 1 1.1 1.1.1 1.1.2 1.1.3 1.2 2 2.1 2.1.1 2.1.2 2.1.3 2.1.4 2.1.
7 7.1 7.1.1 7.1.2 7.1.3 Patient Information Stored by Date/Time................................................................ 43 Patient Information Stored by Patient ID................................................................ 43 Test Results Log.................................................................................................... 45 Retrieving Quality Control................................................................... 46 7.3 View Instrument Usage Log.....................
Accumetrics Standard Terms and Conditions Limited Warranty and Disclaimer. Accumetrics warrants, to the original Buyer only (i.e.
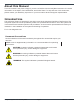
About this Manual This user manual is the place to begin if you are not familiar with the VerifyNow Instrument. It includes information on the Aspirin, P2Y12/PRUTest, and IIb/IIIa Tests. For help with use of this instrument, please contact your laboratory supervisor or your Accumetrics technical support representative. Intended Use The VerifyNow System is intended for use with human whole blood and VerifyNow Test Devices.
Introduction - 1 1 Introduction 1.1 Platelet Function Testing Before you begin to use the VerifyNow System, it is appropriate to review the purpose of the test. In general, platelet function testing measures the activity of platelets. Therapies that inhibit platelet function have been used extensively to prevent the clinical complications of atherothrombosis. Three classes of potent antiplatelet agents, including acetylsalicylic acid (aspirin), P2Y12 inhibitors (e.g.
Introduction - 1 1.1.1 Aspirin Test Acetylsalicylic acid (aspirin) has a significant antiplatelet effect by blocking the production of thromboxane A2 (TXA2). A potent platelet agonist, thromboxane A2 is released by activated platelets and acts to cause vasoconstriction and amplify platelet recruitment by binding to thromboxane receptors on the surface of circulating platelets.
Introduction - 1 1.1.3 IIb/IIIa Test The final common pathway to platelet aggregation involves binding of fibrinogen to the glycoprotein (GP) receptor complex IIb/IIIa. The GP IIb/IIIa inhibitors block platelet aggregation by preventing fibrinogen and other adhesion molecules (vWF) from binding to the IIb/IIIa integrin on platelets.
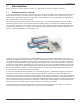
Overview of System Components - 2 2 Overview of System Components 2.1 Instrument The VerifyNow System consists of an instrument (hardware, software), disposable test devices, sample collection tubes, and quality control materials. This section provides a brief overview of each component of the system, beginning with the instrument. The VerifyNow instrument provides the platform for an automated test. It receives a test device and sample collection tube inserted into the test device port.
Overview of System Components - 2 2.1.1 Test Device Port and Cover The test device port holds a VerifyNow test device during the test. When seated in the port, the test device is aligned with optical detection components to measure the agglutination of the sample using light transmittance through wells in the test device. When closed, the test device port cover blocks ambient light in the room from interfering with the test.
Overview of System Components - 2 2.1.3 Icon Keys The four icon keys directly to the right of the display screen correspond to the different icons displaying on the screen. Selecting an icon key displays another screen or directs the instrument to perform an action. 2.1.4 Keypad The keypad contains 13 labeled keys located directly below the display screen.
Overview of System Components - 2 2.1.8 Printer (Accessory) The printer is an optional accessory to the instrument. The printer enables an operator to print test results, QC results, and instrument usage statistics. See section 8.8 for instructions on enabling the printer. 2.2 Test Device The VerifyNow System uses disposable test devices to conduct the test.
2.3 Overview of System Components - 2 Sample Collection Tubes The VerifyNow System uses whole blood collected in a partial-fill vacuum tube. During the test, the tube is inserted onto the needle in the sample well of the test device - requiring no cap removal, specimen preparation, or pipetting step. There are several types of sample collection tubes recommended for use with the system (Table 2‑1).
Overview of System Components - 2 2.4.2 Wet Quality Controls (WQC) Wet Quality Controls consist of an optically absorbent solution and a pellet (Figure 2‑7). When used in lieu of a patient sample during a test, it verifies continued performance. Controls are formulated at clinically relevant levels, and are individually packaged in tubes (Level 1 and 2) and vials (Level 2).
Precautions - 3 3 Precautions 3.1 Safe Operating Procedures This section provides an overview of safe operating procedures and identifies potential hazards when operating the VerifyNow instrument. The VerifyNow System is for in vitro diagnostic use only. Read the contents of this user manual completely. The VerifyNow instrument and its components should only be used as directed in this user manual.
Reagent Storage and Handling - 4 4 Reagent Storage and Handling 4.1 Storage and Stability This section describes special considerations for receiving, storing and handling of VerifyNow reagents and devices. Store test devices (in their unopened pouches) and quality control materials until use at temperatures described in Table 4‑1. Do not freeze.
Quality Controls - 5 Quality Controls 5 Accumetrics has designed the VerifyNow System with a comprehensive set of quality control measures that provide control of the complete analytical process as defined in the CLIA regulation. This includes control of the following factors: • Test system performance (both instrument and reagents) • Environmental conditions • Variations in operator performance The extensive quality control features of the VerifyNow system are outlined in the Appendix.
Quality Controls - 5 Use the following procedure to perform an EQC: NOTE: Pressing the Back key will stop the EQC test at any point and return to the main menu. 1. Power on the instrument using the power switch on the back panel (“I” designates on). The instrument will power on and perform a self-testing routine lasting approximately 30 seconds. After the self-testing is complete, the start screen will display. Press the Next key to advance to the main menu (Figure 5-1).
Quality Controls - 5 4. Remove the EQC device from the storage bay on the right side of the instrument. Open the cover and using the finger grip, insert the EQC device into the test device port until it clicks (Figure 5‑3). The instrument will produce two audible beeps. Close the cover to the test port. NOTE: Do not open the cover until the test has completed. Figure 5‑3 Insert Device The instrument will automatically proceed with the EQC test.
Quality Controls - 5 7. If the instrument is operating within its specifications, PASS will display at the conclusion of the testing (Figure 5‑6). In addition, numeric values will be reported for the diagnostics, along with the acceptable range for each parameter. When the EQC is complete, press the Next key to return to the main menu. 26-Feb-2012 14:57:00 26-Feb-2012 14:57:00 Result: Result: 0.30 02(0.8-3.6): 1.20 V1(5.25: 5.45 V2(0.30): 0.23 P1(-.25-0.5): 0.
Quality Controls - 5 Procedure 1. Locate one test device and one WQC diluent tube. 2. Power on the instrument using the power switch on the back panel (“I” designates on). The instrument will power on and perform a self-testing routine lasting approximately 30 seconds. After the self-testing is complete, the Start screen will display. Press the Next key to advance to the main menu (Figure 5‑7). The instrument should be allowed to warm-up for at least 15 minutes prior to use.
Quality Controls - 5 7. Open the cover. Using the finger grip, insert the test device into the test device port until it clicks (Figure 5‑9). Barcode Scanner Figure 5‑9 Insert Device 8. If the test device is the first from a new lot, the instrument will display a bar code screen as soon as the test device is inserted into the port and the device spot code is read. (Figure 5‑10).
Quality Controls - 5 10. Wait for the image of the tube to display, then insert the WQC sample into the sample well of the test device with the rubber stopper facing downward, so that the needle fully pierces the stopper. The instrument will produce two audible beeps when the tube has been fully inserted (Figure 5‑12). 26-Feb-2012 14:57:00 WQC P2Y12 Figure 5‑12 Insert Tube 11. Close the cover to the test device port (Figure 5‑13). P2Y12 Figure 5‑13 Close Cover 12.
Quality Controls - 5 13. When the results display, record the results or print attached printer (Figure 5‑15). the results, if your instrument has an 26-Feb-2012 14:57:00 WQC P2Y12 Figure 5-15 WQC Level 1 Result 14. Open the cover. Remove the test device and tube together in one piece by grasping the test device finger grip and pulling straight up (Figure 5‑16). Never separate the tube from the test device. Close the cover.
Quality Controls - 5 control material does not produce a result within the expected range, perform an EQC test to ensure that the instrument is working properly. If the EQC is OK, prepare a new WQC Level 1 sample and repeat the WQC procedure with a new test device. If the EQC is not OK, follow the instructions in Chapter 10, Troubleshooting. If the WQC result fails on the second attempt, contact Accumetrics Technical Support. 17. Press the Next key to return to the main menu. 5.2.
Quality Controls - 5 26-Feb-2012 14:57:00 104A 26-Feb-2012 14:57:00 VerifyNow ® System QC Figure 5‑19 Start WQC Level 2 5. Open the foil pouch and remove the test device just before use. Hold it by the finger grip. NOTE: Each test device has a finger grip. Avoid handling other surfaces of the test device. 6. Remove the needle’s protective sheath by pulling directly up on the sheath. Do not twist the sheath, as this may remove the needle (Figure 5‑20). Figure 5‑20 Prepare Needle 7. Open the cover.
Quality Controls - 5 26-Feb-2012 14:57:00 Use bar code scanner to read the bar code. WQC P2Y12 Bar Code Figure 5-22 Scan Bar Code After the bar code has been scanned once, the instrument will accept all remaining test devices from that lot without displaying the bar code screen. NOTE: If you are experiencing difficulty with the bar code scanner scanning the label, try adjusting the angle of the scan by raising the corner of the instrument. 9. Inspect the pellet. It should appear pink.
Quality Controls - 5 12. Replace the cap on the diluent tube by pressing and turning simultaneously. Immediately after replacing the cap, gently invert the tube five times to mix the reagents (Figure 5-25). Control material should be used within 15 minutes of reconstitution. 5X Figure 5‑25 Invert Sample If the reconstituted control is not used immediately, gently invert the tube five times to mix the reagents again just before use (Figure 5-26). 13.
Quality Controls - 5 26-Feb-2012 14:57:00 123 KEEP COVER CLOSED. 26-Feb-2012 14:57:00 123 26-Feb-2012 14:57:00 KEEP COVER CLOSED. 999 WQC P2Y12 WQC P2Y12 Figure 5‑28 Test Progress WQC P2Y12 CAUTION: The sample is pressurized during parts of the test. Never remove the sample tube or test device during the test. To abort a test, press the Back key. Wait for the prompt before removing the test device and tube. 16. When the results display, record the results or print attached printer (Figure 5‑29).
Quality Controls - 5 18. At the conclusion of the test, the resulting value will be displayed on the screen. Look up the expected values printed on the test device pouch for Control Level 2 (Figure 5‑31). 26-Feb-2012 14:57:00 PRU: 4 NOTE: Re-draw sample if there is evidence of hemolysis or clotting in any other tube that was co WQC P2Y12 Control Level 2 Range Figure 5-31 Interpreting WQC Level 2 Results 19.
Patient Testing - 6 6 Patient Testing 6.1 Patient Preparation The VerifyNow System has been developed to provide a simple, accurate and reliable means to measure platelet function from a patient’s blood sample. This section provides instructions on performing the test procedure. The test procedure includes patient preparation, sample collection, sample handling, preparing the instrument for use and running a test.
Patient Testing - 6 6.2 Sample Collection Samples can be collected from an indwelling catheter or using direct venipuncture. NOTE: Always ensure collection tubes are filled to the indicated fill volume. Fill Volume NOTE: At altitudes greater than 2500 feet above sea level, blood collection tubes may not fill to the specified volume, which results in an incorrect ratio of blood to anticoagulant.
Patient Testing - 6 6. Gently invert the sample tube 5 times to ensure complete mixing of the contents. 7. Blood must equilibrate at room temperature (18 °C to 25 °C) for a minimum of 10 minutes after collection before testing, but no longer than 4 hours. Do not place the sample in a water bath or on a rocker plate. NOTE: Re-draw sample if there is evidence of hemolysis or clotting in any other tube that was collected at the same time. 6.2.
Patient Testing - 6 6.3 Sample Handling Fresh whole blood samples in the appropriate partial-fill collection tubes are required for use with the VerifyNow instrument. Keep samples at room temperature. Do not centrifuge, separate, freeze or refrigerate sample. Table 6‑1 provides the amount of time blood must incubate at room temperature after collection and before test. Blood samples older than indicated must be discarded and a new sample drawn.
Patient Testing - 6 3. From the main menu, enter Operator ID and Password, if required. Use the keypad to enter the Operator ID number at the prompt. Press the Tab key to advance to the Password prompt to enter the password number. 4. If sufficient time has elapsed, the instrument will prompt you to perform an EQC (Figure 6‑3). Refer to Chapter 5, Quality Controls for more information.
Patient Testing - 6 NOTE: If you make a mistake while entering a text character, press the Next key to return to the Patient ID Entry Screen. Use the ( ) key to move the cursor to the end of the Patient ID entered, then press the ( ) key to erase character(s) until the mistaken character is deleted. Press the Text the correct character using the directions from above. key to go back to the Text Entry Screen and select Figure 6-5 Insert Device 6.
Patient Testing - 6 9. If the test device is the first from a new lot, the instrument will display a bar code screen as soon as the test device is inserted into the port and the spot code is read. (Figure 6‑8). Place the test device pouch in front of the bar code scanner on the left side of the instrument so that the bar code on the bottom edge of the pouch lines up with the scanner window. Move the pouch both towards and away from the instrument.
Patient Testing - 6 12. Close the cover to the test port (Figure 6‑11). P2Y12 Figure 6-11 Close Cover 13. The instrument automatically draws the sample from the vacuum collection tube into the test device. It then heats the blood to 37°C for a period of time specific to each test, and proceeds with the analysis. During this time the screen will flash indicating that the sample is processing. Do not open the test port cover until the test is complete.
Patient Testing - 6 Figure 6-13 Remove Device Press the Next 6.5 key to return to the main menu. Interpreting Test Results Refer to the following sections for information specific to each test. 6.5.1 Aspirin Test Results The sample result (Figure 6‑14) for the Aspirin Test is interpreted based on the rate of platelet aggregation measured and is reported in Aspirin Reaction Units (ARU).
Patient Testing - 6 26-Feb-2012 14:57:00 PRU: 164 % VerifyNow® P2Y12 Figure 6-15 P2Y12 Results The result may be printed by pressing the Print key, if your instrument has an attached printer. Press the Next key to return to the Main Menu. Press the Retrieve key to retrieve past test results. Refer to Chapter 7, Retrieving Test Results for more information on stored results. 6.5.
Patient Testing - 6 Use the following procedure to calculate percent inhibition. NOTE: A sample taken prior to abciximab or eptifibitide administration cannot be used to establish a “baseline” or uninhibited result if a GP IIb/IIIa inhibitor has been administered within the past 10 days. 1. Press the Percent key. 26-Feb-2012 14:57:00 123 ENTER BASELINE PAU Here 328 AND here 328 VerifyNow® IIb/IIIa Figure 6-17 Enter PAU 2. Obtain the patient’s baseline (pre-drug) PAU result.
Patient Testing - 6 6.6 Shutting down the Instrument Prior to shutting down the instrument, ensure that all operations involving the VerifyNow instrument are complete. Power off the instrument using the power switch on the back panel (“O” designates off). VerifyNow System User Manual | USA Page 42 14439.
Retrieving Test Results - 7 Retrieving Test Results and Performance Data 7 The instrument stores information on patient test results, quality control tests, troubleshooting events, and usage statistics. This section covers the activities to retrieve stored information and display it on the screen, print it, or export it to a network (where network connectivity is enabled). Table 7‑1 lists and describes the six activities available to an operator.
Retrieving Test Results - 7 3. When the following screen displays (Figure 7‑1), enter the numerical Patient Identification and press the Next key. 26-Feb-2012 14:57:00 Figure 7-1 Patient Identification To enter an alphanumeric patient ID, press the Text key (Figure 7‑2). 26-Feb-2012 14:57:00 26-Feb-2012 14:57:00 104A Text: ??????? ABC Figure 7‑2 Alphanumeric Patient ID • Use the and arrows to scroll through the text option screens.
Retrieving Test Results - 7 7.1.3 Test Results Log The screen displays a scrollable log of the last 150 unique results arranged chronologically. If the instrument is configured to use patient identification, then the instrument will retrieve all test results for a particular patient. The cursor is positioned on the most recent test result. Navigate up and down the list using the ( , ) keys (Figure 7‑3).
Retrieving Test Results - 7 In addition to viewing earlier results, icons keys enable results to be printed (optional) or another test started. Icon 7.2 Description New Test Select this icon to perform another test on the same patient (when Patient ID is enabled). The instrument will display the Patient ID screen with the Patient ID completed. Print Result Scroll to the selected record, and select this icon to print the selected test results.
Retrieving Test Results - 7 Feature Description EQC Result Displays the result as either a Pass (P) or Fail (F). A Pass result indicates the instrument was operating within its specification limits. If there was an earlier problem detected during the EQC process, then a FAIL result would display. Operator ID Displays the operator identification for the user who performed the test (when configured).
Retrieving Test Results - 7 7.2.2 Wet Quality Control Results Log The cursor is positioned on the most recent test result (Figure 7‑5). Navigate up and down an individual list using the ( , ) keys.
Retrieving Test Results - 7 3. Press the Next key four times. Refer to the Appendix for information on navigating within the Maintenance section. 4. Press the Statistics key to retrieve the appropriate usage information. See Section 7.3.1 for a description of the instrument usage log. 7.3.1 Instrument Usage Log Navigate within an individual list using the ( Tab key.
Retrieving Test Results - 7 7.4 View Event Log The instrument stores the last 50 error/attention events and the last 11 alarms in its memory. The instrument Event log displays the errors and alarms that have occurred during use. They are arranged chronologically. Use the following procedure to view the Event log (Figure 7‑7): 1. From the main menu, enter Operator ID and Password, if required. Use the keypad to enter the Operator ID number at the prompt.
Retrieving Test Results - 7 Icon 7.5 Description Print Result Scroll to the selected record, using the and keys, and select this icon to print the selected results from the lists. Print All Results Scroll backwards through the results using the key, and select this icon to print all results in the selected log that are forward of the cursor position. Back Select this icon to return to the Main Menu.
Instrument Settings - 8 Instrument Settings 8 This section describes the instrument configuration and procedures to change a setting. Refer to Table 8‑1 for information: Table 8‑1 Instrument Settings Setting 8.1 Description Adjust contrast This setting adjusts the contrast level for viewing the display. Refer to Section 8.1. Adjust display backlight This setting toggles the backlight level for viewing the display. Refer to Section 8.2.
Instrument Settings - 8 5. Press the Lighten key or the Darken key to adjust the screen to the desired contrast (Figure 8‑1). Find a setting that has better visibility with the room’s lighting. Lighten VerifyNow ® System Darken Back PN40072-A @Y Figure 8-1 Adjust Contrast 6. Press the Back 8.2 key twice to return to the Main Menu.
Instrument Settings - 8 Set the Date and Time 8.3 The date and time is initially configured during installation. However, this setting will need to be adjusted during a leap year and twice annually for Daylight Savings Time. Use the following procedure to adjust the setting: 1. From the main menu, enter Operator ID and Password, if required. Use the keypad to enter the Operator ID number at the prompt. Press the Tab key to advance to the Password prompt to enter the password number. 2.
Instrument Settings - 8 user login, if applicable. This time period can vary based on the operation being performed and can be adjusted by the user. It does not affect the display of test results, QC results, or calculations. Use the following procedure to adjust the setting: 1. From the main menu, enter Operator ID and Password, if required. Use the keypad to enter the Operator ID number at the prompt. Press the Tab key to advance to the Password prompt to enter the password number. 2.
Instrument Settings - 8 Enable Patient ID 8.5 The VerifyNow Instrument supports patient result traceability. This includes a feature that assigns a patient identification (ID) to each patient sample. The instrument’s default setting does not assign patient ID; however, use the following procedure to adjust the setting: 1. From the main menu, enter Operator ID and Password, if required. Use the keypad to enter the Operator ID number at the prompt.
Instrument Settings - 8 1. From the main menu, enter Operator ID and Password, if required. Use the keypad to enter the Operator ID number at the prompt. Press the Tab key to advance to the Password prompt to enter the password number. 2. Press the Maintenance Maintenance section. key. Refer to the Appendix for information on navigating within the 3. Press the Password key to display the Operator Authority Log. See Section 8.6.1 for a description of features of the Operator Log. 4.
Instrument Settings - 8 Enable Operator Identification Operator ID Password Authority Level 26-Feb-2012 14:57:00 Use Password: Yes Oper 444 122 Pswd Auth 1323 MRQA 23334 RQA Save Setting Add/Update Record Edit Record Password authority needed. Back Figure 8-6 Operator Authority Log Feature Description Enable Operator Identification Displays whether operator identification is enabled. A “Yes” indicates that operator ID and password is required to log in.
Instrument Settings - 8 NOTE: When the established interval has elapsed, the user is locked out from running a patient test until the EQC test has been successfully completed. The instrument’s default setting is daily. Use the following procedure to adjust the setting based on your institution’s preference: 1. From the main menu, enter Operator ID and Password, if required. Use the keypad to enter the Operator ID number at the prompt.
Instrument Settings - 8 26-Feb-2012 14:57:00 Version: X00191 Use PtId> Yes PtId Lth:3 Printer Setting Save Setting S/N: 895 Time out: 2 3 5 EQC Freq> Daily Use Printer? Yes Network 19200 Back Figure 8‑8 Printer Setting 4. Press the Tab key 7 times to advance the cursor to the Printer setting. At the Use Printer prompt, press either the ( ) or ( ) key to toggle the setting between Yes and No. 5. Press the Save key to keep the setting and return to the Maintenance menu.
Cleaning and Maintenance - 9 9 Cleaning and Maintenance The VerifyNow Instrument does not require frequent maintenance by the user. However, it is important to perform light cleaning and simple maintenance on a routine basis in order to maintain the reliability of the VerifyNow instrument. Table 9-1 lists a recommended cleaning schedule. Table 9‑1 Recommended Instrument Cleaning Schedule Bi-weekly Inspection / Maintenance (every other week) Use the cleaning device (see Section 9.
Cleaning and Maintenance - 9 3. Open the cover and insert the cleaning device into the test device port until it clicks (Figure 9‑2). The adhesive strip removes dust and debris on the internal pneumatic port cleaning strip. NOTE: The instrument does not need to be in any particular mode to use the cleaning device. Figure 9‑2 Insert Cleaning Device 4. Leave the cleaning device in the test port for five seconds, but never longer than ten seconds.
Cleaning and Maintenance - 9 Procedure Use a recommended cleaning solution on the exterior surfaces according to the following procedure: 1. Solutions may be applied by moistening a soft, lint-free cloth, and/or a cotton swab. Do not to allow liquids to flow freely or be sprayed on the instrument. 2. After cleaning with one of the solutions listed above, a cloth moistened with fresh water should be used to dilute and remove all of the residual cleaning solution from the instrument’s surfaces. 3.
Cleaning and Maintenance - 9 NOTE: There are no screws to be removed. Figure 9‑4 Remove Fan Filter 3. Remove the fan filter and inspect it for dust accumulation. 4. If necessary, replace it with a new filter. 5. Gently replace the fan filter and plastic filter retainer. Do not position the instrument so that airflow to the fan is obstructed. 6. Power on the instrument (“I” designates on). CAUTION: Fan filter is to be changed by trained personnel only.
Troubleshooting - 10 10 Troubleshooting Occasionally, an unanticipated event occurs which interrupts the operation of the VerifyNow instrument. The VerifyNow System is equipped to detect events due to system malfunction, adverse environmental conditions, and variations in operator technique. This section covers the resolution of minor events that may be experienced during use of the VerifyNow instrument.
Troubleshooting - 10 Electronics Diagnostics- During an EQC, the system monitors the electronic and mechanical components, and reports a diagnostic failure if a value is out-of-range. The failed parameter(s) will be indicated by an arrow ( ) to the right of the measured value(s). Refer to Table 10‑5 for solutions organized by parameter. CAUTION: Seek technical assistance if you are uncertain how to respond to a malfunction or if you are unable to correct the malfunction.
Troubleshooting - 10 Issue Description Resolution Message – Non-matching baseline values (IIb/IIIa Test only) A message displays while entering the baseline PAU result if the two entries do not match. The two baseline entries do not match. Message – Low baseline value (IIb/IIIa Test only) The baseline result entered is a lower PAU value than the post-drug result. Message – Reference range baseline values (IIb/IIIa Test only) A baseline result is entered that is not within the expected range. 10.
Troubleshooting - 10 No. Issue Description 4 Resolution This error may occur if the instrument is located under bright light or if the spot code on the test device does not match the bar code scanned from the test device pouch (lot information). Error – Test device spot code The instrument does not recognize the spot code on the test device. Place the instrument away from direct sunlight, bright light, or other radiant heat sources (refer to installation guidelines).
Troubleshooting - 10 No. 12 Issue Description Resolution Attention - Tube or test device removed Either the sample tube/test device was removed by the operator before the test was completed OR a non-compatible tube was used. The sample tube or test device was removed during the test. 1) Inspect the tube, and verify that the correct Greiner tube was used. Refer to Section 6.2, Patient Sample Collection for more information. 2) Discard the sample and the test device. Do not reuse.
Troubleshooting - 10 No. 21 Issue Description Resolution Error - Low proximal voltage Possible causes of this error include incomplete reagent reconstitution, a damaged EQC device, faulty optical components, or excessive time between the blood draw into a syringe and sample transfer to the sample tube or start of the test. Test or EQC optical data was outside expected limits. This event occurs during a Failed EQC, and is logged as Error 21 in the event log.
Troubleshooting - 10 No. 28 29 32 Issue Description Resolution Attention - Signal saturation High light transmittance through the detection wells prevents the instrument from measuring a change in optical signal. High light transmittance through the detection wells. In these cases, the event may be associated with the blood sample and the following causes should be investigated: • The patient being tested has a hematocrit outside of the applicable range.
Troubleshooting - 10 No. Issue Description Resolution 104 Alarm 104 Power instrument off and back on. Verify the fan has at least 3 inches of space to ventilate properly, and that it is not being affected by airflow from a vent or another instrument. Heater Timeout During Heating Cycle 118 Alarm 118 Emitter problem associated with an EQC filter Check if fan is functioning. If no airflow can be detected, call Technical Support. Power instrument off and back on.
Troubleshooting - 10 Parameter Issue Description Resolution V2 Maximum leak rate This event is logged as Error 18 in the event log. 1) Use the cleaning device (see Section 1.1) then perform an EQC (see Section 5.1). 2) Repeat if necessary. 3) Call Technical Support if EQC does not pass after three attempts. P1 Maximum pressure level This event is logged as Error 19 in the event log. 1) Use the cleaning device (see Section 1.1) then perform an EQC (see Section 5.1). 2) Repeat if necessary.
Appendix - 11 11 Appendix 11.1 Technical Specifications Feature Specification Dimensions (WxDxH) (See Note 1) 9.5 x 9.3 x 6.5 in / 24 x 23 x 16.5 cm Location Clean, firm, level surface without vibration. Avoid placement near sources of heat or cold, incandescent lighting or direct sunlight. Service Access Perimeter 4 in / 10.4 cm Weight 4 lb / 1.
Appendix - 11 System Components 11.3 Manufacturer Catalog No.
Appendix - 11 Term Description Adenosine diphosphate ADP. When secreted by activated platelets from storage granules, ADP activates additional platelets in circulation through two G protein-coupled P2 receptors, P2Y1 and P2Y12. Anti-platelet Platelet inhibition may be induced in response to an anti-platelet agent. Three classes of potent anti-platelet agents include acetylsalicylic acid (aspirin), P2Y12 inhibitors, and glycoprotein (GP) IIb/IIIa inhibitors.
Appendix - 11 Term Description Detection well The detection wells of an test device contain a lyophilized preparation of human fibrinogen coated beads and platelet agonist. The instrument measures platelet aggregation as an increase in light transmittance through the detection wells. Diluent An optically absorbent solution used in lieu of blood during wet quality control. Diluent tube Tube in the VerifyNow Assay WQC kit (part number 85047) containing the diluent.
Appendix - 11 Term Description Inhibitor, glycoprotein (GP) IIb/IIIa GP IIb/IIIa inhibitors block platelet aggregation by preventing fibrinogen and other adhesion molecules (vWF) from binding to the IIb/IIIa integrin on platelets. Integrilin Eptifibatide (trade name Integrilin®) is a platelet aggregation inhibitor mainly used during and after coronary artery procedures like angioplasty to prevent thrombus (blood clot) formation within the coronary artery.
Appendix - 11 Term Description PAR-4 receptor PAR-4 is one of four protease-activated receptors (PAR) located on the surface of platelets. Thrombin activates PAR-4 by cleavage of part of its extracellular domain. PAR-4 activating peptide (PAR-4 AP), a synthetic peptide, serves as a surrogate for thrombin and activates the platelet through the PAR-4 receptor in the VerifyNow PRUTest.
Appendix - 11 Term Description Pouch The white test device package. Power indicator When power is on, a green LED indicator on the lower left corner of the keypad remains illuminated. PRU See P2Y12 reaction units. ReoPro Abciximab (trade name ReoPro®) is a platelet aggregation inhibitor mainly used during and after coronary artery procedures like angioplasty to prevent thrombus (blood clot) formation within the coronary artery.
Appendix - 11 Icon Name Description Add/Update Record Select this icon to add an operator’s log-in, password, and authority information to the list. Test Select this icon to begin a patient test. Back Select this icon to return to the prior screen. If you have made a change to an instrument setting, it will return to the prior screen without saving changes. Backlight Select this icon to toggle the backlight level for viewing the display.
Appendix - 11 Icon Name Description Print All Select this icon to print the records starting where cursor is positioned. This feature only displays if your system is configured with a printer accessory. QC Select this icon to begin a quality control test (either Level 1 or 2). Retrieve Patient Results Select this icon to retrieve the last 150 patient results from earlier tests. Retry Select this icon to retry scanning the bar code on a test device pouch.
Appendix - 11 11.6 Instrument Software – Test and QC Run a patient test (only with new lot) (optionalfeature) Start screen Main menu Insert assay device Patient ID (no.
ecover essing mple Appendix - 11 Processing sample Measuring sample Calculating result P2Y12 results % inhibition result IIb/IIIaresults Record baseline % inhibition result Aspirinresults Compareresults with printed range Measuring sample Calculating result VerifyNow System User Manual | USA WQC results Page 87 14439.
Appendix - 11 11.7 Instrument Settings and Logs Main screen VerifyNow System User Manual | USA Maintenance Menu 1 Page 88 Maintenance Menu 2 Mainte Men Parameters Cont Operator Authority Log Back 14439.
enance nu 3 Appendix - 11 Maintenance Menu 4 Maintenance Menu 5 Maintenance Menu 6 trast Time and Date Setting EQC Log Usage Log klight Event Log WQC Log Network Data Transfer VerifyNow System User Manual | USA Page 89 14439.
Day VerifyNow System User Manual | USA 1 Replace the fan filter Annual/Monthly Maintenance TASK Year 20_ _ Month Jan Clean exterior surfaces Monthly Maintenance Check the fan filter for cleanliness; clean or replace if needed Use the cleaning device Run Electronic Quality Control (EQC) Bi-Weekly Maintenance (every other week) Daily Maintenance TASK 2 3 Feb 4 5 6 Mar 7 8 Apr 9 10 12 May 11 13 15 June 14 16 July 17 18 20 Aug 19 VerifyNow Instrument Cleaning and Maintenance
Appendix - 11 11.9 Compliance with CLIA Control Requirements The CLIA Regulation, section 493.1256 - Control Procedures, states that the laboratory must perform control procedures as specified by the test manufacturer. It goes on to state that at least once each day of patient testing, a positive and negative control must be run for qualitative tests and two controls materials at different levels must be run for quantitative tests.
Appendix - 11 procedures or changing instrument parameters). • As an additional security feature, various instrument display screens may be set to time out after a default time period set by Accumetrics (2 to 5 minutes), or a time period set by the user (from 0 to 255 minutes). If the instrument is idle for a longer period, it will automatically return to the Main Menu and require re-entry of User ID if applicable.
Appendix - 11 The test device internal controls can detect failures of the reagent system due to improper storage or handling conditions. The internal controls will also flag an improperly collected or mishandled blood sample, or a blood sample with certain types of interfering substances. The Test Device Internal Controls detect errors from the reagent system, adverse environmental conditions, and additional types of operator errors.
Appendix - 11 • Each instrument is tested with a previously qualified lot of VerifyNow test devices. • Testing includes multiple replicates of previously qualified lots of WQC control materials. • Each lot of VerifyNow Test devices is tested against a previously qualified lot of test devices. Testing includes multiple replicates of WQC and blood from several normal donors.
References - 12 12 References 1. Centers for Disease Control. Perspectives in Disease Prevention and Health Promotion Update: Universal Precautions for Prevention of Transmission of Human Immunodeficiency, Hepatitis B Virus, and Other Bloodborne Pathogens in Health-Care Settings. MMRW 1988;37(24): 377-388. VerifyNow System User Manual | USA Page 95 14439.
Index - 13 13 Index A abciximab 3, 5, 10, 11, 31, 32, 40, 79 adenosine diphosphate 4, 83 ADP 4, 39, 79, 81, 82, 83 Aggrastat 5 agonist 3, 4, 5, 10, 80, 83 alarm 49, 50, 67, 71, 75, 79 alert 49, 50, 67, 68, 69, 70, 71, 72, 73, 79 arachidonic acid 4, 79 arterial sites 4, 31, 32 aspirin 3, 4, 39, 78, 79, 82 aspirin reaction units (ARUs) 4, 39, 45, 48, 79 atherothrombosis 3 attention 49, 50, 67, 69, 70, 71, 72, 73, 79 audible beep 19, 22, 23, 26, 28, 36, 37, 68 B backlight 53, 84 bar code label 70 reader 9,
Index - 13 Customer Support Accumetrics and its distribution partners are available to assist with technical support, service, and ordering. Technical Support and Service For US customers or direct customers outside the US, contact Accumetrics for technical support and service at: • Accumetrics: 3985 Sorrento Valley Blvd. San Diego, California 92121 USA • Toll Free: 1 (800) 643-1640 • International (direct): 1 (858) 643-1600 • FAX number: 1 (858) 643-1605 • Email: support@accumetrics.
Accumetrics, Inc. 3985 Sorrento Valley Blvd. San Diego, California 92121 U.S.A. Telephone (for US): 1-800-643-1640 Outside US: +1-858-643-1600 Email address: support@accumetrics.com Website: www.accumetrics.com Accumetrics is a registered trademark of Accumetrics, Inc. Aggrastat is a registered trademark of Medicure International, Inc. Celebrex is a registered trademark of GD Searle, LLC. Cidex is a registered trademark of Johnson & Johnson.