
Installation Guide


English | 2
FLOOR INSTALLATION
(Interior Application Only)
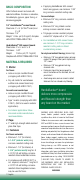
We recommend 1/4” HardieBacker
®
board for oor applications, unless 1/2”
thickness is needed for transition.
1 | Ensure subfloor is structurally
sound
On existing structures:
• Ensure suboor is not damaged.
Replace any loose, warped, uneven or
damaged sections of oor.
• Make certain suboor is a clean and at surface.
For all floors:
• Use minimum 5/8 exterior grade plywood or 23/32 OSB with Exposure 1
classication or better, complying with local building codes and ANSI A108.11.
• Joist spacing not to exceed 24” on center.
• The oor must be engineered not to exceed the L/360 deection criteria (L/720 for
natural stone), including live and dead design loads, for the specic joist spacing used.
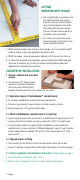
2 | Determine layout of HardieBacker
®
cement board
• Stagger all HardieBacker
®
cement board joints. Do not align with suboor joints.
• Never allow all four corners of boards to meet at one point.
• We recommend an 1/8” gap
between board edges.
• Keep sheet edges 1/8” back from
walls and cabinet bases.
• Score and snap boards to required
sizes and make necessary cutouts.
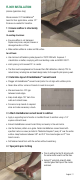
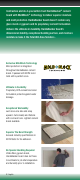
3 | Attach HardieBacker cement board to subfloor
• Apply a supporting bed of mortar or modied thinset to suboor using a 1/4”
square-notched trowel.
• Embed HardieBacker cement board rmly and evenly in the wet mortar.
• Use the fastener pattern as a guide. Fasten HardieBacker cement board with
specied nails or screws (as listed in “Materials Required”) every 8” over the entire
surface. Keep fasteners between 3/8" and 3/4" from board edges and 2" from
board corners.
• Set fastener heads ush with the surface without overdriving.
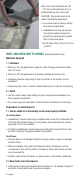
4 | Tape joints prior to tiling
• Prior to setting the tile, ll all joints with
the same mortar used to set the tiles.
• Embed 2” wide high-strength alkali-
resistant glass ber tape in the mortar
and level.