INSTRUCTION BOOK MANUAL DE INSTRUCCIONES LIVRE D'INSTRUCTIONS
IMPORTANT SAFETY INSTRUCTIONS This appliance is not intended for use by persons (including children) with reduced physical, sensory or mental capabilities, or lack of experience and knowledge, unless they have been given supervision or instruction concerning use of the appliance by a person responsible for their safety. Children should be supervised to ensure that they do not play with the appliance.
INSTRUCCIONES IMPORTANTES DE SEGURIDAD Esta máquina no fue concebida para ser usada por personas (incluyendo a los niños) con capacidades físicas, sensoriales o mentales reducidas, o bien con falta de experiencia y conocimientos, salvo si están supervisadas o han recibido instrucciones relativas al uso de la máquina por parte de una persona encargada de su seguridad. Los niños deben ser vigilados para asegurarse de que no jueguen con la máquina.
INSTRUCTIONS DE SÉCURITÉ IMPORTANTES Cette machine n’est pas censée être utilisée par des personnes (y compris des enfants) ayant des capacités physiques, sensorielles ou mentales réduites ou un manque d'expérience et de connaissances, sauf si elles sont sous surveillance ou ont été instruites sur l’usage de la machine par une personne responsable de leur sécurité. Les enfants devraient être surveillés pour s’assurer qu’ils ne jouent pas avec la machine.
TABLE OF CONTENTS SECTION 1. ESSENTIAL PARTS Names of Parts ................................................. 2 Standard Accessories ....................................... 4 SECTION 2. GETTING READY TO SEW Connecting Machine to Power Supply .............. 6 Before Using Your Sewing Machine .................. 6 For Your Safety .................................................. 6 Polarized plug ................................................... 6 Controlling the Sewing Speed ..........................
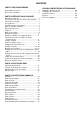
INDICE SECCIÓN 1.COMPONENTES PRINCIPALES SECCIÓN 5.MANTENIMIENTO DE LA MAQUINA Nombres de las partes ............................................. 3 Accessorios estandares ........................................... 5 Limpieza de los dientes del transporte .................. Limpieza de la corredera de la lanzadera .............. Luz para coser ........................................................ Huilage de la machine ............................................
MATIÈRES PARTIE 1.PIECES MAITRESSES SECCIÓN 5.ENTRETIEN DE VOTRE MACHINE Identification des pièces ........................................... 3 Accessoires standard ............................................... 5 Nettoyage du porte-canette .................................... Nettoyage de la coursière ....................................... Lampe de couture ................................................... Engrase ...................................................................
y t r SECTION 1.
SECCIÓN 1. COMPONENTES PRINCIPALES PARTIE 1.
Standard Accessories q w e r t y u i o !0 !1 q w e r t y u i o !0 !1 4 Bobbins Felt Needle set Large screwdriver Small screwdriver Seam ripper/Buttonhole opener Oil Buttonhole foot Zipper foot Hemmer foot Hem guide
Accessorios estandares q w e r t y u i o !0 !1 Accessoires standard q w e r t y u i o !0 !1 Canillas Fieltro Juego de agujas Destornillador grande Destornillador pequeño Cortador/Abreojales Aceite Prensatelas para ojales Prensatelas para cremalleras Prensatela para dobladillo Guía de dobladillo 5 Canettes Feutre Jeu d’aiguitles Gros tournevis Petit tournevis Découd-vite/Ouvre-boutonnière Huile Pied à boutonnière Pied à fermeture à glissière Pied ourleur Guide à ourlets
SECTION II. GETTING READY TO SEW e Connecting Machine to Power Supply q Power supply plug w Power switch e Outlet r Machine socket t Machine plug Before connecting the power cord, make sure the voltage and frequency shown on the machine conform to your electrical power. w r q t 1. Turn off the power switch w. 2. Insert the machine plug t into the machine socket r. 3. Insert the power supply plug q into the outlet e. 4. Turn on the power switch w to activate the power and sewing light.
SECCION II. PREPARACION DE LA MAQUINA PARA COSER PARTIE II. PRÉPAREZ-VOUS À COUDRE Conexión de la máquina a la red eléctrica Branchez la machine q Clavija de toma de corriente w Interruptor de corriente e Red eléctrica r Enchufe de la máquina t Clavija de la máquina Antes de enchufar el cable de conexión a la red de corriente asegúrese de que el voltaje y la frecuencia de la máquina, mostrados en la placa de identificación, coincidan con los de la red de suministro en su hogar.
Setting Spool Pins The spool pins are used for holding the spools of thread when feeding the thread to the machine. Spool pins are separately packed to prevent any damage in transit. Therefore, fix the holder of spool pins in place with a screwdriver, as shown in the figure. Presser Foot Lifter q Presser foot lifter w Normal up position e Highest position e The presser foot lifter raises and lowers the presser foot. You can raise it about 1/4” (0.
Ajuste de los porta-carretes Pose de la broche à bobine Los portacarretes se utilizan para sostener los carretes de hilo y alimentar así a la máquina con el hilo. El carrete de horquilla esta empacado separadamente para prevenir algún daño en el transporte. Por lo tanto, coloque el soporte del carrete de horquilla en el espacio con un destornillador como se muestra en la ilustración. Les broches à bobines servent à retenir les bobines de fil en vue de procéder à l’enfilage du fil supérieur.
Extension Table w • Detaching the table Pull the table away from the machine, as illustrated, for “free-arm” sewing of cuffs and sleeves. • Attaching the table Push the extension table until it snaps into the machine. q Extension table w Pin e Holes r Tab t Free-arm t r q e To Remove and Attach the Foot Holder q q Thumb screw w Foot holder e Presser bar • To remove Remove the thumb screw q by turning it counterclockwise with a screwdriver.
Ampliación móvil de la superficie de costura Rallonge de plateau • Desmontaje de la ampliación móvil Tire de la ampliación móvil hacia afuera de la máquina tal como se ve en la ilustración. • Instalación de la ampliación móvil Empuje la ampliación móvil hasta que se mete de golpe en la máquina. q Ampliación móvil de la superficie de costura w Pasador e Alojamiento r Tablilla t Brazo libre • Pour retirer la rallonge Éloignez-la de la machine comme illustré.
Changing Needle Flat side Lado plano Méplat z q Needle clamp screw w Needle clamp z Turn off the power switch. Raise the needle to its highest position by turning the handwheel counterclockwise, toward you, and lowering the presser foot. Loosen the needle clamp screw q by turning it counterclockwise. Remove the needle from the needle clamp w. x Insert a new needle into the needle clamp with the flat side to the rear. When inserting the needle into the needle clamp w, push it up as far as it goes.
Cambio de aguja Changer l’aiguille q Tornillo de sujeción de la aguja w Alojamiento de la aguja z Apague la máquina con el interruptor de corriente. Suba la aguja hasta su posición más alta girando el volante en el sentido contrario a las agujas del reloj, y baje prensatelas. Afloje el tornillo de sujeción de la aguja q girándolo en el sentido contrario a las agujas del reloj. Retire la aguja de su alojamiento w tirando de ella hacia abajo.
Changing Presser Foot • To remove Turn the handwheel toward you to raise the needle to its highest position. Press the lever q on the back of the foot holder. The presser foot will drop off. • To attach Place the presser foot so the pin e on the foot lines just under the groove w of the foot holder. Lower the foot holder to lock the foot in place. q Lever w Groove e Pin w q e Bobbin Winding • Removing bobbin case Remove the extension table from the machine by pulling it to the left.
Cambio de prensatelas Changement de pied presseur • Para remover Girar manualmente, hacia uno mismo, el volante que la aguja alcance su posición más elevada; mediante la palanca elevadora del prensatelas subirlo. Presionar la palanca q situada en la posterior del soporte del prensatelas. El prensatelas caerá por su peso.
• Winding the Bobbin z While holding the handwheel with your left hand, turn the stopmotion knob in the direction of arrow. z x Draw the thread from spool. Pass the thread through the topcover thread guide. x v c Guide the thread around the bobbin winder thread guide. v Insert the thread through the hole in the bobbin from the inside to the outside. Put the bobbin on the bobbin winder spindle. b Push it to the right. c n With the free end of the thread held in your hand, depress the foot control.
• Enrollado de la bobina • Remplir la canette z Mientras sostiene el volante equilibrador con su mano izquierda, gire el botón de mociónpare hacia usted con la mano derecha. z Tourner le bouton de blocage vers soi avec la main droite tout en tenant le volant de la main gauche. x Saque el hilo del carrete. Pass the thread through the topcover thread guide. x Tirer le fil de la bobine. Pass the thread through the topcover thread guide. c Guíe el hilo a trvés del orificio.
• Inserting bobbin z Place a bobbin in the bobbin case, making sure the thread feeds clockwise from the bobbin. 1 x Draw the thread through the slot of the case. 2 c Continue to draw the thread under the tension spring and through the opening. Pull out about 4˝ (10 cm) of thread. q Tension spring 1 3 v Holding the latch open, position the bobbin case into the shuttle, and then release the latch. 4 b The case should lock into the place when the latch is released.
• Colocación de la canilla • Insertion de la canette z Coloque la canilla en el portacanillas asegurándose que el hilo se alimente en el sentido a las agujas del reloj y salga de la bobina z Introduisez la canette dans le portecanette en prenant soin que le fil se déroule vers la droite et qu’il sorte de la canette. x Tire del hilo a través de la ranura. x Tirez le fil par la fente du porte-canette. c Continúe tirando del hilo debajo del resorte tensor y a través de la abertura.
Threading the Machine • Threading the machine * Raise the thread take-up lever to its highest position by turning the handwheel counter clockwise. * Raise the presser foot lifter. * Place a spool on the spool pin, with thread coming off as shown. x z v z Pass the thread through the top cover thread guide. x Draw the end of thread around the upper thread guide. c b n c While holding the thread near the spool, draw the end of the thread down around the check spring holder.
Enhebrado del hilo de la aguja Enfilage de la machine • Enhebrado del hilo de la aguja * Suba el tirahilos hasta su posición más alta girando el volante en el sentido contrario a las agujas del reloj. * Levante la palanca de elevación del prensatelas. * Coloque un carrete en el portacarretes con el hilo saliendo, tal como se muestra. • Enfilage de la machine * Faites monter le levier releveur tendeur de fil le plus haut possible en tournant le volant à main en sens antihoraire.
• Drawing up bobbin thread z Raise the presser foot. Hold the needle thread lightly with your left hand. z x x Rotate the handwheel counterclockwise, toward you, for one complete turn. Bring the bobbin thread up by pulling the needle thread up. c c Pull both threads 4˝ to 6˝ (10.0 to 15.0 cm) under and behind the presser foot.
• Extracción del hilo de la canilla z Suba el prensatelas. Sujete ligeramente el hilo de la aguja con su mano izquierda. • Comment faire monter le fil de la canette z Faites monter le pied presseur. Tenez le fil de l’aiguille souplement de la main gauche. x Gire el volante en el sentido contrario a las agujas del reloj una vuelta completa. Saque el hilo de la canilla tirando del hilo de la aguja. x Tournez le volant d’un tour complet en sens antihoraire.
Adjust the Needle Thread Tension for a Straight Stitch 1 • Correct tension q Needle thread (Top thread) w Bobbin thread (Bottom thread) e To loosen r To tighten The ideal straight stitch has threads locked between two layers of fabric, as illustrated (magnified to show detail). If you look at the top and bottom of a seam, notice that there are no gaps. Each stitch is smooth and even. When adjusting the needle thread tension, the higher the number, the tighter the needle thread tension.
Ajuste de la tensión del hilo de la aguja para puntada recta Réglage de la tension du fil de l’aiguille pour le point droit • Tensión correcta q Hilo de la aguja (Hilo superior) w Hilo de la canilla (Hilo inferior) e Para aflojar r Para apretar • Tension correcte q Fil de l’aiguille (Fil supérieur) w Fil de la canette (Fil inférieur) e Pour relâcher la tension r Pour augmenter la tension La puntada recta ideal cierra los hilos entre las dos telas tal como se ve en la figura (ampliada).
1 Adjust the Needle Thread Tension for a Zigzag Stitch 2 For an ideal zigzag stitch, the bobbin thread does not show on the right side (Top side) of the fabric and needle thread shows slightly on the wrong side (Bottom side) of the fabric. See the illustrations for correct appearance. To match this appearance, adjust the needle tension.
Ajuste de la tensión del hilo de la aguja para puntada zig-zag Réglage de la tension du fil de l’aiguille pour le point zig-zag En la puntada zig-zag ideal, el hilo de la canilla no aparecerá en la parte de arriba de la tela y el hilo de la aguja se verá ligeramente en la parte de abajo de la tela. Vea el aspecto correcto en las ilustraciones. Para igualar esta apariencia, ajuste la tensión del hilo de la aguja.
Pattern Selector Dial q Raise the needle and presser foot. Turn the pateern selector dial to set the setting mark at the symbol corresponding to the desired pattern. q Setting mark NOTE: To avoid needle or fabric damage, make sure the needle is up and out of the fabric while selecting a stitch. Stitch Length Dial q Turn the stitch length dial to set the setting mark at the desired stitch length. The higher the number, the longer the stitch length q Setting mark • Adjust the dial in the 0.
Perilla de selección de patrón Cadran de sélection du point Suba la aguja y el prensatelas. Gire la perilla de selección de patrón para colocar la marca indicadora en el símbolo que corresponde al patrón deseado. q Marca indicadora Soulever l’aiguille et le pied presseur. Tourner le cadran de sélection du point et placer le repère en face du symbole correspondant au point désiré.
q w SECTION 3. BASIC SEWING e Straight Stitch Sewing q Pattern selector: w Presser foot: e Thread tension: r Stitch length: r B Zigzag foot 2–6 1.5–4 • Starting to sew Raise the presser foot and position the fabric next to a seam guide line on the needle plate (5/8˝ [1.6 cm] is most common). Lower the needle to the point where you want to start. Lower the presser foot and pull the threads toward the back. Depress the foot control.
SECCIÓN 3. OPERACIONES BÁSICAS DE COSTURA PARTIE 3. COUTURE DE BASE Costura de puntada recta Utilisation du point droit q w e r q w e r Selector de patrón: Prensatelas: Tensión del hilo: Longitud de puntada: B Prensatelas de zigzag 2–6 1.5–4 Cadran de sélection du point : Pied presseur: Tension du fil: Longueur du point: B Pied zigzag 2–6 1,5–4 • Début d’une couture Levez le pied presseur et placez le tissu le long de la ligne de repère sur la plaque d’aiguille (la plus utilisée est à 1.
q w Zigzag Sewing e q Pattern selector: w Presser foot: e Thread tension: r Stitch length: C Zigzag foot 2–5 0.5–4 r The zigzag stitch is one of the most common and versatile stitches. It can be a utility stitch for button sewing, buttonhole making, hemming, overcasting, mending and darning. It can also be used to decorate with trims, appliques and cut work, or as a decorative stitch. q w SECTION 4.
Puntada de zig-zag q Selector de patrón: w Prensatelas: e Tensión del hilo de la aguja: r Longitud de puntada: Zig-zag simple q w e r C Prensatelas para zig-zag 2-5 0.5 a 4 La puntada de zig-zag es una de las puntadas más comunes y más versátiles. Es una puntada de servicio para pegar botones, hacer ojales, para dobladillos, puntada sobrepuesta, para remendar y para zurcir. También puede ser utilizada para decorar con ribetes, aplicaciónes y como puntada decorativa.
q w Tricot Stitch e q Pattern selector: w Presser foot: e Thread tension: r Stitch length: D Zigzag foot 1–4 1–4 r Place the fabric under the presser foot in such a manner that the edge is slightly inside the righthand side of the presser foot. Guide the fabric so that the right hand stitches fall at the edge of the fabric. Trim the excess close to the stitches. Be careful not to cut the stitches.
Puntada de múltiple zig-zag q Selector de patrón: w Prensatelas: e Tensión del hilo de la aguja: r Longitud de puntada: Point zig-zag multiple q w e r D Prensatelas para zig-zag 1a4 1a4 Selecteur de point: Pied presseur: Tension du fil de l’aiguille: Longueur du point: D Pied zig-zag 1à4 1à4 Coloque la tela debajo del pie prensatelas de tal forma que el borde quede ligeramente introducido en la parte derecha del prensatelas.
q w Straight Stretch e q Pattern selector: w Presser foot: e Thread tension: r Stitch length: B Zigzag foot 2–6 S.S. r This strong, durable stitch is recommended where both elasticity and strength are necessary to ensure comfort and durability. Use it to reinforce areas such as crotch and armhole seams as well as to eliminate puckering on knits and stretch fabrics. Also use when constructing items requiring extra strength such as backpacks.
Puntada recta triple q Selector de patrón: w Prensatelas: e Tensión del hilo de la aguja: r Control de la longitud: Point droit extensible q w e r B Prensatelas para zig-zag 2a6 S.S. Sélecteur de point: Pied presseur: Tension du fil de l’aiguille: Longueur du point: B Pied zig-zag 2à6 S.S. Esta puntada de costura resistente y duradera, es recomendada en casos donde sean necesarios tanto la elasticidad como la durabilidad para asegurar comodidad y durabilidad.
q w Buttonhole e q Pattern selector: w Presser foot: e Thread tension: r Stitch length: A( ) Buttonhole foot 2–6 0.5-1 r To adjust buttonhole stitch density: Set the stitch length dial between 0.5 and 1.0 to adjust the buttonhole stitch density. z Carefully mark buttonhole length on fabric. Place the fabric under the foot with the buttonhole marking running toward you. z x x Slide both threads to the left. Line up the foot with the top mark on the fabric.
Puntada de múltiple zig-zag q Selector de patrón: w Prensatelas: e Tensión del hilo de la aguja: r Longitud de puntada: Point zig-zag multiple q Selecteur de point: w Pied presseur: A( ) Prensatelas para ojales 2a6 0.5-1 e Tension du fil de l’aiguille: r Longueur du point: A( ) Pied à boutonnière 2à6 0.5-1 Para ajustar la densidad de la puntada para ojales: Pour régler la densité du point de boutonnière: Coloque la perilla de longitud de puntada entre 0.5 y 1.
q w r e Button Sewing t q Pattern selector: w Presser foot: e Thread tension: r Stitch length: t Feed dog: C Zigzag foot 2–6 Any Dropped Drop the feed dogs. Match the holes in a button with the horizontal slot on the Presser foot. Adjust stitch width matching the distance of the holes on the button. Lower the foot to hold the button in place. Check to see if the needle enters into the holes on the button by turning the handwheel by hand. Sew about ten (10) stitches.
Costura de botones q Selector de patrón: w Prensatelas: e Tensión del hilo de la aguja: r Control de la longitud: t Dientes de transporte: Pose des boutons q w e r t C Prensatelas para zig-zag 2a6 Cualquier número Bajados Sélecteur de point: Pied presseur: Tension du fil de l’aiguille: Longueur du point: Griffes d’entraînement: C Pied zig-zag 2à6 Toute Abaissées Abaissez les griffes d’entraînement. Faites correspondre les trous du bouton avec la fente horizontale du pied presseur.
q w Zipper Application e q Pattern selector: w Presser foot: e Thread tension: r Stitch length: B Zipper foot 2–6 1.5–4 r Pin or baste zipper tape to fabric and place it under the foot. Smooth the threads toward the back and lower the foot. To sew the left side of the zipper, guide the zipper teeth along the edge of the foot and stitch through the garment and zipper tape. Turn the fabric and sew the other side of the zipper in the same way as you did the left side.
Aplicación de cremalleras q Selector de patrón: w Prensatelas: e Tensión del hilo de la aguja: r Control de la longitud: Installation des fermeture-éclair q Sélecteur de point: w Pied presseur: B Prensatelas para cremalleras 2a6 1.5–4 e Tension du fil de l’aiguille: r Longueur du point: B Pied pour fermetures éclair 2à6 1.5–4 Épingler ou faufiler le ruban de la fermeture éclair et le placer sous le pied. Tirer les fils vers l’arrière et baisser le pied.
q w Blind Stitch Hemming e r q Pattern selector: w Presser foot: e Thread tension: r Stitch length: t Hem guide t q q Lightweight fabric w Heavyweight fabric e Wrong side (Bottom side) of fabric w 1/4˝ (0.6 cm) e E or F Zigzag foot 1–4 1–4 1/4˝ (0.6 cm) e On heavyweight fabrics that ravel, the raw edge should be overcast first. Then fold the hem, as illustrated leaving 1/4˝ (0.6 cm) of the hem edge showing.
Dobladillo invisible q Selector de patrón: w Prensatelas: e Tensión del hilo de la aguja: r Control de la longitud: t Guía de dobladillo Ourlet invisible EoF Prensatelas para zig-zag 1a4 1a4 q w e r t Sélecteur du point: Pied presseur: Tension du fil de l’aiguille: Largeur du point: Guide à ourlets E ou F Pied zig-zag 1à4 1à4 q Telas ligeras w Telas gruesas e Parte de abajo la tela q Tissu fin w Tissu épais e Côté envers du tissu En telas gruesas que se deshilachan, el borde inacabado deberá sobrehil
q w Rolled Hem e q Pattern selector: w Presser foot: e Thread tension: r Stitch length: B Rolled Hem foot 2–6 2 r z Lower the needle into the fabric at the point where sewing is to begin, then lower the hemmer foot. Sew 3 or 4 stitches while holding the needle and bobbin threads. z x Lower the needle into the fabric and lift the hemmer foot. Insert the folded portion of the fabric into the curl of the hemmer foot.
Dobladillos enrollados q Selector de patrón: w Prensatelas: e Tensión del hilo de la aguja: r Control de la longitud: Ourleur présente q w e r B Prensatelas para dobladillo 2a6 2 Sélecteur de point: Pied presseur: Tension du fil de l’aiguille: Longueur du point: B Pied ourleur 2à6 2 z Baje la aguja sobre la tela en el punto donde ha de empezar a coser, después baje el pie para dobladillosss. Cosa 3 ó 4 puntadas sujetando los hilos de la canilla y la aguja.
q w Shell Stitch e q Pattern selector: w Presser foot: e Thread tension: r Stitch length: r G Zigzag foot 3–9 1–2 t Use a lightweight fabric such as tricot. Fold the fabric and stitch on the bias. You may need to increase the needle thread tension slightly. Allow the needle to just clear the folded edge of the fabric at zigzag stitches. If you sew rows of shell stitches, space the rows at least 5/8˝ (1.5 cm) apart. You can also sew shell stitches on knits or soft silky woven fabrics in any direction.
Puntada en forma de concha q Selector de patrón: w Prensatelas: e Tensión del hilo de la aguja: r Control de la longitud: Point coquille q w e r G Prensatelas para zig-zag 3a9 1a2 Sélecteur de point: Pied presseur: Tension du fil de l’aiguille: Longueur du point: G Pied zig-zag 3à9 1à2 Use telas ligeras como son las prendas de tricot. Doble la tela y puntéela en diagonal. Quizás tenga que incrementar ligeramente la tensión del hilo de la aguja.
q w Feather Stitch e q Pattern selector: w Presser foot: e Thread tension: r Stitch length: D Zigzag foot 1–4 S.S. r This stitch is strong, useful and decorative. It reinforces stretch and woven fabrics. You can use it to sew spandex undergarments or decoratively hem elastic fabric. You can also use this stitch in patchwork quilting. Sew this pattern on a seam that is already joined and pressed flat.
Puntada de pluma q Selector de patrón: w Prensatelas: e Tensión del hilo de la aguja: r Control de la longitud: Point d’épines q w e r D Prensatelas para zig-zag 1a4 S.S. Sélecteur de point: Pied presseur: Tension du fil de l’aiguille: Longueur du point: D Pied zig-zag 1à4 S.S. Esta puntada es resistente, útil y decorativa. Esta puede reforzar las telas elásticas y tejidas. Puede usarla para coser prendas de ropa interior elástico o dobladillar decorativamente la tela elástica.
q w Elastic Stretch Stitch e q Pattern selector: w Presser foot: e Thread tension: r Stitch length: H Zigzag foot 1–4 S.S. r Choose this stitch to attach elastic to garments. Mark elastic into quarters and match these to the center front, center back and side seams. Place the middle of the elastic under the center of the presser foot and stitch into place, making sure the elastic is evenly distributed.
Puntada elástica de extensión q Selector de patrón: w Prensatelas: e Tensión del hilo de la aguja: r Control de la longitud: Point extensible pour la fixation des élastiques q w e r H Prensatelas para zig-zag 1a4 S.S. Sélecteur de point: Pied presseur: Tension du fil de l’aiguille: Longueur du point: H Pied zig-zag 1à4 S.S. Utilisez ce point pour fixer un élastique sur un vêtement. Divisez la longueur de l’élastique en quatre parties égales et marquez chaque quartier.
SECTION 5. CARE OF YOUR MACHINE Cleaning the Feed Dogs Unplug the machine and remove the presser foot and needle with a screwdriver. Remove the needle plate with a screwdriver. Use a lint brush to clean the feed dogs. Replace needle plate and tighten with a screwdriver. Sewing Light The sewing light is located behind the face plate. To change the bulb, take the face plate off the sewing machine by removing the setscrew. * Unplug the power supply before changing the bulb.
SECCIÓN 5. MANTENIMIENTO DE LA MAQUINA PARTIE 5. ENTRETIEN DE VOTRE MACHINE Limpieza de los dientes del transporte Nettoyage du porte-canette Desenchufe la máquina y quite el prensatelas y la aguja. Retire los tornillos y quite la placa de aguja. Débranchez le cordon électrique, puis retirez le pied presseur et l’aiguille. A l’aide d’un tournevis, retirez la platine de l’aiguille. Con un cepillo, quite el polvo y los restos de tejidos que queda en los dientes.
Cleaning the Shuttle Race y This area must be kept free of dust, lint and occasional tangled thread. Clean the shuttle race area about every three months. e • Cleaning the shuttle area q Bobbin case w Levers e Shuttle race cover r Shuttle t Shuttle race y Center pin on the shuttle w w r 1. Raise the needle bar to its highest point and remove the bobbin case q. 2. Push shuttle race levers w aside. Lift shuttle race cover e and take shuttle r out. 3. Clean the shuttle race t with a lint brush. 4.
Limpieza de la corredera de la lanzadera Nettoyage de la coursière Esta área deberá mantenerse libre de polvo, pelusa y de ocasionales hilos atorados. Limpie la área de la corredera de la lanzadera. Limpie la área de la corredera de la lanzadera cada tres meses aproximadamente. La navette doit être gardée exempte de poussière, de charpie et de bouts de fil emmêlés. Nettoyez la navette a tous les trois mois.
Oiling the Machine e Apply a few drops of fine quality sewing machine oil to points indicated by arrows in the illustrations. For a machine in constant use, oil two or three times a year. q • Oiling behind the face plate Remove the cap, screw and face plate. Oil the point indicated in the illustration. w q Cap w Screw e Face plate • Oiling behind the top cover Lift the carrying handle. Remove 2 screws and top cover Oil the point indicated in the illustration.
Aceitar la Machine Huilage de la Machine Aplique unas gotas de aceite para máquinas de coser de buena calidad en los puntos indicados por las flechas de la ilustración. Para una máquina de uso constante, aceitarla una o dos veces al año. Verser quelque gouttes d’huile de machine à coudre de bonne qualité aux parties indiqués dans les gravures. Pour une machine en usage continuelle, lubrifier deux ou trois fois l’an. • Aceitar detrás la placa frontal Saque el tapón y el tornillo, Saque la placa frontal.
Troubleshooting Condition Cause Reference The needle thread is not threaded properly. The needle thread tension is too tight. The needle is bent or blunt. The needle is incorrectly inserted. The needle thread and the bobbin thread are not set properly under the presser foot at the beginning of sewing. 6. The fabric is not drawn to the rear when the sewing has finished. 7. The thread is too heavy or too fine for the needle. Pages 20, 22 Pages 24, 26 Page 12 Page 12 Pages 20, 22 1.
Soluciones para problemas de funcionamiento Causa Probable Condición Se rompe el hilo de la aguja. 1. 2. 3. 4. 5. El hilo de la aguja no se ha enhebrado correctamente. La tensión del hilo de la aguja es excesiva. La aguja está despuntada o doblada. La aguja no está bien colocada. Los hilos de la aguja y la canilla no están bien colocados debajo del prensatelas al empezar a coser. 6. La tela no se ha extraído hacia atrás al terminar la costura. 7. El hilo es demasiado grueso o fino para la aguja.
En cas de problème Problème Le fil d’aiguille se casse. Cause Reference 1. Le fil d’aiguille n’est pas passé correctement. 2. La tension du fil d’aiguille est trop forte. 3. L’aiguille est tordue ou émoussée. 4. L’aiguille est maí installée. 5. Le fil d’aiguille et celui de la canette ne sont pas passés correctement sous le pied presseur au debut de la couture. 6. On ne tire pas le tissu vers l’arrière à la fin de la couture. 7. Le fil est trop épais ou trop fin pour í’aiguille.
731-402-195 (E/S/F) Printed in Taiwan