
Instructions / Assembly
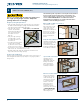
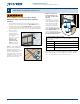
Table Of Contents

IMPORTANT INFORMATION
|
TABLE OF CONTENTS
|
GLOSSARY
SAFETY AND HANDLING
Installation Instructions
for Vinyl Windows with Integral Nailing Fin (JII001)
2
JELD-WEN does not endorse the installation of our products
into a barrier-type install system unless a sill pan is present,
incorporated with through-wall ashing and can drain to the
exterior (along with other “required” components). Failure to
do so may result in the denial of any warranty claims
JELD-WEN advises against product installation in
high interior water exposure environments such as
showers, steam rooms and enclosed pool areas. These
areas are beyond the tested/certied design intent of
the window and any related warranty claims could be
denied on that basis.
Glossary
Buck
A wood framework attached to the masonry inside a window or patio
door rough opening.
Mull Joint
The joint where two or more window units are structurally joined together.
Mulled Unit
Two or more window units structurally joined together.
Self-Adhered Flashing
An adhesive-backed tape material used to waterproof the rough opening
and/or used to seal a window to the building’s weather barrier.
Weep Hole (weep channel)
The visible exit or entry part of a water drainage system used to drain
water out of a window.
Safety
• Read and fully understand ALL manufacturers’ instructions before
beginning. Failure to follow proper installation instructions may result in
the denial of warranty claims for operational or performanceproblems.
• DO NOT work alone. Two or more people are required. Use safe
liftingtechniques.
• Use caution when handling glass. Broken or cracked glass can cause
serious injury.
• Wear protective gear (e.g., safety glasses, gloves, ear protection, etc.).
• Operate hand/power tools safely and follow the manufacturer’s
operating instructions.
• Use caution when working at elevated heights.
• If disturbing existing paint, take proper precautions if lead paint is
suspected (commonly used before 1979). Your regional EPA
(www.epa.gov/lead) or Consumer Product Safety Commission ofces
provide information regarding regulations and lead protection.
Window Handling
• Make sure operable windows are locked prior to installation.
• Heed material manufacturers’ handling and application instructions.
• Handle in a vertical position; DO NOT carry at or drag on the oor.
• DO NOT put stress on joints, corners or frames.
• Store window in a vertical, leaning position to allow air circulation;
DO NOT stack horizontally.
• Ensure the storage area is dry, well-ventilated and protected from
exposure to direct sunlight.
• Only install into vertical walls when conditions and sheathing aredry.
IF INJURY OCCURS, IMMEDIATELY SEEK MEDICAL ATTENTION!
Table of Contents
Safety and Handling....................................... 2
Materials and Tools .......................................3
Inspect product ...........................................3
Inspect Rough Opening (R.O.) ............................... 4
Install Sill Pan Flashing System............................... 5
Temporarily Fasten and Shim Product ......................... 6
Fasten Product (Size And Spacing)............................ 7
Install Drip Cap ........................................... 9
Create “Interior” Air Seal................................... 9
Remove Protective Film ...................................10
Drilling, sawing, sanding or machining wood products
can expose you to wood dust, a substance known to
the State of California to cause cancer. Avoid inhaling
wood dust or use a dust mask or other safeguards
for personal protection. For more information, go to
www.P65Warnings.ca.gov/wood.
PLEASE NOTE: Installations where the sill is higher than 35 feet above
ground level, or any product installation into a wall condition not
specically addressed in these instructions, must be designed by an
architect or structural engineer. Failure to install windows into a square,
level, and plumb openings could result in denial of warranty claims for
operational or performance problems.
NOTE TO INSTALLER: Provide a copy of these instructions to the
building owner. By installing this product, you acknowledge the
terms and conditions of the limited product warranty as part of the
terms of thesale.