
Instructions / Assembly
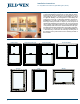
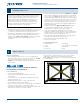
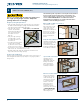
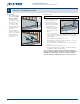
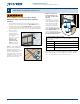
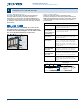
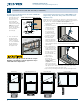
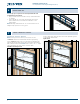
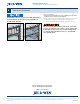
Table Of Contents

MATERIALS AND TOOLS
INSPECT PRODUCT
1
Installation Instructions
for Vinyl Windows with Integral Nailing Fin (JII001)
3
JELD-WEN exterior window and door products should be installed in
accordance with JELD-WEN’s recommended installation instructions,
which are printed on the product label or can be found on our
website: www.jeld-wen.com. NOTE: When using ashing, spray
adhesive/primer, sealant and foam products, we recommend
using the same manufacturer and verifying compatibility. It is the
End User’s responsibility to determine if dissimilar materials are
compatible with the substrates in the application.
• Sill pan: A pan ashing system (as dened in ASTM E2112) is required
at the sill prior to window/door product installation. A sill pan should
have a positive slope, must be installed onto the sill of the R.O. in a
weather-tight manner and tied into the drainage plane of the building
envelope. For sill pans without a positive slope, place a 3/16"-1/4" tall
plastic shim 2" from each corner and no more than 8" on-center in
between (excludes Canada and potentially large door systems). If an
aftermarket sill pan is preferred, then we suggest the Manufacturer’s
instructions be followed.
• Sealant: An exterior grade (High-Performing, Low VOC) sealant
is recommended for installation practices. Check with sealant
manufacturers for color-match options and paintability.
• Polyurethane Low-Expansion Window and Door Foam: A low-
expansion, polyurethane window and door foam is recommended for
installation practices. Avoid using moderate to high-expansion foam
products as operational issues or damage may occur.
• Backer Rod: 1/8" larger than the widest portion of the gap (used in
conjunction with sealant bead for interior air seal).
• Non-compressible or non-water degradable shims.
• Drip cap (if not supplied).
Potential Needed Tools
• Utility knife/shears
• J-roller
• Hammer
• Tape measure
• Caulking gun
• Level (4' minimum recommended)
• Drill with bits
• Pry bar
Remove Packaging
• Remove shipping materials such as corner covers, shipping blocks,
shrink wrap or pads. If there is a protective lm on the glass, DO NOT
remove it until installation and construction is complete.
• DO NOT remove the installation label until after the inspection of the
job iscomplete.
If any of the above conditions represent a concern, or if you expect
environmental conditions to exceed the window’s performance
rating, DO NOT install the window. Contact your dealer or distributor
forrecommendations.
Needed Materials
• #8 pan-head/ washer-head (or larger diameter head), corrosion-resistant
screw OR 1 3/4" galvanized roong nails. Minimum embedment of
1 1/4" into the structural framing (or as required by localcode).
• For Wind Zone 3 (WZ3) Products (Tilt Single Hung, Side Load Single
Hung, Tilt Double Hung and Horizontal Slider Windows): #8 x 2 1/2"
at-head screws (stainless steel required) are needed to go through
and anchor the bracket to the rough framing (two screws
per bracket).
DO NOT open/close the sash until the window is
installed and properly shimmed.
Inspect Window
• Cosmetic and/or shipping damage.
• Product squareness (diagonal measurements not more than
1/4"different).
• Correct product (size, color, grid pattern, handing, glazing, energy-
efciency requirements, etc.).
• Manufacturing abnormalities (e.g., warp, bow, squareness).
• Cracked frame welds or other frame damage.
• Splits, cracks, holes, missing sections or other damage to the nailing n
longer than 6" and/or within 1/2" of the window frame.
• For side-by-side mulled units, a drip cap that extends the length of the
frame plus 1/8" overhang on each end is required.