
Manual
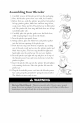
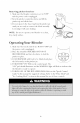

Assembling Your Blender
1. Carefully remove all blender parts h'om the pad<aging.
2. Place the blender power base on a solid, level surtace.
3. Befure first use, wash the pitcher jar, pitcher lid, pitcher
lid cap, pitcher gasket, blade base and base ring in hot,
soapy water. Rinse and <11"7.The pitcher jar is dishwasher
sak'. The pitcher lid, base ring and blade base are all top
rack dishwasher safe.
4. ( arehllly place the pitcher gasket over the blade base,
while keeping lingers away h'om the blades.
5. Turn the pitcher jar upside down.
6. Using caution, place the blade base and pitcher gasket
into the bottom opening of the pitcher jar.
7. Twist the base ring onto bottom of pitcher jar, making
sure it threads evenly and secures the pitcher gasket and
blade base in place. The base ring shoukl be tightened
hand tight onto the pitcher jar. I)o not over tighten.
8.Turn the pitcher jar right side up and place it on top of
the blender power base and turn clockwise to lock the
pitcher in place.
9. Insert the pitcher lid cap into the pitcher lid and tighten
it by turning clockwise. Place the pitcher lid onto the
pitcher jar.
10. Plug the detachable power cord into the blender power
base and a properly grounded 3 prong electrical outlet.
The blender is now ready to use.