
Installation guide


INSTALLATIONINSTRUCTIONS
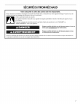
Excessive Weight Hazard
Use two or more people to move and install
warming drawer.
Failure to do so can result in back or other injury.
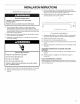
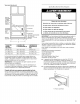
6. Open warming drawer and slowly push against the front
panel to slide the drawer completely into the cabinet until the
flanges on the front panel meet the cabinet face.
7. Use the two #8-18 x 5/8"screws provided to secure the
warming drawer frame to the cabinet.
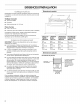
1. Turn off power supply. Using 2 or more people, move
warming drawer close to its final location. Remove and
discard shipping materials, tape, and protective film from the
warming drawer. Remove and set aside racks and other parts
from inside warming drawer.
2. Make sure the that the warming drawer Temperature control
knob is set to the OFF position.
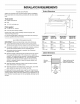
3. Support the warming drawer on a sturdy surface level with
the cutout opening.
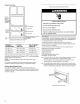
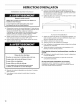
Electrical Shock Hazard
Plug into a grounded 3 prong outlet.
Do not remove ground prong.
Do not use an adapter.
Do not use an extension cord.
Failure to follow these instructions can result in death,
fire, or electrical shock.
A. Two #8-18 x %" screws
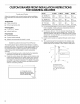
1. Check that all parts are now installed. If there is an extra part,
go back through the steps to see which step was skipped.
2. Check that you have all of your tools.
3. Dispose of/recycle all packaging materials.
4. For warming drawer use and cleaning, read the Use and Care
Guide.
5. Turn the Temperature control knob to HI, and the light should
illuminate.
If warming drawer(s) does not operate, check the
following:
• Household fuse is intact and tight; or circuit breaker has not
tripped.
• Warming drawer is plugged in, and electrical supply is
connected.
If you need Assistance or Service:
Please reference the "Assistance or Service" section of the Use
and Care Guide or contact the dealer from whom you purchased
your warming drawer.
4. Plug the power supply cord into the grounded 3 prong outlet.
5. Slide the warming drawer over half way into the cutout
opening.