
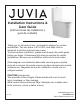
Installation & Assembly


1.2.1.2.a
Test Set The Toilet
(Test Set El Inodoro)
6
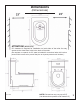
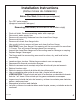
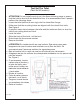
• ATTENTION! Do not install wax ring yet. Use these following steps to ensure
that the toilet is level with the bathroom oor. It is recommended that 2 people
perform the following steps.
• Lower the toilet (without a wax ring) onto the closet oor ange.
• Make sure that the mounting holes are aligned with the closet oor bolts.
See Figure 4
• If needed, insert shims between the toilet and the bathroom oor, to stop the
toilet from rocking back and forth.
• Level the toilet.
• Shim the back of the bowl, not the front.
• Note where the shims were needed.
• Remove the toilet.
• ¡ATENCIÓN! No instale el anillo de cera todavía. Siga estos pasos para
asegurarse de que el inodoro esté nivelado con el piso del baño. Se
recomienda que 2 personas realicen los siguientes pasos.
• Baje el inodoro (sin un anillo de cera) en la brida del piso del armario.
• Asegúrese de que los oricios de montaje estén alineados con los pernos del
piso del armario.
Ver Figura 4
• Si es necesario, inserte
calzos entre el inodoro y
el piso del baño, para
evitar que el inodoro se
balancee hacia adelante
y hacia atrás.
• Nivelar el inodoro.
• Calce la parte posterior
del tazón, no el frente.
• Tenga en cuenta donde
se necesitaron las calzas.
• Retire el inodoro.