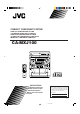
COMPACT COMPONENT SYSTEM KOMPAKT-KOMPONENTEN-SYSTEM SYSTEME DE COMPOSANTS COMPACT KOMPACTO KOMPONENTEN-SYSTEEM SISTEMAS DE COMPONENTES COMPACTOS IMPIANTO A COMPONENTI COMPATTO CA-MXJ100 STANDBY OPEN / CLOSE CD1 CD2 CD3 DISC CHANGE COMPACT DIGITAL AUDIO PLAY & EXCHANGER VOLUME COUNTER RESET + CLOCK/TIMER DEMO ACTIVE BASS EX. SOUND MODE – AUX FM/AM PROGRAM/SET TIMER ON/OFF SLEEP - TUNING CD TAPE TAPE A/B TUNING + REPEAT PROGRAM REPEAT /SET CD CD ACTIVE SOUND BASS EX.
Warnings, Cautions and Others / Warnung, Achtung und sonstige Hinweise / Mises en garde, précautions et indications diverses / Waarschuwingen, voorzorgen en andere mededelingen / Avisos, precauciones y otras notas / Avvertenze e precauzioni da osservare IMPORTANT for the U.K. DO NOT cut off the mains plug from this equipment.
English ATTENZIONE Per ridurre il rischio di shock elettrici, incendi, ecc... 1. Non togliete viti, coperchi o la scatola. 2. Non esponete l'apparecchio alla piogggia e all'umidità. Caution –– switch! Disconnect the mains plug to shut the power off completely. The switch in any position does not disconnect the mains line. The power can be remote controlled. Achtung –– -Schalter! Den Netzstecker aus der Steckdose ziehen, um die Stromversorgung vollkommen zu unterbrechen.
Caution: Proper Ventilation Voorzichtig: Goede ventilatie vereist To avoid risk of electric shock and fire, and to prevent damage, locate the apparatus as follows: 1 Front: No obstructions and open spacing. 2 Sides/ Top/ Back: No obstructions should be placed in the areas shown by the dimensions below. 3 Bottom: Place on the level surface. Maintain an adequate air path for ventilation by placing on a stand with a height of 10 cm or more.
IMPORTANT FOR LASER PRODUCTS / WICHTIGER HINWEIS FÜR LASER-PRODUKTE / IMPORTANT POUR LES PRODUITS LASER / BELANGRIJKE INFORMATIE VOOR LASERPRODUKTEN / IMPORTANTE PARA LOS PRODUCTOS LÁSER / IMPORTANTE PER I PRODOTTI LASER REPRODUCTION OF LABELS/ANBRINGUNGSORTE FÜR LASER-PRODUKTE/REPRODUCTION DES ETIQUETTES/VERKLARING VAN DE LABELS/REPRODUCCIÓN DE ETIQUETAS/RIPRODUZIONE DELLE ETICHETTE 1 CLASSIFICATION LABEL, PLACED ON REAR ENCLOSURE 2 WARNING LABEL, PLACED INSIDE THE UNIT 1 KLASSIFIKATIONSETIKETTE AN DER R
English Introduction We would like to thank you for purchasing one of our JVC products. Before operating this unit, read this manual carefully and thoroughly to obtain the best possible performance from your unit, and retain this manual for future reference. About This Manual Power sources This manual is organized as follows: • When unplugging from the wall outlet, always pull the plug, not the AC power cord. • The manual mainly explains operations using the buttons and controls on the unit.
English Contents Location of the Buttons and Controls ....................... 3 Front Panel ................................................................. 4 Remote Control .......................................................... 5 Getting Started ............................................................ 6 Unpacking .................................................................. 6 Putting the Batteries into the Remote Control ........... 6 Connecting Antennas ....................................
English Location of the Buttons and Controls Become familiar with the buttons and controls on your unit. 1 i STANDBY OPEN / CLOSE 2 CD1 CD2 CD3 o ; DISC CHANGE COMPACT PLAY & EXCHANGER DIGITAL AUDIO 3 4 5 6 7 8 9 p q w VOLUME COUNTER RESET + CLOCK/TIMER DEMO ACTIVE BASS EX.
Display Window 1 2 4 5 TAPE A B SLEEP 2 1 3 CD-SYNC 6 7 SOUND REC ST PRGM 3 9 8 PRESET REPEAT ALL 1 CD p q kHz MHz VOL e w See pages in the parentheses for details. Front Panel 1 2 3 4 5 6 7 8 9 p q w e r t y u i o ; a s d f Carousel (standby/on) button and STANDBY lamp (9) Display window CLOCK/TIMER button (9, 16) COUNTER RESET button (15) DEMO button (8) SOUND MODE button (10) ACTIVE BASS EX.
English Remote Control Remote Control TIMER ON/OFF SLEEP w e 1 ACTIVE SOUND BASS EX. MODE PROGRAM REPEAT /SET 2 3 4 5 6 7 8 r t y u i o ; TAPE A/B TUNING MODE FM MODE CD AUX FM/AM TAPE CD DISC SKIP VOL. 9 + FADE MUTING p q VOL. a s – 1 (standby/on) button (9) 2 PROGRAM/SET button (9) 3 REPEAT button (12) 4 CD 0 button (12) Pressing this button also turns on the unit. 5 TAPE A/ B button (14) 6 CD 38 button (12) Pressing this button also turns on the unit.
Continued Unpacking Connecting Antennas After unpacking, check to be sure that you have all the following items. The number in the parentheses indicates the quantity of the pieces supplied. FM antenna FM antenna (supplied) IAL • • • • 5 FM 7 AM (MW/LW) loop antenna (1) FM antenna (1) Remote control (1) Batteries (2) X COA If any is missing, consult your dealer immediately.
English AM (MW/LW) antenna Connecting Speakers You can connect a pair of the front speakers. 2, 3 1 AM ANT SPEAKERS IMPEDANCE 6-16 OHMS. + L Black Red – – AM (MW/LW) loop antenna (supplied) Speaker cord Speaker cord R + 1 Connect the AM (MW/LW) loop antenna to the AM ANT terminal as illustrated. 2 Turn the AM (MW/LW) loop antenna until you have the best reception.
English Connecting Other Equipment NOW, you can plug in the unit and other connected equipment FINALLY! You can connect an audio equipment — used only as a playback device. When you connect and use this equipment, refer also to its manual. Be sure that the plugs of the audio cords are color coded: White plugs and jacks are for left audio signals, and red ones for right audio signals. FM 75 • DO NOT connect any equipment while the power is on.
English Common Operations Setting the Clock To adjust the clock again Before operating the unit any further, first set the clock built in this unit. • There is a time limit in doing the following steps. If the setting is canceled before you finish, start from step 1 again. • If you want to stop clock setting, press CLOCK/TIMER once or wait until the time limit of 15 seconds comes. 1 Press CLOCK/TIMER twice.
English Adjusting the Volume Reinforcing the Bass Sound You can adjust the volume level only while the unit is turned on. The richness and fullness of the bass sound is maintained regardless of how low you set the volume. You can use this effect only for playback. Turn VOLUME clockwise to increase the volume or counterclockwise to decrease it. VOLUME + To get the effect, press ACTIVE BASS EX. so that the BASS indicator appears on the display. ACTIVE BASS EX.
English Listening to FM and AM (MW/LW) Broadcasts Tuning in a Station 1 Tune in the station you want to preset. • See “Tuning in a Station” to the left. 1 Press FM/AM. FM/AM The unit automatically turns on and tunes in the previously tuned station (FM, MW, or LW). • Each time you press the button, the band changes among FM, MW, and LW. MHz 2 Press PROGRAM/SET. PROGRAM/SET 2 Select a station. PRGM On the unit: Press and hold TUNING – or TUNING + for more than 1 second.
Playing Back CDs Loading CDs English Continued Playing Back CDs You can play CDs continuously. 1 Press OPEN/CLOSE 0 on the OPEN / CLOSE unit or CD 0 on the remote control. 1 Load CDs. 2 Press REPEAT on the unit CD The unit automatically turns on and the carousel comes out. 2 Place one or two discs correctly on the front slots of the carousel, with its label side up. ALL CD INCORRECT press DISC CHANGE on the unit (or DISC SKIP on the remote control).
English 4 Press 4 or ¢ Basic CD Operations (4 / 1 or ¢ / ¡ on the remote control) to select the track number, then press PROGRAM/SET. While playing a CD, you can do the following operations. To exchange CDs during playback of another Press DISC CHANGE to eject and exchange the CD. PROGRAM/SET To locate a particular point in a track During play, press and hold 1 or ¡. • 1 : Fast reverses the disc. • ¡ : Fast forwards the disc. When using the remote control, press and hold 4 / 1 or ¢ / ¡.
English Playing Back Tapes To stop during play, press 7. Playing Back a Tape 1 Press EJECT 0 for the deck you want to use. To operate the other deck, press TAPE A/B, then TAPE 3. To fast-forward the tape, press ¡ (or ¢ / ¡ on the remote control). To rewind the tape, press 1 (or 4 / 1 on the remote control). T EC 0EJ To remove the cassette, press 0 EJECT for deck A or EJECT 0 for deck B. For Deck B For Deck A 2 Put a cassette in, with the exposed part of the tape down.
English Recording Resetting the Tape Counter IMPORTANT: • It may be unlawful to record or play back copyrighted material without the consent of the copyrighted owner. • The recording level is automatically set correctly, so it is not affected by the VOLUME control. Thus, during recording you can adjust the sound you are actually listening to without affecting the recording level.
Continued 3 Set the on-time you want the unit to turn on. There are three timers available — Recording Timer, Daily Timer, and Sleep Timer. 1) Press 4 or ¢ to set the hour, then press PROGRAM/SET. 2) Press 4 or ¢ to set the minute, then press PROGRAM/ SET. “OFF TIME” appears for 2 seconds, then the unit enters off-time setting mode. Before using the timers, you need to set the clock built in the unit. (See page 9.
English 7 When selecting “FM,” “MW,” or “LW.” Press 4 or ¢ to select the preset station number, then press PROGRAM/SET. The unit enters recording timer setting mode. If you want to continue the Recording Timer setting, go to step 3 of the Recording Timer setting procedure. 3 Press PROGRAM/SET. “ON TIME” appears for 2 seconds, then the unit enters on-time setting mode. PROGRAM/SET 8 Press CLOCK/TIMER. CLOCK/TIMER The indicator stops flashing and remains lit.
English 7 Select the preset station. Using Sleep Timer 1) Press 4 or ¢ to select the band (“FM,” “MW,” or “LW”), then press PROGRAM/SET. 2) Press 4 or ¢ to select a preset channel number. With Sleep Timer, you can fall asleep to music. You can set Sleep Timer when the unit is operating. How Sleep Timer actually works The unit automatically turns off after the specified time length passes by. PROGRAM/SET On the remote control ONLY: 1 Press SLEEP. 8 Press PROGRAM/SET.
English Maintenance To get the best performance of the unit, keep your discs, tapes, and mechanism clean. Handling discs • Remove the disc from its case by holding it at the edge while pressing the center hole lightly. • Do not touch the shiny surface of the disc, or bend the disc. • Put the disc back in its case after use to prevent warping. • Be careful not to scratch the surface of the disc when placing it back in its case. • Avoid exposure to direct sunlight, temperature extremes, and moisture.
English Troubleshooting If you are having a problem with your unit, check this list for a possible solution before calling for service. If you cannot solve the problem from the hints given here, or the unit has been physically damaged, call a qualified person, such as your dealer, for service. Symptom Cause Action No sound is heard. Connections are incorrect or loose. Check all connections and make corrections. (See pages 6 to 8.) Hard to listen to broadcasts because of noise.
VICTOR COMPANY OF JAPAN, LIMITED V EN, GE, FR, NL, SP, IT Cover-CA-MXJ100[E]/f 6 J 00.4.
INSTRUCTIONS SPEAKER SYSTEM SP-MXJ100 BEDIENUNGSANLEITUNG: LAUTSPRECHERSYSTEM MANUEL D’INSTRUCTIONS: SYSTEME DES ENCEINTES GEBRUIKSAANWIJZING: LUIDSPREKERSYSTEEM MANUAL DE INSTRUCCIONES: SISTEMA DE ALTAVOCES ISTRUZIONI: SISTEMA DI ALTOPARLANTI BRUKSANVISNING: HÖGTALARSYSTEM VEJLEDNING: HØJTTALERSYSTEM KÄYTTÖOHJE: KAIUTINJÄRJESTELMÄ INSTRUKCJA UŻYTKOWANIA: ZESTAW GŁOŚNIKOWY HASZNÁLATI ÚTMUTATÓ: HANGSZÓRÓ RENDSZER NÁVOD K OBSLUZE: REPRODUKTOROVÁ SOUSTAVA Thank you for purchasing JVC speakers.
CONNECTION • Turn off power to the whole system before connecting the speakers to the amplifier. • The nominal impedance of the SP-MXJ100 is 6 Ω. Select for use an amplifier to which a speaker system with the load impedance of 6 Ω can be connected. • The maximum power handling capacity of the SP-MXJ100 is 40 W. Excessive input will result in abnormal noise and possible damage.
ANSCHLUSS RACCORDEMENT • Schalten Sie vor dem Anschluß der Lautsprecher an den Verstärker die Spannungsversorgung des gesamten Systems aus. • Die Nennimpedanz der Lautsprecher — Systeme SP-MXJ100 beträgt 6 Ω. Wählen Sie einen Verstärker, an den ein Lautsprechersystem mit einer Lastimpedanz von 6 Ω angeschlossen werden kann. • Die maximale Belastbarkeit der SP-MXJ100 beträgt 40 W. Eine Überlastung führt zu Verzerrungen und möglicherweise zu Beschädigungen.
AANSLUITINGEN CONEXIÓN • Schakel de spanning van alle aangesloten komponenten uit alvorens de luidsprekers met de versterker te verbinden. • De nominale impedantie van de SP-MXJ100 bedraagt 6 Ω. Kies daarom een versterker waarop u een luidspekersysteem kunt aansluiten met een impedantie belasting van 6 Ω. • Het maximum verwerkingsvermogen van de SP-MXJ100 bedraagt 40 W. Te hoge ingang kan in abnor male geluidsreproduktie en in beschadigingen resulteren.
COLLEGAMENTO ANSLUTNING • Spegnete la corrente dell’intero sistema prima di collegare gli altoparlanti all’amplificatore. • L’impedenza nominale del modello SP-MXJ100 è 6 Ω. Selezionate per l'uso un amplificatore a cui collegare un altoparlante con un'impedenza di carico di 6 Ω. • La capacità di corrente massima del modello SP-MXJ100 è 40 W. Un ingresso eccessivo causerà un suono anormale è possibili danni.
TILSLUTNING LIITÄNTÄ • Sluk for strømmen til hele systemet før højttalerne forbindes til forstærkeren. • Den nominelle impedans for SP-MXJ100 er 6 Ω. Anvend en forstærker, hvortil der kan tilsluttes et højttalersystem med en belastningsimpedans på 6 Ω. • Den maksimale belastningskapacitet for SP-MXJ100 er 40 W. For kraftigt indgangssignal vil resultere i unormal stoj og muligvis beskadigelse.
PODŁĄCZENIE CSATLAKOZTATÁS • Przed podłączeniem kolumn do wzmacniacza najpierw wyłączyć sieć całego zestawu. • Impedancja znamionowa kolumn zestawu głośnikowego SPMXJ100 wynosi 6 Ω. Wybrać taki wzmacniacz, który pozwala na podłączenie kolumn o impedancji obciążeniowej wynoszącej 6 Ω. • Maksymalna moc kolumn zestawu głośnikowego SP-MXJ100 wynosi 40 W. Zbyt wysoki poziom sygnału na wejściu kolumn powoduje zniekształcenie dźwięku, a nawet może spowodować uszkodzenie głośników.
ZAPOJENÍ • Vypojte napájení celé soustavy před zapojením reproduktorů k zesilovači. • Jmenovitá impedance SP-MXJ100 je 6 Ω. Zvolte si k používání zesilovač, k němuž je možné zapojit reproduktorovou soustavu s impedancí zátěže 6 Ω. • Maximální kapacita příkonu, který může zpracovat SP-MXJ100, je 40 W. Nadměrný příkon způsobí abnormální hluk a možné poškození.