
Compact Component System Instructions
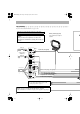
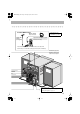
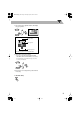

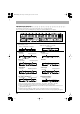
Table Of Contents
- US,UN version
- Warnings, Cautions and Others
- Contents
- Introduction
- Getting Started
- Before Operating the System
- Daily Operations —Playback
- Daily Operations —Sound&Other Adjustments
- Unique DVD/VCD Operations
- Advanced Disc Operations
- On-Screen Disc Operations
- Advanced Tape Operations
- Enjoying Karaoke
- Timer Operations
- Set up Menu Operations
- Operating the TV
- Additional Information
- UX version
- Warnings, Cautions and Others
- Contents
- Introduction
- Getting Started
- Before Operating the System
- Daily Operations —Playback
- Daily Operations —Sound&Other Adjustments
- Unique DVD/VCD Operations
- Advanced Disc Operations
- On-Screen Disc Operations
- Advanced Tape Operations
- Enjoying Karaoke
- Timer Operations
- Set up Menu Operations
- Operating the TV
- Additional Information
- UW,UY version
- Warnings, Cautions and Others
- Contents
- Introduction
- Getting Started
- Before Operating the System
- Daily Operations —Playback
- Daily Operations —Sound&Other Adjustments
- Unique DVD/VCD Operations
- Advanced Disc Operations
- On-Screen Disc Operations
- Advanced Tape Operations
- Timer Operations
- Set up Menu Operations
- Operating the TV
- Additional Information
5
T
CENTER
CENTER SPEAKER
8
OPTICAL
DIGITAL
OUTPUT
FRONT
MAIN SPEAKER
LEFT
RIGHT
ª
FRONT
SUBWOOFERS
·
ª
·
ª
·
ª
·
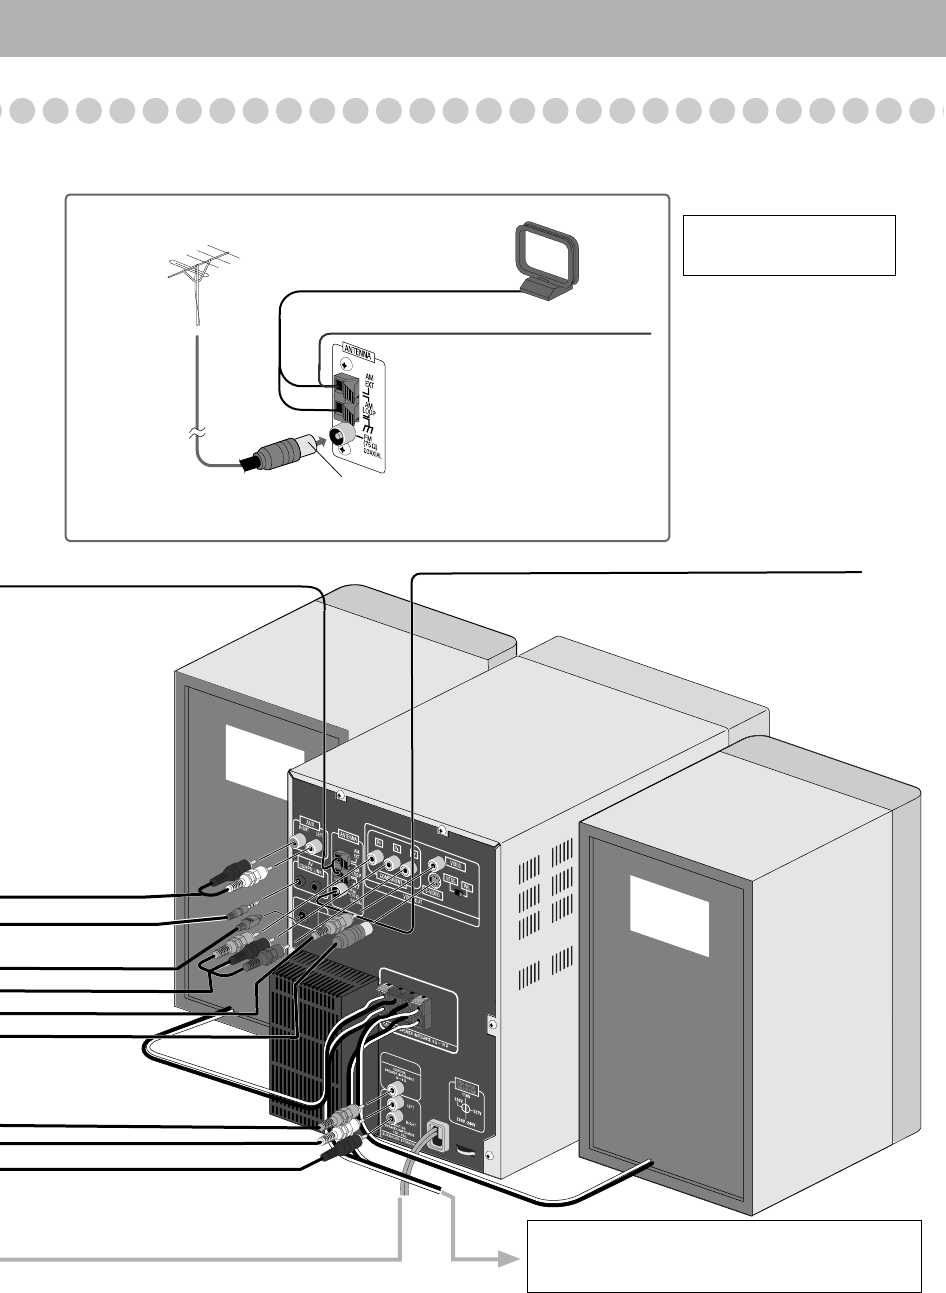
For better FM/AM reception
Outdoor FM
antenna
(not supplied)
AM loop antenna
Keep it connected.
Vinyl-covered wire (not supplied)
Extend it horizontally.
Disconnect the supplied FM antenna, and connect to an outdoor FM
antenna using a 75 Ω wire with coaxial type connector (IEC or DIN45325).
FM antenna (supplied)
Extend it so that you can
obtain the best reception.
To Front subwoofer
• See “To connect the speakers” on page 6 and
“Setting the Speakers” on page 8.
* This illustration uses
SP-MXJD8 as speakers.
MX-JD5&8[UX].book Page 5 Monday, April 26, 2004 2:22 PM