
User Guide


28
Network Settings
䢇 Changing the IP address using the
Internet Explorer
1 Launch the Internet Explorer on the computer
2 When proxy settings are enabled in the Internet Explorer, follow the steps below to
disable the proxy of the Internet Explorer
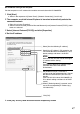
● Select in the order of [Tool]-[Internet Options]-[Connections]-[LAN Setting], followed by
deselecting the check for [Use a proxy server for your LAN] under [Proxy Server] of the [Local
Area Network (LAN) Settings] window.
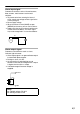
3
If the active script of the Internet Explorer is disabled, follow the steps below to enable it
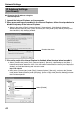
● Select [Trusted sites] under [Tool]-[Internet Options]-[Security]. Upon doing so, the [Sites…]
button directly below becomes active. Click this button and deselect the check [in the displayed
window], and add the following web site to the zone.
http://192.168.0.2
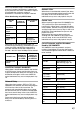
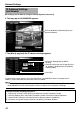
● Next, select [Trusted sites] under [Tool]-[Internet Options]-[Security], and press the [Custom
Level] button. Select [Enable] under [Scripting]-[Active script] of the [Security Settings] window
that has been opened.
IP Address Settings
(continued)
Deselect the check
Select [Enable]